CM/ECF Basics
Adding a New Party to a Case
Updated 11/11/2020
- Click Add/Create New Party.
- Search by Last/Business name.
- The Party search results screen displays either:
- Possible matches - Click the name to view additional party information.
- If correct, click Select name from list.
- If not correct, click Create new party.
- No person found - Click Create new party.
- Possible matches - Click the name to view additional party information.
- When creating the new party, enter only the Name and Role.
- Click Submit.
Allowing Pop-Ups
Updated 11/11/2020
Some of the screens in CM/ECF utilize pop-up windows, and if you have a pop-up blocker enabled on your browser, screens will not load properly. Party information windows appear as pop-ups, and the payment screens all work through pop-up windows. To ensure you will be able to view these windows, be sure to set your browser to allow pop-ups from the Court's website or temporarily disable your pop-up blocker when docketing in CM/ECF.
Mozilla Firefox
- Open Firefox.
- Select Tools > Options.
- Select Privacy & Security from the left menu.
- Scroll down to Permissions. If Block pop-up windows is checked, click Exceptions.
- Type uscourts.gov in the "Address of website" field and click Allow.
Google Chrome
- Open Chrome.
- Click the three dots in the upper right corner and select Settings.
- Select Privacy & security from the left menu.
- Select Site Settings.
- Click Pop-ups and redirects.
- Click Add.
- Type uscourts.gov in the "Add a site" field.
- Click Add.
Internet Explorer
- Open Internet Explorer.
- Select Tools from the menu bar
- From the Privacy tab, if Turn on Pop-up Blocker is checked, select Settings.
- Type uscourts.gov in the "Address of a website to allow" field and click Type uscourts.gov in the "Add a site" field.
- Click Close.
Attachments to Documents
Updated 11/11/2020
Supporting documents (e.g. declarations, memorandums and exhibits) may be added as attachments to the main document. Notices of hearing and certificates of service must be filed separately.
Step-by-Step Instructions
- At the PDF upload screen:
- Click Browse/Choose File and attach the main document.
- Click the Yes radio button to the right of Attachments to Documents.
- When done, click Next to add attachments.
- The Attachment screen displays:
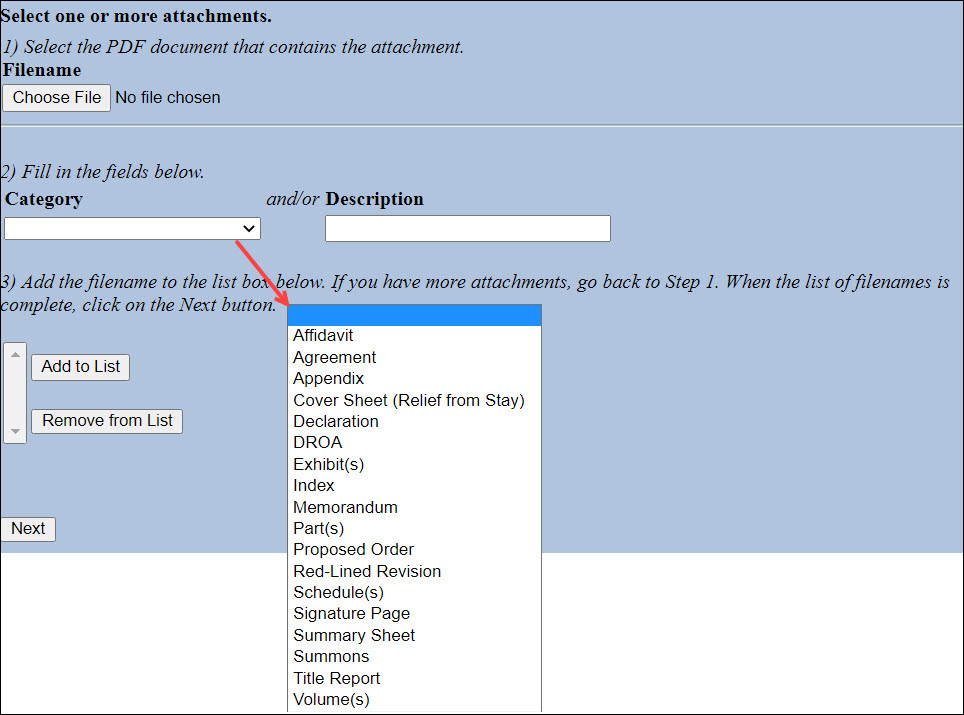
- Click Browse/Choose File to select the PDF document of the attachment.
- Click the drop-down arrow and select a Category and/or enter a Description.
- Click Add to List. The file name will appear in the list box.
- Repeat these steps to upload additional attachments.
- When done adding all attachments, click Next to continue.
Sample docket entry:

Clearing Temporary Files/Cache
Updated 11/11/2020
Pages you view on the internet (including CM/ECF screens and documents) are stored in temporary files for quick viewing. If these temporary files are not deleted, they can create problems in CM/ECF. Therefore, it is recommended that you regularly clear your internet browser cache and temporary files.
Mozilla Firefox
- Open Firefox.
- Select Tools > Options.
- Select Privacy & Security from the left menu.
- In the Cookies and Site Data section, click Clear Data.
- Make sure Cookies and Site Data and Cached Web Content are selected, and click Clear.
- Click Clear Now.
- Close the browser window.
Google Chrome
- Open Chrome.
- Click the three dots in the upper right corner.
- Select More Tools > Clear browsing data…
- Check Cookies and other site data and Cached images and files, and click Clear data.
- Close the browser window.
Internet Explorer
- Open Internet Explorer.
- Select Tools > Internet Options.
- In the General tab, under the Browsing History section, click Delete...
- In the Delete Browsing History window, check Temporary Internet Files and website files and Cookies and website data. If you have saved any favorites, make sure the box for Preserve Favorites website data is unchecked.
- Click Delete.
- Close the browser window.
Credit Card Payments
Updated 11/11/20
When electronically filing a document requiring a fee, payment with a credit card must be made by 6:00 PM HST on the day of filing. Failure to make a timely payment will result in an automatically generated email notifying the filer that his or her login will be disabled for filing documents if the outstanding balance remains due for more than one day. If this occurs, the login will give access only to the Internet payment portion of CM/ECF. Once the outstanding fees are paid, the ability to file documents will be automatically reinstated.
Making Payments
Following the filing of a document for which a fee is incurred, the filer will be asked to Continue Filing or Pay Now.
Continue Filing: The charge is recorded and the payment process is deferred. The next time the filer logs into CM/ECF, the Summary of Current Charges will be displayed, showing all deferred charges. Note: This feature is helpful when filing documents for several cases. When filing the last document, you can make one payment for all outstanding filing fees by selecting Utilities, then Internet Payments Due.
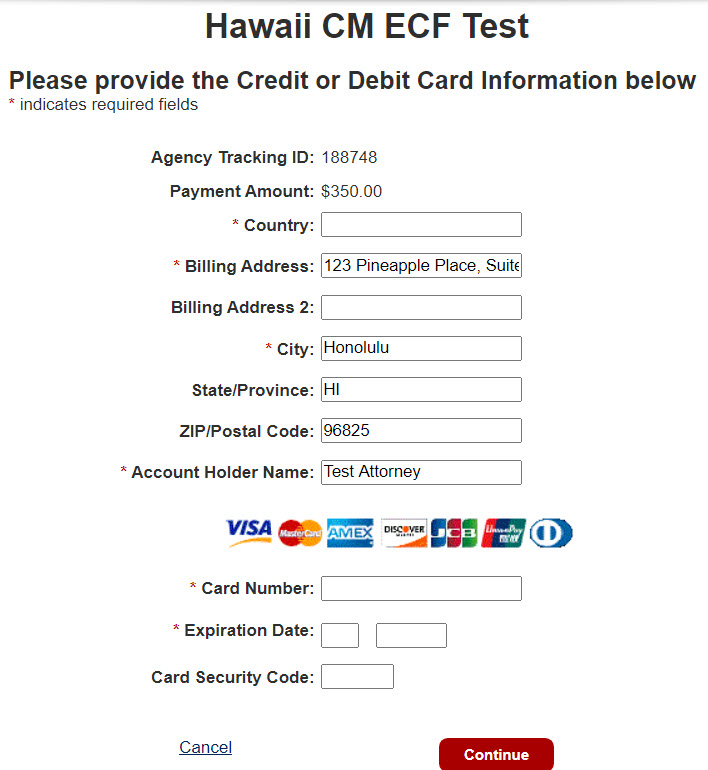
Pay Now: Proceed to make payment as described below.
- Complete the required fields. Click Continue.
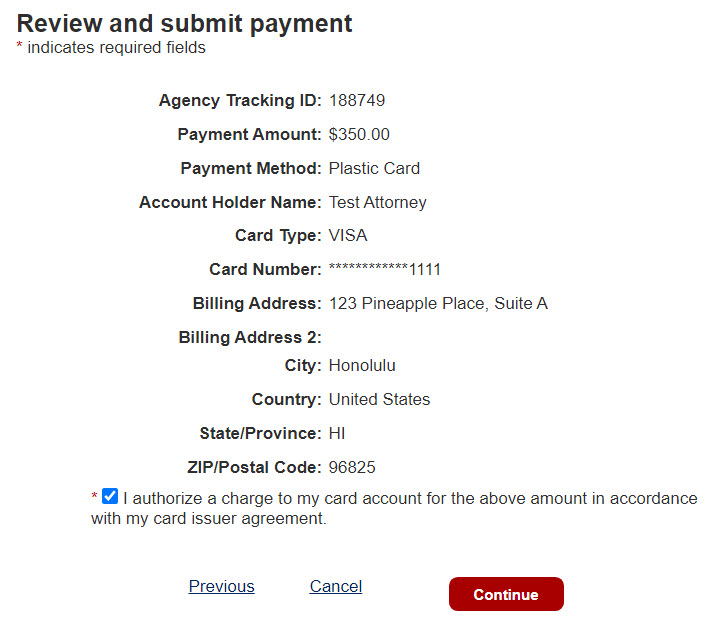
- Review, authorize charge and click Continue.
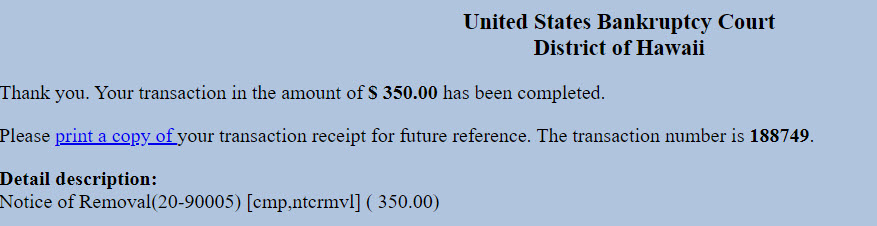
- Click print a copy of link to view the receipt.
Mailings
Updated 11/11/20
The Mailings menu selection provides a list of electronic and/or manual recipients for a case. There are three output options: List of Creditors, Mailing Info for a Case and Mailing Labels by Case.
List of Creditors
This report displays names/addresses for a specific case, either in 3-column label format or as delimited data fields. It lists all parties (including the debtor, trustee and U.S. Trustee), all creditors, debtor's attorney and the Clerk's Office. It does not include attorneys for non-debtor parties. PACER fees apply.
IMPORTANT! When "3 columns" format is selected, the program substitutes a creditor's "preferred address" as specified in a Notice of Address filed pursuant to 11 U.S.C. § 342(f). These recipients are designated with "(p)". Bypassed recipients due to an undeliverable (u) or duplicate (d) address are listed at the bottom of the page.
Mailing Info for a Case
This report displays a list of those who receive email notices and those who require manual noticing.
Electronic Mail Notice List - List of parties to receive email notices for this case.
Manual Notice List - List of parties who are not on the list to receive email notices for this case.
Creditor List - Complete list of creditors only. PACER fees apply.
List of Creditors - Link to list of all creditors and all parties in the case. It does not include attorneys for non-debtor parties. PACER fees apply.
Mailing Labels by Case
This report displays name/address data in label format for a single case. You have the option of selecting all or some case participants. To print labels, use your browser's print function, or copy the screen contents into a word processing program. There is no charge for this report.
IMPORTANT! When "3 columns" format is selected, the program substitutes a creditor's "preferred address" as specified in a Notice of Address filed pursuant to 11 U.S.C. § 342(f). These recipients are designated with "(p)".
Maintaining Your ECF Account
Updated 11/11/2020
You can access your account information through the Maintain Your ECF Account menu to update your office/address/telephone number, email preferences and filing agent information. You may also deactivate a filing agent.
Step-by-Step Instructions: Updating Your Office, Address or Telephone Number
- Select Utilities > Maintain Your ECF Account.
- When the account screen displays, edit as appropriate.
- Click Submit.
- Click Submit to search for Open cases and Closed cases.
- Select to Update All cases.
- Click Submit to complete the update.
Step-by-Step Instructions: Updating Your Email Preferences
- Select Utilities > Maintain Your ECF Account.
- Click Email information.
- Edit as appropriate.
- Primary email address - Enter an email address to receive Notices of Electronic Filing (NEFs). Reenter the primary email address to verify.
- Secondary email address - You may have NEFs sent to other email addresses in addition to your primary address. When entering email addresses, separate each address with a semicolon or press "Enter" after each address so one address appears on each line.
- Send the notices specified below - Select one or both options.
- Send notices in cases in which I am involved - Check to receive NEFs in cases in which you are a participant. IMPORTANT! You are allowed one free look for each PDF associated with the notice, which expires 15 days from receipt of the notice.
- Send notices in these additional cases - Users can elect to receive NEFs in cases in which they have an interest but are not case participants. Check the box, enter a case number and click Find This Case. There is no limit to the number of additional cases that can be listed. IMPORTANT! You will not receive a free look for these PDFs.
- Send notices for adversary proceedings in which I am directly involved and for their related bankruptcy cases - Select this option if you would like to receive NEFs of bankruptcy matters when your appearance is only entered in the adversary proceeding.
- Send notices for adversary proceedings in which I am directly involved but not for their related bankruptcy cases - Select this option if you would not like to receive NEFs for related bankruptcy cases.
- Send a notice for each filing - Select to receive email notices as activity occurs throughout the day.
- Send a Daily Summary Report - Select to receive a single summary report at the end of the day.
- Format notices
- HTML format will include hyperlinks to the PDFs.
- Text will feature the URL of the PDF document, which can be copied and pasted into the location bar of your browser.
- When done, click Return to Account screen.
- Click Submit.
- Click Submit to complete the update.
Step-by-Step Instructions: Updating Filing Agent Information and Permissions
- Select Utilities > Maintain Your ECF Account
- Click More user information.
- The filing agents associated with your account displays in the gray box. Click the hyperlink of the agent you wish to update.
- The Filing Agent Information screen displays.
- Edit as appropriate.
- To edit the filing agent's permission to pay fees on your behalf:
- Click Update permissions.
- Select Y or N to allow Internet Payment.
- Click Return to account screen.
- Click Submit.
- A message displays confirming the update to the filing agent account. Click OK.
- Click Return to Account screen.
- Click Submit to complete the update.
Step-by-Step Instructions: Deactivating a Filing Agent
- Select Utilities > Maintain Your ECF Account.
- Click More user information.
- The filing agents associated with your account displays in the gray box.
- An active filing agent is shown with a check in the box next to the filing agent's name. To deactivate the association, uncheck the box and click Return to Account screen.
- Click Submit to complete the update.
Notice of Bankruptcy Case Filing
Updated 11/11/20
The Notice of Bankruptcy Case Filing is the verification that the case has been filed. Click the hyperlink to view the notice. Note: You will be prompted for your PACER credentials and charged to view the notice.

Notice of Electronic Filing
Updated 11/11/20
The Notice of Electronic Filing is the verification that the filing has been sent electronically to the Court's database. It certifies that this is now an official court document.
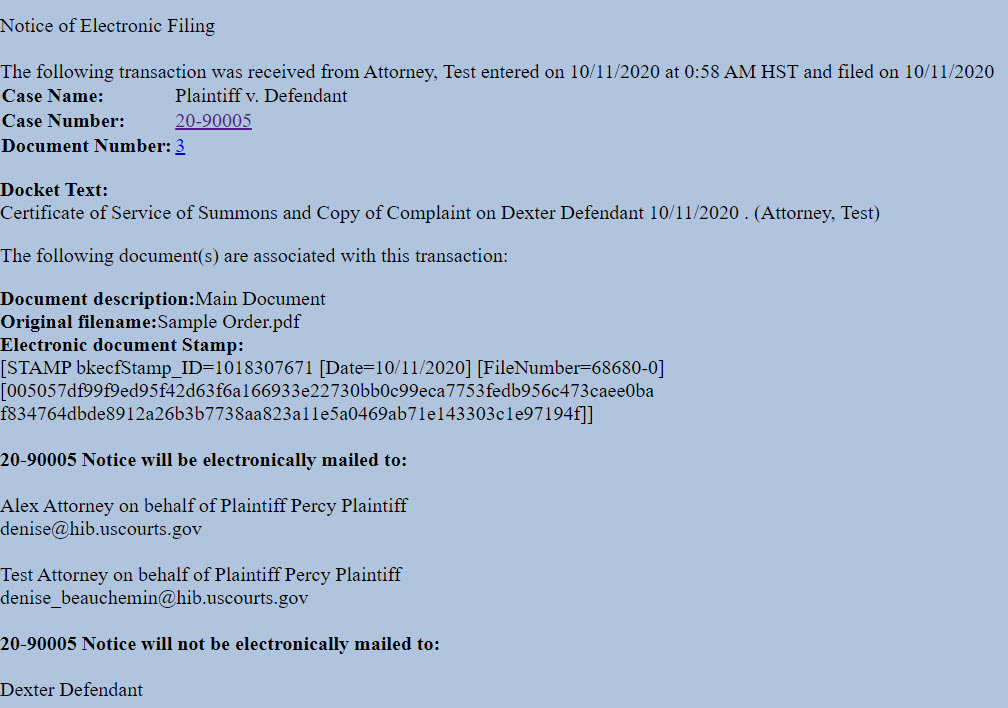
- Clicking on the Case Number hyperlink will display the docket report for this case. You will be prompted for your PACER credentials and charged to view the report.
- Clicking on the Document Number hyperlink will display the PDF image of the document just filed. You will be prompted for your PACER credentials and charged to view the document.
- To get your free look, you must click on the document number hyperlink from the Notice of Electronic Filing that you receive via e-mail and not the Notice of Electronic Filing that you see at the conclusion of the filing process.
Passwords and Usernames
Updated 1/25/2022
With NextGen, the court no longer has the ability to help with PACER username and password. Resets and retrieval information must be done through PACER. If you have questions or need assistance, please contact the PACER Service Center at (800) 676-6856 between the hours of 8 AM and 6 PM CST, Monday through Friday.
Relating Documents
Updated 11/11/20
Relating documents greatly assists those reviewing a case docket in finding all documents that concern a particular motion or other matter. In addition, documents that have been related appear on various reports used by the judge and law clerks in preparing for both hearing and non-hearing matters.
When creating a relation, you may be presented with a list of categories to which to relate your document.

- To select more than one category, hold the Ctrl button while clicking.
- To select all categories, left-click and drag to the bottom of the list.
- If you know the docket is long, you have the option to narrow the range of docket entries by entering Filed dates or Document numbers.
- Click Next when done.
When the list of all applicable docket entries displays, check the box for each docket entry that should relate to the current filing. Make sure to review the Relation Guidelines at the bottom of this page.
Relation Guidelines
Follow these general guidelines when relating documents:
| IF FILING: | THEN RELATE TO: |
|---|---|
| Notice of Hearing | Motion, application or objection being heard |
| Supporting documents (e.g., Declaration, Affidavit, Memorandum) | Underlying motion, application or objection |
| Response | Underlying motion, application or objection AND the document to which you are responding |
| Certificate of Service | Document(s) served |
| Amended Motion | Original motion |
| Motion to Modify Confirmed Plan | Order confirming plan |
| Withdrawal of Motion, Objection or Other Document | Document being withdrawn |
| Request for Audio Recording | Minutes of the hearing you wish reproduced |
| Transcript Request | Minutes of the hearing you wish transcribed |
| Notice of Appeal | Order being appealed OR minutes of the hearing at which the announcement of the decision or order was made |
If you cannot continue because there is no list of documents or the document you need is not included, contact the ECF Help Desk at (808) 523-7373 for assistance.
Searching in CM/ECF
Updated 11/11/2020
CM/ECF offers a search feature that allows users to locate available events. It is important that you select the correct event because some events alert court staff to the filing of the documents and others require filing fees.
Step-by-Step Instructions
- Log in to CM/ECF.
- Select Search from the blue menu bar.

- A search box displays in the upper right corner of the page.
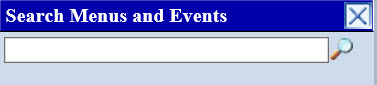
- In the blank search field, enter a keyword for the event you want to find. For example, if you would like to know if there is an event for Garnishee Disclosure, type Garnishee in the box.
- Click the magnifier icon to search.
- All events containing the keyword displays.
- The example above will yield the following results, indicating that Garnishee Disclosure can be found under Miscellaneous Documents in both Adversary Events and Bankruptcy Events. Click the appropriate event hyperlink to begin filing.

If you do not find a suitable event, call the Help Desk at (808) 523-7373 before continuing.
Viewing Your Transaction Log
Updated 11/11/20
The View Your Transaction Log menu option displays details of the your docketing transactions within a specified date range.
Step-by-Step Instructions: Processing the Report
- Select Utilities.
- Select View Your Transaction Log.
- The report parameters screen displays.
- Enter beginning and end dates.
- Select sort option.
- If you have filing agents associated with your account, you may select Users. Press and hold [Ctrl] key to select multiple users. If no selection is made, the report shows transactions for all users.
- Click Submit.
- The transaction log displays the following types of information:
- Transaction Id (and filing agent name, if applicable);
- Date and time;
- Case Number; and
- Text.
Sample Transaction Log
![]()