CM/ECF Filing Procedures
This manual provides guidance for electronically filing documents in the United States Bankruptcy Court for the District of Hawaii. These procedures are intended to be consistent with applicable statutes and rules but there may be additional legal or procedural requirements that are not addressed in these procedures. The filer is responsible for complying with any contrary or additional requirements imposed by statute, federal or local rule, or court order.
The Clerk's Office is not permitted to give legal advice. However, if you have questions regarding filing procedures that are not answered in this manual, please contact the CM/ECF Help Desk: helpdesk@hib.uscourts.gov or (808) 523-7373, or call the Clerk's Office at (808) 522-8100.
CM/ECF Basics
Adding a New Party to a Case
Updated 11/11/2020
- Click Add/Create New Party.
- Search by Last/Business name.
- The Party search results screen displays either:
- Possible matches - Click the name to view additional party information.
- If correct, click Select name from list.
- If not correct, click Create new party.
- No person found - Click Create new party.
- Possible matches - Click the name to view additional party information.
- When creating the new party, enter only the Name and Role.
- Click Submit.
Allowing Pop-Ups
Updated 11/11/2020
Some of the screens in CM/ECF utilize pop-up windows, and if you have a pop-up blocker enabled on your browser, screens will not load properly. Party information windows appear as pop-ups, and the payment screens all work through pop-up windows. To ensure you will be able to view these windows, be sure to set your browser to allow pop-ups from the Court's website or temporarily disable your pop-up blocker when docketing in CM/ECF.
Mozilla Firefox
- Open Firefox.
- Select Tools > Options.
- Select Privacy & Security from the left menu.
- Scroll down to Permissions. If Block pop-up windows is checked, click Exceptions.
- Type uscourts.gov in the "Address of website" field and click Allow.
Google Chrome
- Open Chrome.
- Click the three dots in the upper right corner and select Settings.
- Select Privacy & security from the left menu.
- Select Site Settings.
- Click Pop-ups and redirects.
- Click Add.
- Type uscourts.gov in the "Add a site" field.
- Click Add.
Internet Explorer
- Open Internet Explorer.
- Select Tools from the menu bar
- From the Privacy tab, if Turn on Pop-up Blocker is checked, select Settings.
- Type uscourts.gov in the "Address of a website to allow" field and click Type uscourts.gov in the "Add a site" field.
- Click Close.
Attachments to Documents
Updated 11/11/2020
Supporting documents (e.g. declarations, memorandums and exhibits) may be added as attachments to the main document. Notices of hearing and certificates of service must be filed separately.
Step-by-Step Instructions
- At the PDF upload screen:
- Click Browse/Choose File and attach the main document.
- Click the Yes radio button to the right of Attachments to Documents.
- When done, click Next to add attachments.
- The Attachment screen displays:
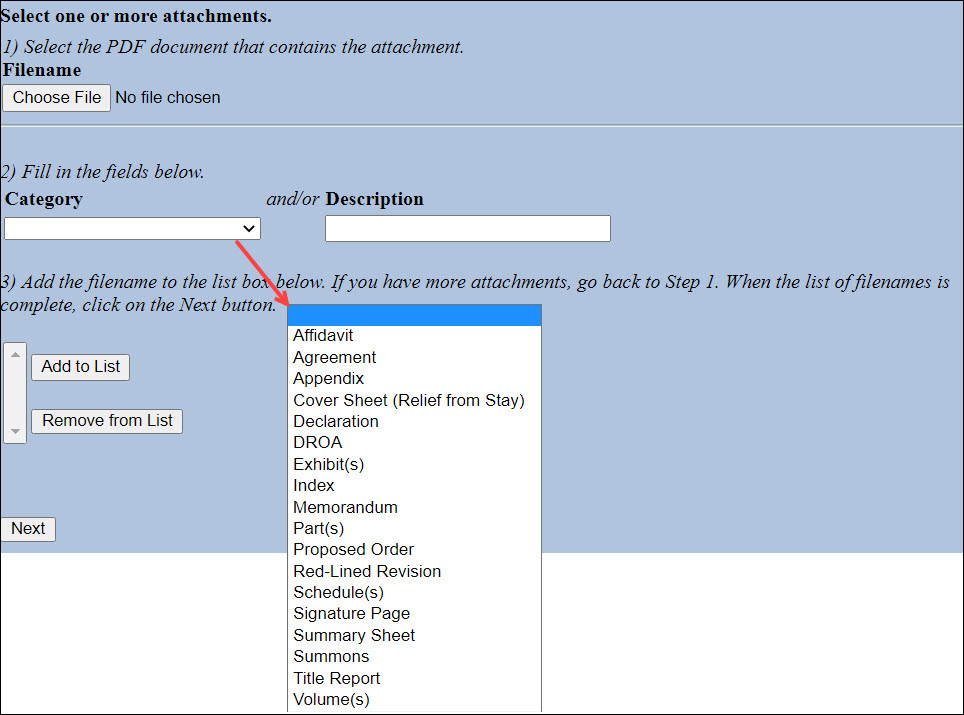
- Click Browse/Choose File to select the PDF document of the attachment.
- Click the drop-down arrow and select a Category and/or enter a Description.
- Click Add to List. The file name will appear in the list box.
- Repeat these steps to upload additional attachments.
- When done adding all attachments, click Next to continue.
Sample docket entry:

Clearing Temporary Files/Cache
Updated 11/11/2020
Pages you view on the internet (including CM/ECF screens and documents) are stored in temporary files for quick viewing. If these temporary files are not deleted, they can create problems in CM/ECF. Therefore, it is recommended that you regularly clear your internet browser cache and temporary files.
Mozilla Firefox
- Open Firefox.
- Select Tools > Options.
- Select Privacy & Security from the left menu.
- In the Cookies and Site Data section, click Clear Data.
- Make sure Cookies and Site Data and Cached Web Content are selected, and click Clear.
- Click Clear Now.
- Close the browser window.
Google Chrome
- Open Chrome.
- Click the three dots in the upper right corner.
- Select More Tools > Clear browsing data…
- Check Cookies and other site data and Cached images and files, and click Clear data.
- Close the browser window.
Internet Explorer
- Open Internet Explorer.
- Select Tools > Internet Options.
- In the General tab, under the Browsing History section, click Delete...
- In the Delete Browsing History window, check Temporary Internet Files and website files and Cookies and website data. If you have saved any favorites, make sure the box for Preserve Favorites website data is unchecked.
- Click Delete.
- Close the browser window.
Credit Card Payments
Updated 11/11/20
When electronically filing a document requiring a fee, payment with a credit card must be made by 6:00 PM HST on the day of filing. Failure to make a timely payment will result in an automatically generated email notifying the filer that his or her login will be disabled for filing documents if the outstanding balance remains due for more than one day. If this occurs, the login will give access only to the Internet payment portion of CM/ECF. Once the outstanding fees are paid, the ability to file documents will be automatically reinstated.
Making Payments
Following the filing of a document for which a fee is incurred, the filer will be asked to Continue Filing or Pay Now.
Continue Filing: The charge is recorded and the payment process is deferred. The next time the filer logs into CM/ECF, the Summary of Current Charges will be displayed, showing all deferred charges. Note: This feature is helpful when filing documents for several cases. When filing the last document, you can make one payment for all outstanding filing fees by selecting Utilities, then Internet Payments Due.
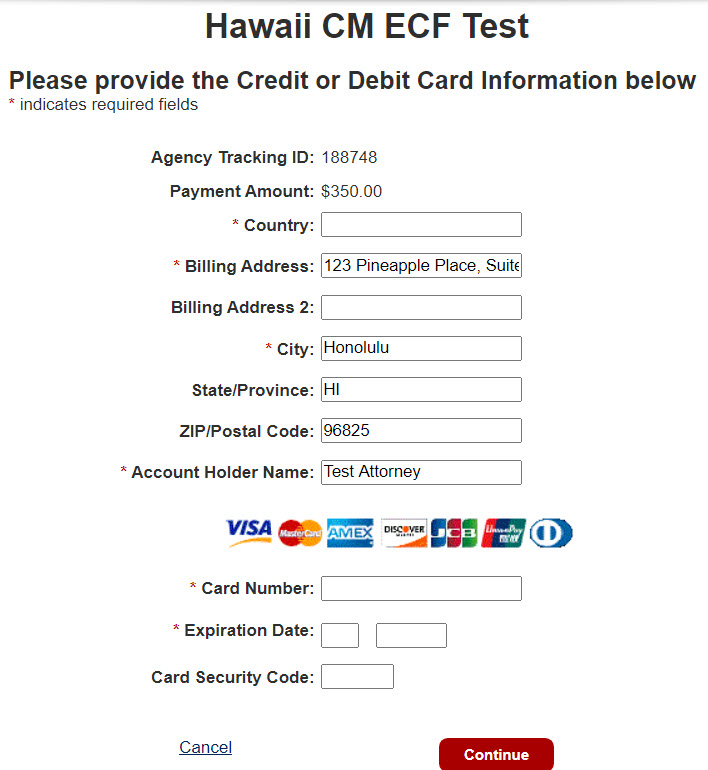
Pay Now: Proceed to make payment as described below.
- Complete the required fields. Click Continue.
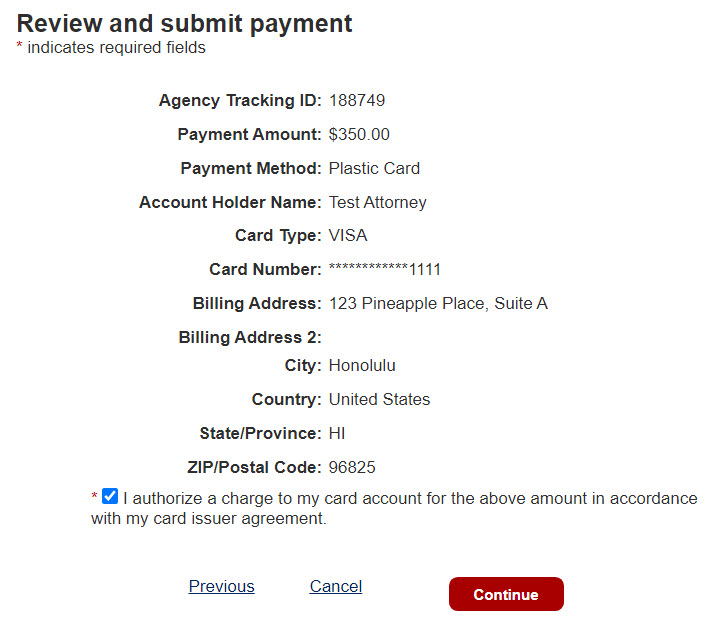
- Review, authorize charge and click Continue.
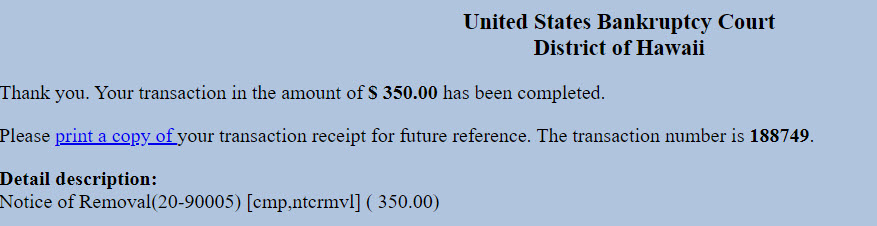
- Click print a copy of link to view the receipt.
Mailings
Updated 11/11/20
The Mailings menu selection provides a list of electronic and/or manual recipients for a case. There are three output options: List of Creditors, Mailing Info for a Case and Mailing Labels by Case.
List of Creditors
This report displays names/addresses for a specific case, either in 3-column label format or as delimited data fields. It lists all parties (including the debtor, trustee and U.S. Trustee), all creditors, debtor's attorney and the Clerk's Office. It does not include attorneys for non-debtor parties. PACER fees apply.
IMPORTANT! When "3 columns" format is selected, the program substitutes a creditor's "preferred address" as specified in a Notice of Address filed pursuant to 11 U.S.C. § 342(f). These recipients are designated with "(p)". Bypassed recipients due to an undeliverable (u) or duplicate (d) address are listed at the bottom of the page.
Mailing Info for a Case
This report displays a list of those who receive email notices and those who require manual noticing.
Electronic Mail Notice List - List of parties to receive email notices for this case.
Manual Notice List - List of parties who are not on the list to receive email notices for this case.
Creditor List - Complete list of creditors only. PACER fees apply.
List of Creditors - Link to list of all creditors and all parties in the case. It does not include attorneys for non-debtor parties. PACER fees apply.
Mailing Labels by Case
This report displays name/address data in label format for a single case. You have the option of selecting all or some case participants. To print labels, use your browser's print function, or copy the screen contents into a word processing program. There is no charge for this report.
IMPORTANT! When "3 columns" format is selected, the program substitutes a creditor's "preferred address" as specified in a Notice of Address filed pursuant to 11 U.S.C. § 342(f). These recipients are designated with "(p)".
Maintaining Your ECF Account
Updated 11/11/2020
You can access your account information through the Maintain Your ECF Account menu to update your office/address/telephone number, email preferences and filing agent information. You may also deactivate a filing agent.
Step-by-Step Instructions: Updating Your Office, Address or Telephone Number
- Select Utilities > Maintain Your ECF Account.
- When the account screen displays, edit as appropriate.
- Click Submit.
- Click Submit to search for Open cases and Closed cases.
- Select to Update All cases.
- Click Submit to complete the update.
Step-by-Step Instructions: Updating Your Email Preferences
- Select Utilities > Maintain Your ECF Account.
- Click Email information.
- Edit as appropriate.
- Primary email address - Enter an email address to receive Notices of Electronic Filing (NEFs). Reenter the primary email address to verify.
- Secondary email address - You may have NEFs sent to other email addresses in addition to your primary address. When entering email addresses, separate each address with a semicolon or press "Enter" after each address so one address appears on each line.
- Send the notices specified below - Select one or both options.
- Send notices in cases in which I am involved - Check to receive NEFs in cases in which you are a participant. IMPORTANT! You are allowed one free look for each PDF associated with the notice, which expires 15 days from receipt of the notice.
- Send notices in these additional cases - Users can elect to receive NEFs in cases in which they have an interest but are not case participants. Check the box, enter a case number and click Find This Case. There is no limit to the number of additional cases that can be listed. IMPORTANT! You will not receive a free look for these PDFs.
- Send notices for adversary proceedings in which I am directly involved and for their related bankruptcy cases - Select this option if you would like to receive NEFs of bankruptcy matters when your appearance is only entered in the adversary proceeding.
- Send notices for adversary proceedings in which I am directly involved but not for their related bankruptcy cases - Select this option if you would not like to receive NEFs for related bankruptcy cases.
- Send a notice for each filing - Select to receive email notices as activity occurs throughout the day.
- Send a Daily Summary Report - Select to receive a single summary report at the end of the day.
- Format notices
- HTML format will include hyperlinks to the PDFs.
- Text will feature the URL of the PDF document, which can be copied and pasted into the location bar of your browser.
- When done, click Return to Account screen.
- Click Submit.
- Click Submit to complete the update.
Step-by-Step Instructions: Updating Filing Agent Information and Permissions
- Select Utilities > Maintain Your ECF Account
- Click More user information.
- The filing agents associated with your account displays in the gray box. Click the hyperlink of the agent you wish to update.
- The Filing Agent Information screen displays.
- Edit as appropriate.
- To edit the filing agent's permission to pay fees on your behalf:
- Click Update permissions.
- Select Y or N to allow Internet Payment.
- Click Return to account screen.
- Click Submit.
- A message displays confirming the update to the filing agent account. Click OK.
- Click Return to Account screen.
- Click Submit to complete the update.
Step-by-Step Instructions: Deactivating a Filing Agent
- Select Utilities > Maintain Your ECF Account.
- Click More user information.
- The filing agents associated with your account displays in the gray box.
- An active filing agent is shown with a check in the box next to the filing agent's name. To deactivate the association, uncheck the box and click Return to Account screen.
- Click Submit to complete the update.
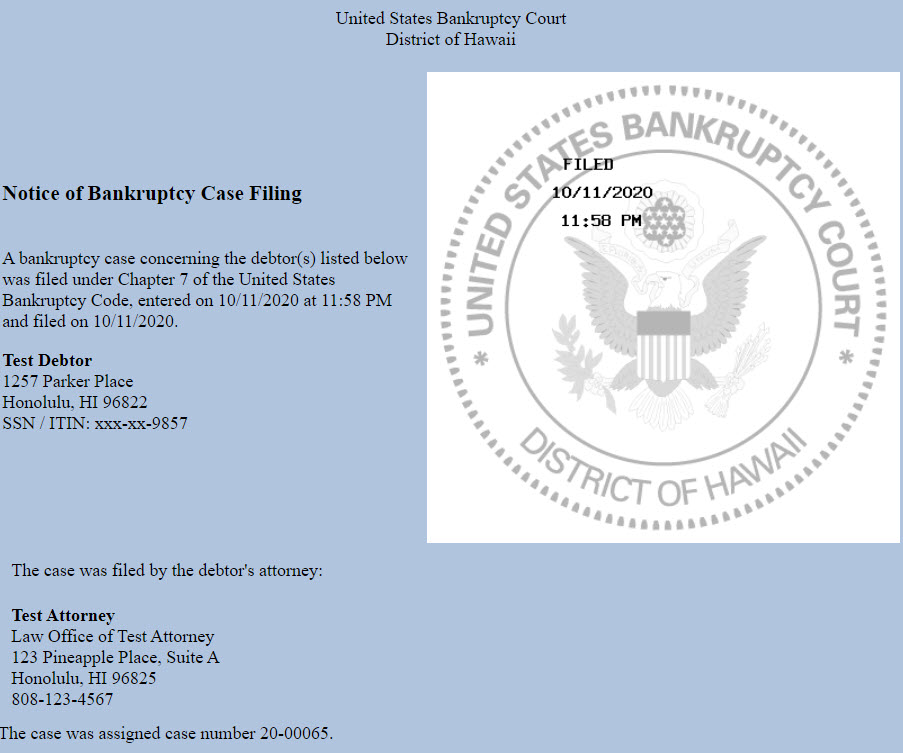
Notice of Bankruptcy Case Filing
Updated 11/11/20
The Notice of Bankruptcy Case Filing is the verification that the case has been filed. Click the hyperlink to view the notice. Note: You will be prompted for your PACER credentials and charged to view the notice.

Notice of Electronic Filing
Updated 11/11/20
The Notice of Electronic Filing is the verification that the filing has been sent electronically to the Court's database. It certifies that this is now an official court document.
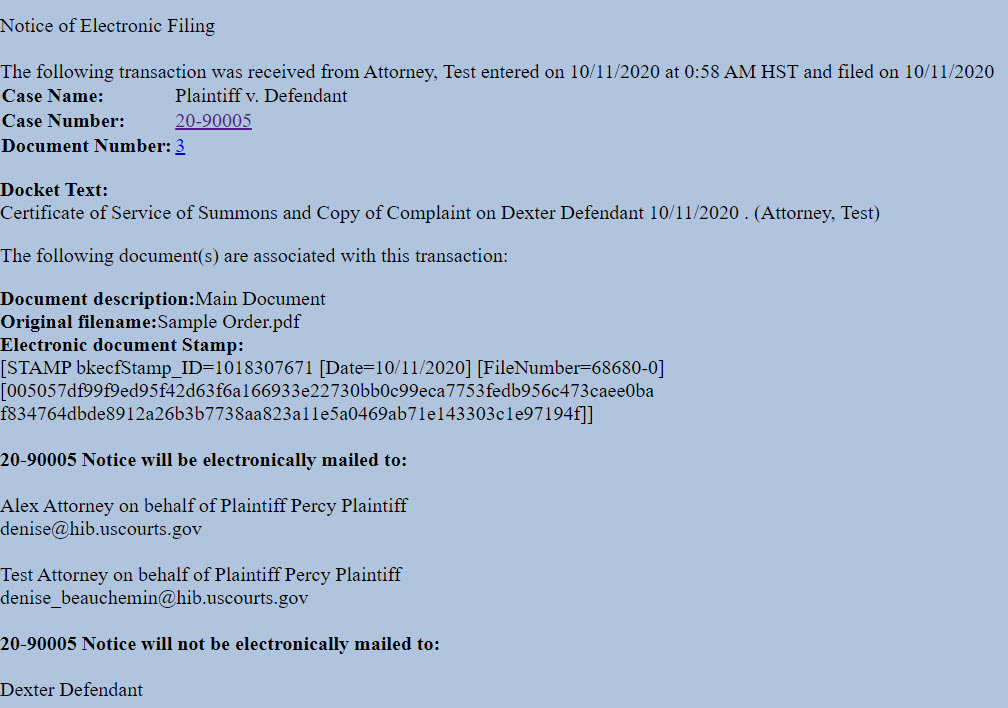
- Clicking on the Case Number hyperlink will display the docket report for this case. You will be prompted for your PACER credentials and charged to view the report.
- Clicking on the Document Number hyperlink will display the PDF image of the document just filed. You will be prompted for your PACER credentials and charged to view the document.
- To get your free look, you must click on the document number hyperlink from the Notice of Electronic Filing that you receive via e-mail and not the Notice of Electronic Filing that you see at the conclusion of the filing process.
Passwords and Usernames
Updated 1/25/2022
With NextGen, the court no longer has the ability to help with PACER username and password. Resets and retrieval information must be done through PACER. If you have questions or need assistance, please contact the PACER Service Center at (800) 676-6856 between the hours of 8 AM and 6 PM CST, Monday through Friday.
Relating Documents
Updated 11/11/20
Relating documents greatly assists those reviewing a case docket in finding all documents that concern a particular motion or other matter. In addition, documents that have been related appear on various reports used by the judge and law clerks in preparing for both hearing and non-hearing matters.
When creating a relation, you may be presented with a list of categories to which to relate your document.

- To select more than one category, hold the Ctrl button while clicking.
- To select all categories, left-click and drag to the bottom of the list.
- If you know the docket is long, you have the option to narrow the range of docket entries by entering Filed dates or Document numbers.
- Click Next when done.
When the list of all applicable docket entries displays, check the box for each docket entry that should relate to the current filing. Make sure to review the Relation Guidelines at the bottom of this page.
Relation Guidelines
Follow these general guidelines when relating documents:
| IF FILING: | THEN RELATE TO: |
|---|---|
| Notice of Hearing | Motion, application or objection being heard |
| Supporting documents (e.g., Declaration, Affidavit, Memorandum) | Underlying motion, application or objection |
| Response | Underlying motion, application or objection AND the document to which you are responding |
| Certificate of Service | Document(s) served |
| Amended Motion | Original motion |
| Motion to Modify Confirmed Plan | Order confirming plan |
| Withdrawal of Motion, Objection or Other Document | Document being withdrawn |
| Request for Audio Recording | Minutes of the hearing you wish reproduced |
| Transcript Request | Minutes of the hearing you wish transcribed |
| Notice of Appeal | Order being appealed OR minutes of the hearing at which the announcement of the decision or order was made |
If you cannot continue because there is no list of documents or the document you need is not included, contact the ECF Help Desk at (808) 523-7373 for assistance.
Searching in CM/ECF
Updated 11/11/2020
CM/ECF offers a search feature that allows users to locate available events. It is important that you select the correct event because some events alert court staff to the filing of the documents and others require filing fees.
Step-by-Step Instructions
- Log in to CM/ECF.
- Select Search from the blue menu bar.

- A search box displays in the upper right corner of the page.
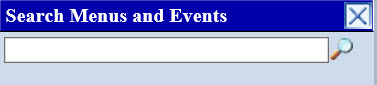
- In the blank search field, enter a keyword for the event you want to find. For example, if you would like to know if there is an event for Garnishee Disclosure, type Garnishee in the box.
- Click the magnifier icon to search.
- All events containing the keyword displays.
- The example above will yield the following results, indicating that Garnishee Disclosure can be found under Miscellaneous Documents in both Adversary Events and Bankruptcy Events. Click the appropriate event hyperlink to begin filing.

If you do not find a suitable event, call the Help Desk at (808) 523-7373 before continuing.
Viewing Your Transaction Log
Updated 11/11/20
The View Your Transaction Log menu option displays details of the your docketing transactions within a specified date range.
Step-by-Step Instructions: Processing the Report
- Select Utilities.
- Select View Your Transaction Log.
- The report parameters screen displays.
- Enter beginning and end dates.
- Select sort option.
- If you have filing agents associated with your account, you may select Users. Press and hold [Ctrl] key to select multiple users. If no selection is made, the report shows transactions for all users.
- Click Submit.
- The transaction log displays the following types of information:
- Transaction Id (and filing agent name, if applicable);
- Date and time;
- Case Number; and
- Text.
Sample Transaction Log
![]()
Bankruptcy Case Opening
Create a Creditor List
Updated 12/1/2020
In General
A bankruptcy petition must be accompanied by a list of the names and addresses of all creditors and other parties who are or will be included on bankruptcy schedules D, E/F, G, and H. If some of the names and addresses of creditors are not known at the time the petition is filed, an amended creditor list may be filed later, but there will be a $34 filing fee charged and the debtor will be responsible for mailing bankruptcy notices to the additional creditors.
Format of Names and Addresses
Follow these guidelines when creating the creditor list:
- Do not include the debtor and the debtor’s attorney, U.S. Trustee, or case number.
- List blocks of names and addresses in a single column down the left margin.
- Separate each name and address block with at least one blank line.
- Each name and address block may not exceed 5 lines total.
- Each line must not exceed 40 characters, including spaces.
- Each line must begin with a letter, digit, or one of these characters: #, %, &, or @.
- Any “Attention” or “c/o” information should be placed on the second line.
- The last line must contain the City, State (2‐letter abbreviation), and ZIP Code.
- But for foreign addresses, list the country name (in English) by itself on the last line.
- Do not include account numbers.
- If the following entities require notice, use the addresses below:
|
Internal Revenue Service |
Department of Taxation |
Click here to view a sample creditor list.
Save Creditor List as .txt File
- Click Save As.
- Click the drop down box arrow and select file type of Plain Text (*.txt).
- Enter the file name in File Name: "your file name".txt.
- Click Save.
- You can also type your matrix using Notepad or Wordpad which automatically saves the document to .txt format.
Verification
The creditor list must be accompanied by the debtor’s verification that all entities included on bankruptcy schedules D, E/F, G, and H have been included in the creditor list. Use a form that substantially conforms to the local form (Debtor's Verification of Creditor List).
File a Chapter 7
Updated 8/15/2022
Overview
- Review Ch 7 Filing Requirements
- Fee: $338.00 - Debtors who are individuals may request that the fee be paid in installments (Official Form 103A) or waived (Official Form 103B) by filing the appropriate signed application
Step-by-Step Instructions
Case Opening Screen
- Select Bankruptcy.
- Select Open Voluntary BK Case.
- Chapter - Select 7.
- Joint Petition - Defaults to n. Change to y if this is a joint filing.
- Deficiencies - Defaults to n. Change to y if missing schedules, statements or other required documents, including credit counseling certificate (for individuals) or document authorizing the filing of the bankruptcy (for corporations, LLCs and partnerships).
- When done, click Next to continue.
Search for a Debtor Screen
- Search for an existing debtor record by entering debtor's SSN or Tax ID. Click Search.
- If no match is found, No person found displays. Click Create new party.
- If a possible match is found, parties with the same SSN/Tax ID display.
- Click a name and the debtor's information displays in a pop up window.
- If the displayed information is an exact match, click Select name from list.
- If not an exact match, click Create new party.
Debtor Information Screen
Enter all debtor information exactly as it appears on the petition.
- Last name, First name, Middle name - Enter exactly as they appear on the petition. Do not use all caps.
- Generation (Jr., III, etc.) - Enter, if any.
- SSN / ITIN - If individual, enter SSN or ITIN.
- Tax ID / EIN - If business, enter Tax ID in format of XX-XXXXXXX.
- Address 1, Address 2, Address 3 - Enter debtor's mailing address.
- City, State, Zip - Enter debtor's mailing city, state and zip.
- County - Select current county of residence (or principal place of business). Be sure to select the correct county as this determines the location of the Section 341 meeting of creditors.
- Country - Leave blank, unless outside of U.S.A.
- Phone, Fax and E-mail - Leave blank.
- Party Text - Leave blank.
- Alias - Add, if any.
- Corporate parent/affiliate - Add, if any.
- Click Review… and verify entered information is correct. Click Return to Party Screen.
- When done, click Submit to continue.
- If a joint filing, the Search for a joint debtor screen displays.
- Repeat to add joint debtor.
- Copy previous party's address is checked by default. Uncheck if address differs and add joint debtor's address.
- Click Submit to continue.
Divisional Office Screen
- Click Next to continue.
Statistical Data Screen
- Prior filing within last 8 years – Select no or yes.
- Fee status - Select one of the following:
- Installment when filing an Application for Individuals to Pay the Filing Fee in Installments.
- Paid when paying the fee in full.
- fee not paid is reserved for court use only.
- IFP filing fee waived when filing an Application to Have the Chapter 7 Filing Fee Waived.
- Nature of debt - Select business, consumer or other.
- Asset notice - Select No (Chapter 7 cases are always opened as no asset).
- Estimated number of creditors - Select appropriate option.
- Estimated assets - Select appropriate option.
- Estimated liabilities - Select appropriate option.
- Type of debtor - Select Individual, Corporation, Partnership or Other.
- For business debtors, select appropriate Nature of business.
- When done, click Next to continue.
Summary of Assets and Liabilities Screen
- This screen displays for individual debtors with consumer debts.
- Enter values from corresponding schedules.
- When done, click Next to continue.
- If data is not available, click Next to bypass this screen.
Data Collection Screen
- This screen displays for individual debtors with consumer debts.
- Enter values from corresponding schedules and forms 122A-1 (Chapter 7 Statement of Your Current Monthly Income), 122A-1 Supp (Statement of Exemption from Presumption of Abuse) or 122A-2 (Chapter 7 Means Test Calculation).
- When done, click Next to continue.
- If data is not available, click Next to bypass this screen.
Deficiencies Screen
- This screen displays if deficiencies were noted on the first screen.
- Check the items NOT included in this filing.
- Click Next to continue.
PDF Upload Screen
- Click Browse/Choose File and upload PDF of petition, schedules and statements. For individual debtors, do NOT include credit counseling certificates. File them separately.
- Click Next to continue.
Incomplete Filings Screen
- This screen displays if deficiencies were noted on the first screen.
- The due date defaults to 14 days from date of filing.
- Click Next to continue.
Presumption of Abuse Screen
- This screen displays for individuals with primarily consumer debts.
- Select either no or yes to the prompt Does the Presumption of Abuse Arise?
- Click Next.
Filing Fee Screen
- This screen does NOT display if you selected IFP filing fee waived.
- If paying in full, leave the default amount of $338.
- If paying in installments, do NOT make a payment now. Change the amount to $0.0. Payment due in full 14 days after case filed.
- Click Next.
Final Docket Entry Screen
- Carefully review the final docket entry.
- If incorrect, use your browser back button to the applicable screen to make corrections.
- If correct, click Next to file your case.
- If fees are due, a Summary of current charges displays in a separate window. Click Pay Now or Continue Filing.
Notice of Bankruptcy Case Filing
- The Notice of Bankruptcy Case Filing is verification that the case has been electronically filed with the court.
Next Steps
- Upload creditors.
- Assign judge/trustee.
- For individual debtors, file Certificate of Credit Counseling (or if on Official Form 101, Part 5, the fourth box is checked, separately file Motion for Exemption from Credit Counseling).
- For corporations and artificial entities, file Corporate Resolution or Statement Regarding Authority to File Petition.
- File Disclosure of Compensation of Attorney for Debtor, if not included with petition.
- If paying in installments, file Application for Individuals to Pay the Filing Fee in Installments.
- If applying for fee waiver, file Application to Have the Chapter 7 Filing Fee Waived.
- File the signed Declaration re: Electronic Filing within 7 days of case opening.
File a Chapter 11
Updated 3/20/2026
Overview
Fee: $1738.00
Step-by-Step Instructions
Case Opening Screen
- Select Bankruptcy.
- Select Open Voluntary BK Case.
- Chapter - Select 11.
- Joint Petition - Defaults to n. Change to y if this is a joint filing.
- Deficiencies - Defaults to n. Change to y if missing schedules, statements or other required documents, including credit counseling certificate (for individuals) or document authorizing the filing of the bankruptcy (for corporations, LLCs and partnerships).
- When done, click Next to continue.
Search for a Debtor Screen
- Search for an existing debtor record by entering debtor's SSN or Tax ID. Click Search.
- If no match is found, No person found displays. Click Create new party.
- If a possible match is found, parties with the same SSN/Tax ID display.
- Click a name and the debtor's information displays in a pop up window.
- If the displayed information is an exact match, click Select name from list.
- If not an exact match, click Create new party.
Debtor Information Screen
Enter all debtor information exactly as it appears on the petition.
- Last name, First name, Middle name - Enter exactly as they appear on the petition. Do not use all caps.
- Generation (Jr., III, etc.) - Enter, if any.
- SSN / ITIN - If individual, enter SSN or ITIN.
- Tax ID / EIN - If business, enter Tax ID in format of XX-XXXXXXX.
- Address 1, Address 2, Address 3 - Enter debtor's mailing address.
- City, State, Zip - Enter debtor's mailing city, state and zip.
- County - Select current county of residence (or principal place of business). Be sure to select the correct county as this determines the location of the meeting of creditors.
- Country - Leave blank, unless outside of U.S.A.
- Phone, Fax and E-mail - Leave blank.
- Party Text - Leave blank.
- Alias - Add, if any.
- Corporate parent/affiliate - Add, if any.
- Click Review… and verify entered information is correct. Click Return to Party Screen.
- When done, click Submit to continue.
- If a joint filing, the Search for a joint debtor screen displays.
- Repeat to add joint debtor.
- Copy previous party's address is checked by default. Uncheck if address differs and add joint debtor's address.
- Click Submit to continue.
Divisional Office Screen
- Click Next to continue.
Statistical Data Screen
- Prior filing within last 8 years – Select no or yes.
- Fee status - Select one of the following:
- Installment when filing an Application for Individuals to Pay the Filing Fee in Installments.
- Paid when paying the fee in full.
- fee not paid is reserved for court use only.
- Nature of debt - Select business, consumer or other.
- Asset notice - Select Yes
- Estimated number of creditors - Select appropriate option.
- Estimated assets - Select appropriate option.
- Estimated liabilities - Select appropriate option.
- Small business - A small business debtor is defined in 11 U.S.C. § 101(51D). Select Yes or No.
- Subchapter - If appropriate, check the box to indicate that you are electing to proceed under subchapter V of chapter 11.
- Chapter 11 Non-individual - Select appropriate option.
- Type of debtor - Select Individual, Corporation, Partnership or Other.
- For debtors with business debts, select appropriate Nature of business.
- Special categories - Select if appropriate.
- NAICS (north American Industry Classification System) - Enter 4-digit code that best describes debtor. Click here for more NAIS info..
- Click Next to continue.
Summary of Assets and Liabilities Screen
- Enter values from corresponding schedules.
- When done, click Next to continue.
- If data is not available, click Next to bypass this screen.
Deficiencies Screen
- This screen displays if deficiencies were noted on the first screen.
- Check the items NOT included in this filing.
- Click Next to continue.
PDF Upload Screen
- Click Browse/Choose File and upload PDF of petition, schedules and statements. For individual debtors, do NOT include credit counseling certificates. File them separately.
- Click Next to continue.
Incomplete Filings Screen
- This screen displays if deficiencies were noted on the first screen.
- The due date defaults to 14 days from date of filing.
- Click Next to continue.
Filing Fee Screen
- If paying in full, leave the default amount of $1738.
- If paying in installments, do NOT make a payment now. Change the amount to $0.0.
- Click Next.
Final Docket Entry Screen
- Carefully review the final docket entry.
- If incorrect, use your browser back button to the applicable screen to make corrections.
- If correct, click Next to file your case.
- If fees are due, a Summary of current charges displays in a separate window. Click Pay Now or Continue Filing.
Notice of Bankruptcy Case Filing
- The Notice of Bankruptcy Case Filing is verification that the case has been electronically filed with the court.
Next Steps
- Upload creditors.
- Assign judge/trustee.
- For individual debtors, file Certificate of Credit Counseling (or if on Official Form B 101, Part 5, the fourth box is checked, separately file Motion for Exemption from Credit Counseling).
- For corporations and artificial entities, file Corporate Resolution or Statement Regarding Authority to File Petition.
- File the signed Declaration re: Electronic Filing form within 7 days of case opening.
File a Chapter 11 Under Subchapter V
Updated 8/15/2022
Overview
- Debtor must append to the voluntary petition its most recent balance sheet, statement of operations, cash−flow statement, and Federal income tax return, or a statement made under penalty of perjury that these documents have not been prepared or filed.
- Provisions of the Small Business Reorganization Act ("SBRA"), effective February 19, 2020, created a subchapter V under chapter 11.
- Fee: $1738.00
References
- 11 USC §§ 101(51D), 1116(1)
- Order Adopting SBRA Interim Rules Effective February 19, 2020
Step-by-Step Instructions
Case Opening Screen
- Select Bankruptcy.
- Select Open Voluntary BK Case.
- Chapter - Select 11.
- Joint Petition - Select n.
- Deficiencies - Defaults to n. Change to y if missing schedules, statements or other required documents or document authorizing the filing of the bankruptcy (for corporations, LLCs and partnerships).
- When done, click Next to continue.
Search for a Debtor Screen
- Search for an existing debtor record by entering debtor's Business Name. Click Search.
- If no match is found, No person found displays. Click Create new party.
- If a possible match is found, parties with the same business name display.
- Click a name and the debtor's information displays in a pop up window.
- If the displayed information is an exact match, click Select name from list.
- If not an exact match, click Create new party.
Debtor Information Screen
Enter all debtor information exactly as it appears on the petition.
- Last name, First name, Middle name - Enter exactly as they appear on the petition. Do not use all caps.
- SSN / ITIN - Leave blank
- Tax ID / EIN - Enter Tax ID in format of XX-XXXXXXX.
- Address 1, Address 2, Address 3 - Enter debtor's mailing address.
- City, State, Zip - Enter debtor's mailing city, state and zip.
- County - Select current county of principal place of business.
- Country - Leave blank, unless outside of U.S.A.
- Phone, Fax and E-mail - Leave blank.
- Party Text - Leave blank.
- Alias - Add, if any.
- Corporate parent/affiliate - Add, if any.
- Click Review… and verify entered information is correct. Click Return to Party Screen.
- When done, click Submit to continue.
Divisional Office Screen
- Click Next to continue.
Statistical Data Screen
- Prior filing within last 8 years – Select no or yes.
- Fee status - Select Paid.
- Nature of debt - Select appropriate option.
- Asset notice - Select Yes
- Estimated number of creditors - Select appropriate option.
- Estimated assets - Select appropriate option.
- Estimated liabilities - Select appropriate option.
- Small business - A small business debtor is defined in 11 U.S.C. § 101(51D). Select Yes or No.
- Subchapter - Check the box to indicate that you are electing to proceed under subchapter V of chapter 11.
- Chapter 11 Non-individual - Select if appropriate.
- Type of debtor - Select appropriate option.
- Nature of business - Select appropriate option.
- Special categories - Select if appropriate.
- NAICS (north American Industry Classification System) - Enter 4-digit code that best describes debtor. Click here for more NAIS info..
- Click Next to continue.
Summary of Assets and Liabilities Screen
- Enter values from corresponding schedules.
- When done, click Next to continue.
- If data is not available, click Next to bypass this screen.
Plan Due Date Screen
- This screen displays the Subchapter V Plan due date.
- Click Next to continue.
Deficiencies Screen
- This screen displays if deficiencies were noted on the first screen.
- Check the items NOT included in this filing.
- Click Next to continue.
PDF Upload Screen
- Click Browse/Choose File and upload PDF of petition, schedules and statements.
- Click Next to continue.
Incomplete Filings Screen
- This screen displays if deficiencies were noted on the first screen.
- The due date defaults to 14 days from date of filing.
- Click Next to continue.
Filing Fee Screen
- If paying in full, leave the default amount of $1738.
- Click Next.
Final Docket Entry Screen
- Carefully review the final docket entry.
- If incorrect, use your browser back button to the applicable screen to make corrections.
- If correct, click Next to file your case.
- If fees are due, a Summary of current charges displays in a separate window. Click Pay Now or Continue Filing.
Notice of Bankruptcy Case Filing
- The Notice of Bankruptcy Case Filing is verification that the case has been electronically filed with the court.
Next Steps
- Upload creditors.
- Assign judge/trustee.
- If not included with petition, file Corporate Resolution or Statement Regarding Authority to File Petition.
- File the signed Declaration re: Electronic Filing form within 7 days of case opening.
File a Chapter 12
Updated 8/15/2022
Overview
- Fee: $278.00 - Debtors who are individuals may request that the fee be paid in installments (Official Form 103A) by filing the appropriate signed application. Payment is generally due in full 14 days after the case is filed.
- Chapter 12 plan must be filed 90 days after the date of case filing.
- Confirmation hearing of the plan must be concluded within 45 days after filing of the plan.
Step-by-Step Instructions
Case Opening Screen
- Select Bankruptcy.
- Select Open Voluntary BK Case.
- Chapter - Select 12.
- Joint Petition - Defaults to n. Change to y if this is a joint filing.
- Deficiencies - Defaults to n. Change to y if missing schedules, statements or other required documents, including credit counseling certificate (for individuals) or document authorizing the filing of the bankruptcy (for corporations, LLCs and partnerships)
- When done, click Next to continue.
Search for a Debtor Screen
- Search for an existing debtor record by entering debtor's SSN or Tax ID. Click Search.
- If no match is found, No person found displays. Click Create new party.
- If a possible match is found, parties with the same SSN/Tax ID display.
- Click a name and the debtor's information displays in a pop up window.
- If the displayed information is an exact match, click Select name from list.
- If not an exact match, click Create new party.
Debtor Information Screen
Enter all debtor information exactly as it appears on the petition.
- Last name, First name, Middle name - Enter exactly as they appear on the petition. Do not use all caps.
- Generation (Jr., III, etc.) - Enter, if any.
- SSN / ITIN - If individual, enter SSN or ITIN.
- Tax ID / EIN - If business, enter Tax ID in format of XX-XXXXXXX.
- Address 1, Address 2, Address 3 - Enter debtor's mailing address.
- City, State, Zip - Enter debtor's mailing city, state and zip.
- County - Select current county of residence or principal place of business.
- Country - Leave blank, unless outside of U.S.A.
- Phone, Fax and E-mail - Leave blank.
- Party Text - Leave blank.
- Alias - Add, if any.
- Corporate parent/affiliate - Add, if any.
- Click Review… and verify entered information is correct. Click Return to Party Screen.
- When done, click Submit to continue.
- If a joint filing, the Search for a joint debtor screen displays.
- Repeat to add joint debtor.
- Copy previous party's address is checked by default. Uncheck if address differs and add joint debtor's address.
- Click Submit to continue.
Divisional Office Screen
- Click Next to continue.
Statistical Data Screen
- Prior filing within last 8 years – Select no or yes.
- Fee status - Select one of the following:
- Installment when filing an Application for Individuals to Pay the Filing Fee in Installments.
- Paid when paying the fee in full.
- fee not paid is reserved for court use only.
- Nature of debt - business
- Asset notice - Select Yes.
- Estimated number of creditors - Select appropriate option.
- Estimated assets - Select appropriate option.
- Estimated liabilities - Select appropriate option.
- Type of debtor - Select appropriate option.
- Nature of business - Select appropriate option.
- When done, click Next to continue.
Summary of Assets and Liabilities Screen
- Enter values from corresponding schedules and statement.
- When done, click Next to continue.
- If data is not available, click Next to bypass this screen.
Deficiencies Screen
- This screen displays if deficiencies were noted on the first screen.
- Check the items NOT included in this filing.
- Click Next to continue.
PDF Upload Screen
- Click Browse/Choose File and upload PDF of petition, schedules and statements. For individual debtors, do NOT include the credit counseling certificate(s). File them separately.
- Click Next to continue.
Incomplete Filings Screen
- If deficiencies were noted on the first screen, the due date displays.
- Click Next to continue.
Government Claims Deadline Screen
- Government proofs of claim due date displays.
- Click Next to continue.
Filing Fee Screen
- If paying in full, leave the default amount of $278.
- If paying in installments, do NOT make a payment now. Change the amount to $0.0.
- Click Next.
Final Docket Entry Screen
- Carefully review the final docket entry.
- If incorrect, use your browser back button to the applicable screen to make corrections.
- If correct, click Next to file your case.
Summary of Current Charges
- If fees are due, a Summary of current charges displays in a separate window. Click Pay Now or Continue Filing.
Notice of Bankruptcy Case Filing
- The Notice of Bankruptcy Case Filing is verification that the case has been electronically filed with the court.
Next Steps
- Upload creditors.
- Assign judge/trustee.
- For individual debtors, file Certificate of Credit Counseling (or if on Official Form B 101, Part 5, the fourth box is checked, separately file Motion for Exemption from Credit Counseling).
- File Disclosure of Compensation of Attorney for Debtor, if not included with petition.
- If paying in installments, file Application for Individuals to Pay the Filing Fee in Installments.
- File the signed Declaration re: Electronic Filing form within 7 days of case opening.
File a Chapter 13
Updated 8/15/2022
Overview
- Review Ch 13 Filing Requirements
- Fee: $313.00 - Debtors who may request that the fee be paid in installments (Official Form 103A) by filing the appropriate signed application. Payment is generally due in full 14 days after the case is filed.
Step-by-Step Instructions
Case Opening Screen
- Select Bankruptcy.
- Select Open Voluntary BK Case.
- Chapter - Select 13.
- Joint Petition - Defaults to n. Change to y if this is a joint filing.
- Deficiencies - Defaults to n. Change to y if missing schedules, statements or other required documents, including credit counseling certificate and chapter 13 plan.
- When done, click Next to continue.
Search for a Debtor Screen
- Search for an existing debtor record by entering debtor's SSN. Click Search.
- If no match is found, No person found displays. Click Create new party.
- If a possible match is found, parties with the same SSN display.
- Click a name and the debtor's information displays in a pop up window.
- If the displayed information is an exact match, click Select name from list.
- If not an exact match, click Create new party.
Debtor Information Screen
Enter all debtor information exactly as it appears on the petition.
- Last name, First name, Middle name - Enter exactly as they appear on the petition. Do not use all caps.
- Generation (Jr., III, etc.) - Enter, if any.
- SSN / ITIN - If individual, enter SSN or ITIN.
- Address 1, Address 2, Address 3 - Enter debtor's mailing address.
- City, State, Zip - Enter debtor's mailing city, state and zip.
- County - Select current county of residence. Be sure to select the correct county as this determines the location of the Section 341 meeting of creditors.
- Country - Leave blank, unless outside of U.S.A.
- Phone, Fax and E-mail - Leave blank.
- Party Text - Leave blank.
- Alias - Add, if any.
- Corporate parent/affiliate - Add, if any.
- Click Review… and verify entered information is correct. Click Return to Party Screen.
- When done, click Submit to continue.
- If a joint filing, the Search for a joint debtor screen displays.
- Repeat to add joint debtor.
- Copy previous party's address is checked by default. Uncheck if address differs and add joint debtor's address.
- Click Submit to continue.
Divisional Office Screen
- Click Next to continue.
Statistical Data Screen
- Prior filing within last 8 years – Select no or yes.
- Fee status - Select one of the following:
- Installment when filing an Application for Individuals to Pay the Filing Fee in Installments.
- Paid when paying the fee in full.
- fee not paid is reserved for court use only.
- Nature of debt - Select business, consumer or other.
- Asset notice - Select No (Chapter 7 cases are always opened as no asset).
- Estimated number of creditors - Select appropriate option.
- Estimated assets - Select appropriate option.
- Estimated liabilities - Select appropriate option.
- Type of debtor - Select Individual.
- When done, click Next to continue.
Summary of Assets and Liabilities Screen
- This screen displays for individual debtors with consumer debts.
- Enter values from corresponding schedules and statement.
- When done, click Next to continue.
- If data is not available, click Next to bypass this screen.
Data Collection Screen
- This screen displays for individual debtors with consumer debts.
- Enter values from corresponding schedules.
- When done, click Next to continue.
- If data is not available, click Next to bypass this screen.
Deficiencies Screen
- This screen displays if deficiencies were noted on the first screen.
- Check the items NOT included in this filing.
- Click Next to continue.
PDF Upload Screen
- Click Browse/Choose File and upload PDF of petition, schedules and statements. Do NOT include the chapter 13 plan and credit counseling certificate(s). File them separately.
- Click Next to continue.
Incomplete Filings and Claims Deadline Screen
- If deficiencies were noted on the first screen, the due date displays.
- Government proofs of claim due date displays.
- Click Next to continue.
Filing Fee Screen
- If paying in full, leave the default amount of $313.
- If paying in installments, do NOT make a payment now. Change the amount to $0.0.
- Click Next.
Final Docket Entry Screen
- Carefully review the final docket entry.
- If incorrect, use your browser back button to the applicable screen to make corrections.
- If correct, click Next to file your case.
Summary of Current Charges
- If fees are due, a Summary of current charges displays in a separate window. Click Pay Now or Continue Filing.
Notice of Bankruptcy Case Filing
- The Notice of Bankruptcy Case Filing is verification that the case has been electronically filed with the court.
Next Steps
- Upload creditors.
- Assign judge/trustee.
- File Chapter 13 Plan.
- File Certificate of Credit Counseling (or if on Official Form B 101, Part 5, the fourth box is checked, separately file Motion for Exemption from Credit Counseling).
- File Disclosure of Compensation of Attorney for Debtor, if not included with petition.
- If paying in installments, file Application for Individuals to Pay the Filing Fee in Installments.
- File the signed Declaration re: Electronic Filing form within 7 days of case opening.
File a Chapter 15
Updated 8/15/2022
Overview
- The purpose of Chapter 15 is to provide effective mechanisms for dealing with insolvency cases involving debtors, assets, claimants, and other parties of interest involving more than one country. Generally, a chapter 15 case is ancillary to a primary proceeding brought in another country, typically the debtor's home country. Under chapter 15, a U.S. court may authorize a trustee or other entity to act in a foreign country on behalf of a U.S. bankruptcy estate. An ancillary case is commenced by a "foreign representative" filing a petition for recognition of a "foreign proceeding."
- After notice and a hearing, the court is authorized to issue an order recognizing the foreign proceeding as either a "foreign main proceeding" (a proceeding pending in a country where the debtor's center of main interests are located) or a "foreign non-main proceeding" (a proceeding pending in a country where the debtor has an establishment, but not its center of main interests).
- Use Official Form 401 Chapter 15 Petition for Recognition of Foreign Proceeding
- The petition must be accompanied by documents showing the existence of the foreign proceeding and the appointment and authority of the foreign representative.
- Fee: $1738.00
Step-by-Step Instructions
Case Opening Screen
- Select Bankruptcy.
- Select Open Voluntary BK Case.
- Chapter - Select 15.
- Joint Petition - Defaults to n. Change to y if this is a joint filing.
- Deficiencies - Defaults to n. Change to y if missing documents.
- Main/Nonmain - Select one:
- Foreign main proceeding
- Foreign nonmain proceeding
- Foreign main proceeding, or in the alternative, foreign nonmain proceeding.
- When done, click Next to continue.
Search for a Debtor Screen
- Search for an existing debtor record by entering debtor's SSN or Tax ID. Click Search.
- If no match is found, No person found displays. Click Create new party.
- If a possible match is found, parties with the same SSN/Tax ID display.
- Click a name and the debtor's information displays in a pop up window.
- If the displayed information is an exact match, click Select name from list.
- If not an exact match, click Create new party.
Debtor Information Screen
Enter all debtor information exactly as it appears on the petition.
- Last name, First name, Middle name - Enter exactly as they appear on the petition. Do not use all caps.
- Generation (Jr., III, etc.) - Enter, if any.
- SSN / ITIN - If individual, enter SSN or ITIN.
- Tax ID / EIN - If business, enter Tax ID in format of XX-XXXXXXX.
- Address 1, Address 2, Address 3 - Enter debtor's mailing address.
- City, State, Zip - Enter debtor's current mailing address.
- County - Select OUTSIDE U.S. (99999).
- Country - Enter country name in all capitals.
- Phone, Fax and E-mail - Leave blank.
- Party Text - Leave blank.
- Alias - Add, if any.
- Corporate parent/affiliate - Add, if any.
- Click Review… and verify entered information is correct. Click Return to Party Screen.
- When done, click Submit to continue.
- If a joint filing, the Search for a joint debtor screen displays.
- Repeat to add joint debtor.
- Copy previous party's address is checked by default. Uncheck if address differs and add joint debtor's address.
- Click Submit to continue.
Divisional Office Screen
- Click Next to continue.
Statistical Data Screen
- Fee status - Paid.
- Type of debtor - Select Individual, Corporation, Partnership or Other.
Deficiencies Screen
- This screen displays if deficiencies were noted on the first screen.
- Check the items NOT included in this filing.
- Click Next to continue.
PDF Upload Screen
- Click Browse/Choose File and upload PDF of petition and other required documents.
- Click Next to continue.
Incomplete Filings Screen
- This screen displays if deficiencies were noted on the first screen.
- The due date defaults to 14 days from date of filing.
- Click Next to continue.
Filing Fee Screen
- If paying in full, leave the default amount of $1738.
- If paying in installments, do NOT make a payment now. Change the amount to $0.0.
- Click Next.
Final Docket Entry Screen
- Carefully review the final docket entry.
- If incorrect, use your browser back button to the applicable screen to make corrections.
- If correct, click Next to file your case.
- If fees are due, a Summary of current charges displays in a separate window. Click Pay Now or Continue Filing.
Notice of Bankruptcy Case Filing
- The Notice of Bankruptcy Case Filing is verification that the case has been electronically filed with the court.
Next Steps
- Assign judge/trustee.
- File the signed Declaration re: Electronic Filing form within 7 days of case opening.
Upload Creditor List
Updated 11/11/2020
In General
A bankruptcy petition must be accompanied by a list of the names and addresses of all creditors and other parties who are or will be included on bankruptcy schedules D, E/F, G, and H. If there are a few creditors, you may enter the creditors individually. Otherwise, you should upload a .txt file with the names and addresses. For additional guidance on creating the creditor list and saving it as a .txt file, refer to Create a Creditor List.
Step-by-Step: Upload Creditors Using .txt File
- Select Bankruptcy > Creditor Maintenance.
- Select Upload list of creditors file.
- Enter the Case Number.
- The Load Creditor Information screen displays.
- Click Browse and attach .txt file.
- Click Next.
- The Total Creditors Entered screen displays.
- Verify number of creditors.
- If correct, click Submit.
- If incorrect, click the browser Back button to return to the Load Creditor Information screen.
- The Creditors Receipt screen confirms the total number of creditors uploaded to the case.
Step-by-Step: Uploading Creditors INDIVIDUALLY
- Select Bankruptcy > Creditor Maintenance.
- Select Enter individual creditors.
- Enter the Case Number.
- The Creditor Information screen displays.
- Enter the creditors being added to the case. Separate creditors with a blank line.
- Accept defaults for Creditor type (Creditor) and Creditor committee (No).
- Click Next when done.
- The Total Creditors Entered screen displays.
- Verify number of creditors.
- If correct, click Submit.
- If incorrect, click the browser Back button to return to the Creditor Information screen.
- The Creditors Receipt screen confirms the total number of creditors uploaded to the case.
Next Step
For a new case, click Return To Creditor Maintenance Menu and proceed with Assign a Judge/Trustee.
Assign Judge/Trustee
Updated 11/11/2020
In General
After opening a case and uploading the creditor list, run the Judge/Trustee Assignment program which automatically assigns a judge, trustee and 341 meeting date. If you would like to increase the possibility of having the same meeting date assigned to multiple cases, run the Judge/Trustee Assignment program after you have opened and uploaded the creditor lists for all cases.
Step-by-Step Instructions
- Select Bankruptcy > Judge/Trustee Assignment.
- The 341 Judge and Trustee screen displays the case assignments.
IMPORTANT! In a chapter 11 case, the program only assigns a judge. The Office of the United States Trustee is responsible for setting the meeting of creditors.
Next Steps
- For individual debtors, file Certificate of Credit Counseling (or if on Official Form 101, Part 5, the fourth box is checked, separately file Motion for Exemption from Credit Counseling).
- For corporations and artificial entities, file Corporate Resolution or Statement Regarding Authority to File Petition.
- File Disclosure of Compensation of Attorney for Debtor, if not included with petition.
- If paying in installments, file Application for Individuals to Pay the Filing Fee in Installments.
- If applying for fee waiver, file Application to Have the Chapter 7 Filing Fee Waived.
- Mail the originally signed Declaration re: Electronic Filing form to the Clerk's Office. This is due within 7 days of case opening.
File an Involuntary Petition
Updated 8/15/2022
Overview
- An involuntary chapter 7 or 11 case may be commenced under certain circumstances by a petition filed by creditors holding claims against the debtor.
- Fee: Chapter 7 $338.00 / Chapter 11 $1738.00
- Involuntary Petition Against An Individual (Official Form 105)
- Involuntary Petition Against a Non-Individual (Official Form 205)
References
11 U.S.C. §303
FRBP 1007, 1010, 1011, 1013, 7004
Step-by-Step Instructions
Case Opening Screen
- Select Bankruptcy.
- Select Open Involuntary BK Case.
- Chapter - Select 7 or 11.
- Joint Petition - n.
- Click Next to continue.
Search for Alleged Debtor Screen
- Search for an existing debtor record by entering debtor's SSN or Tax ID. Click Search.
- If no match is found, No person found displays. Click Create new party.
- If a possible match is found, parties with the same SSN/Tax ID display.
- Click a name and the debtor's information displays in a pop up window.
- If the displayed information is an exact match, click Select name from list.
- If not an exact match, click Create new party.
Alleged Debtor Information Screen
Enter all alleged debtor information exactly as it appears on the petition.
- Last name, First name, Middle name - Enter exactly as they appear on the petition. Do not use all caps.
- Generation (Jr., III, etc.) - Enter, if any.
- SSN / ITIN - If individual, enter SSN or ITIN.
- Tax ID / EIN - If business, enter Tax ID in format of XX-XXXXXXX.
- Address 1, Address 2, Address 3 - Enter debtor's mailing address.
- City, State, Zip - Enter debtor's mailing city, state and zip.
- County - Select current county of residence or principal place of business.
- Country - Leave blank, unless outside of U.S.A.
- Phone, Fax and E-mail - Leave blank.
- Party Text - Leave blank.
- Alias - Add, if any.
- Corporate parent/affiliate - Add, if any.
- Click Review… and verify entered information is correct. Click Return to Party Screen.
- When done, click Submit to continue.
Search for Petitioning Creditor Screen
- Search for an existing party record by entering the petitioning creditor's name. Click Search.
- If no match is found, No person found displays. Click Create new party.
- If a possible match is found, parties with the same name display.
- Click a name and the debtor's information displays in a pop up window.
- If the displayed information is an exact match, click Select name from list.
- If not an exact match, click Create new party.
Petitioning Creditor Information Screen
Enter petitioning creditor information.
- Last name, First name, Middle name - Enter exactly as they appear on the petition.
- Generation (Jr., III, etc.) - Add, if any.
- Address 1, Address 2, Address 3 - Enter address.
- City, State, Zip - Enter mailing city, state and zip.
- Country - Leave blank, unless outside of U.S.A.
- Check the box, The user opening the case is the filing attorney for this party.
- Click Review… and verify entered information is correct. Click Return to Party Screen.
- Click Submit to continue.
- Repeat these steps to add additional petitioning creditors.
- When done adding all petitioning creditors, click End petitioning creditor selection.
Divisional Office Screen
- Click Next to continue.
Statistical Data Screen
- Prior filing within last 8 years – Select no or yes.
- Fee status - Select Paid.
- Nature of debt - Select business or consumer.
- Asset notice - Select Yes
- Estimated number of creditors - Select appropriate option.
- Estimated assets - Select appropriate option.
- Estimated liabilities - Select appropriate option.
- Type of debtor - Select Individual, Corporation, Partnership or Other.
- For debtors with business debts, select appropriate Nature of business.
- Click Next to continue.
PDF Upload Screen
- Click Browse/Choose File and upload PDF of involuntary petition and other documents.
- Click Next to continue.
Filing Fee Screen
- Click Next.
Final Docket Entry Screen
- Carefully review the final docket entry.
- If incorrect, use your browser back button to the applicable screen to make corrections.
- If correct, click Next to file your case.
- If fees are due, a Summary of current charges displays in a separate window. Click Pay Now or Continue Filing.
Notice of Bankruptcy Case Filing
- The Notice of Bankruptcy Case Filing is verification that the case has been electronically filed with the court.
Next Steps
- Complete Form H2500E Summons to Debtor in Involuntary Case.
- File Summons Issued - Involuntary.
- File the signed Declaration re: Electronic Filing form within 7 days of case opening.
Adversary Proceedings
File a Complaint
Updated 11/10/2021
Process Overview
- Open adversary proceeding, attaching Complaint and Adversary Proceeding Cover Sheet
- Fee: $350, unless debtor is the plaintiff or trustee is requesting deferral.
- File Summons and Notice of Scheduling Conference in an Adversary Proceeding.
Forms
- Adversary Proceeding Cover Sheet (Official Form 1040)
- Summons and Notice of Scheduling Conference in an Adversary Proceeding (H2500B)
References
FRBP 7001-7087
Step-by-Step Instructions
Open Adversary Proceeding Screen
- Select Adversary > Open an AP.
- Complaint - Select y
Search for a Plaintiff Screen
- Search for an existing party record by entering plaintiff's name. Click Search.
- If no match is found, No person found displays. Click Create new party.
- If a possible match is found, parties with the same name display.
- Click a name and the party's information displays in a pop up window.
- If the displayed information is an exact match, click Select name from list. If you are not sure it is the same party, click Create new party.
- If not an exact match, click Create new party.
Plaintiff Information screen - Complete the following fields. Leave all other fields blank.
- Last name, First name, Middle name - Enter exactly as they appear in the caption of the complaint. Do not use all caps.
- Generation (Jr., III, etc.) - Enter, if any.
- Address 1, Address 2, Address 3 - Optional.
- City, State, Zip - Optional.
- Party Text - If applicable, enter extraneous party information, e.g. a Vermont insurance company, in her capacity as Commissioner of Financial Securities.
- Role in Bankruptcy Case - Select appropriate option.
- Add additional attorney - The attorney opening this adversary proceeding is automatically added as the plaintiff's attorney. Click to add additional attorneys.
- Alias - Add alias, if any.
- Click Review… and verify entered information is correct. Click Return to Party Screen.
- Click Submit.
Search for a Plaintiff Screen
- Repeat until all plaintiffs have been added.
- When done, click End plaintiff selection.
Search for a Defendant Screen
- Search for an existing party record by entering defendant's name. Click Search.
- If no match is found, No person found displays. Click Create new party.
- If a possible match is found, parties with the same name display.
- Click a name and the party's information displays in a pop up window.
- If the displayed information is an exact match, click Select name from list. If you are not sure it is the same party, click Create new party.
- If not an exact match, click Create new party.
Defendant Information Screen - Complete the following fields. Leave all other fields blank.
- Last name, First name, Middle name - Enter exactly as they appear in the caption of the complaint. Do not use all caps.
- Generation (Jr., III, etc.) - Enter, if any.
- Address 1, Address 2, Address 3 - Required.
- City, State, Zip - Required.
- Party Text - If applicable, enter extraneous party information, e.g. a Vermont insurance company, in her capacity as Commissioner of Financial Securities.
- Role in Bankruptcy Case - Select appropriate option.
- Attorney - Add attorney for defendant, if any. If debtor is the defendant, you must add the debtor's attorney.
- Alias - Add alias, if any.
- Click Review… and verify entered information is correct. Click Return to Party Screen.
- Click Submit.
Search for a Defendant Screen
- Repeat until all defendants have been added.
- When done, click End defendant selection.
Case Association Screen
- Lead case number - Enter case number of related bankruptcy case.
- Association type - Adversary.
Case Assignment Screen
- Click Next.
Statistical Information Screen
- Party Code - Select appropriate option.
- Rule 23 (class action) - Select appropriate option.
- Jury demand - If a demand for jury trial is included in the complaint, select Plaintiff. If not, select None.
- Demand ($000) - Enter in thousands (e.g. "5" for $5,000)
- State law - Select appropriate option.
- Nature of suit - Select the primary nature of suit and up to four more natures of suit.
- Note: If one of the natures of suit is 41 (Objection / revocation of discharge - 727(c),(d),(e)), select it as the primary nature of suit.
PDF Upload Screen
- Click Browse/Choose File and upload PDF of complaint. You may also attach the Adversary Proceeding Cover Sheet but do NOT attach the Summons and Notice of Scheduling Conference. The summons must be filed separately.
Jury Demand Screen
- Answer prompt regarding jury demand
Fee Policy Screen
- Information regarding the court's policy regarding payment of filing fees display. Read it carefully.
Fee Screen
- If plaintiff is the debtor, enter 0.0 as the fee amount.
- If trustee is requesting deferral of the payment, enter 0.0 as the fee amount.
- Otherwise, click Next to accept default fee amount of $350.00.
- Click Next again at the blank screen.
Final Docket Screen
- Carefully review the final docket entry.
- If incorrect, use your browser back button to the applicable screen to make corrections.
- If correct, click Next to file your adversary proceeding.
- If fees are due, a Summary of current charges displays in a separate window. Click Pay Now or Continue Filing.
Notice of Electronic Filing
- The Notice of Electronic Filing is verification that the case has been electronically filed with the court.
Next Steps
- File Adversary Proceeding Cover Sheet, if not already attached to complaint.
- Obtain scheduling conference date from CHAP Presets Report.
- Complete Summons and Notice of Scheduling Conference in an Adversary Proceeding (Form H2500B).
- File Summons and Notice of Scheduling Conference.
Summons (AP)
Updated 11/10/2021
In General
The summons is the notice which accompanies the complaint, advising of the names of the parties, the time limits for responding to the complaint and the details of the scheduling conference. When completing the summons, refer to the CHAP Chamber Presets Report for available scheduling conference dates. (Click here for more information about hearing presets.)
Form
Summons and Notice of Scheduling Conference in an Adversary Proceeding (H2500B)
Step-by-Step Instructions
- Select Adversary > Complaint & Summons.
- Enter Case Number.
- Select Summons (AP).
- Click Browse/File and upload PDF of the summons.
- Carefully read the message that displays: Enter name of each defendant at prompt Summons Issued on. Use date of filing (today) for issue date.
- Select the appropriate defendants upon which the summons was issued. Press and hold [Ctrl] key to select multiple parties.
- From the drop-down list of preset hearings, select the Scheduling Conference date stated on your summons .
- Modify docket text, if appropriate.
- Verify final docket text. Click Next to complete the filing.
- The Notice of Electronic Filing displays. This is the verification that the document has been electronically filed.
Certificate of Service of Summons
Updated 11/10/2021
In General
Plaintiff(s) must serve the complaint and summons on the defendant(s) in the manner and within the time limit set forth in FRBP 7004. File the Certificate of Service after service has been made.
Form
Page 2 of Summons and Notice of Scheduling Conference in an Adversary Proceeding (H2500B)
Step-by-Step Instructions
- Select Adversary > Complaint & Summons.
- Enter Case Number.
- Select Certificate of Service of Summons.
- Click Browse/File and upload PDF of the certificate of service.
- Select the appropriate defendants upon which the summons was served. Press and hold [Ctrl] key to select multiple parties.
- Enter the Date served.
- Modify docket text, if appropriate.
- Verify final docket text. Click Next to complete the filing.
- The Notice of Electronic Filing displays. This is the verification that the document has been electronically filed.
Answer
Updated 11/11/2020
Step-by-Step Instructions
- Select Adversary > Answers / Responses to Motions.
- Select Complaint, 3rd, cross, counter.
- Enter Case Number.
- If filing this document with other attorneys, check the box and add co-counsel. If not, click Next to skip the joint filing screen.
- Select Party filer. Press and hold [Ctrl] key to select multiple parties.
- The Attorney/Party Association screen displays if the association does not already exist. Carefully read the message in red and click Next when done.
- Place a check in the box next to the complaint, amended complaint, cross-claim, counter-claim or third party complaint to which your answer refers.
- Click Browse/File and upload the PDF.
- If you are filing only an answer, click Next to skip the third-party, cross-claim, counterclaim screen. If your answer includes a third-party, cross-claim or counterclaim, place a check in the appropriate box, click Next and select the appropriate party/parties.
- Select whether a demand for jury trial is included in the answer.
- Modify docket text, if appropriate.
- Verify final docket text. Click Next to complete the filing.
- The Notice of Electronic Filing displays. This is the verification that the document has been electronically filed.
Crossclaim, Third-Party Complaint and Counterclaim
Updated 11/11/2020
In General
A crossclaim is a claim asserted by one defendant against another defendant. A third-party complaint is a complaint filed by a defendant against a third (new) party. A counterclaim is a claim by the defendant against the plaintiff. These are typically filed as part of the Answer to the original complaint. Follow the instructions below to file it separately.
Step-by-Step Instructions
- Select Adversary > Complaint & Summons.
- Enter Case Number.
- Select Crossclaim, Third-Party Complaint or Counterclaim.
- Click Browse/File and upload PDF.
- Select the appropriate parties against whom the document is being filed. Press and hold [Ctrl] key to select multiple parties.
- Select Party filer.
- The Attorney/Party Association screen displays if the association does not already exist. Carefully read the message in red and click Next when done.
- Select whether a demand for jury trial is included in the document.
- Modify docket text, if appropriate.
- Verify final docket text. Click Next to complete the filing.
- The Notice of Electronic Filing displays. This is the verification that the document has been electronically filed.
Summons - Counterclaim / Cross Claim / Third Party
Updated 11/15/2020
In General
The summons is the notice which accompanies the complaint, advising of the names of the parties and the time limits for responding to the complaint.
Forms
Summons on a Cross-Claim / Counter Claim (H2500cc)
Third-Party Summons (H2500D)
Step-by-Step Instructions
- Select Adversary > Complaint & Summons.
- Enter Case Number.
- Select Summons - Counterclaim / Cross Claim / Third Party.
- Select Party filer. Press and hold [Ctrl] key to select multiple parties.
- Click Browse/File and upload PDF of the summons.
- Modify docket text, if appropriate.
- Verify final docket text. Click Next to complete the filing.
- The Notice of Electronic Filing displays. This is the verification that the document has been electronically filed.
File a Notice of Removal
Updated 11/11/2020
Process Overview
- Open adversary proceeding, attaching Notice of Removal and Adversary Proceeding Cover Sheet.
- Fee: $350, unless debtor is the plaintiff or trustee is requesting deferral.
- File Process and Pleadings in Removed Matter.
- Court will issue a Notice of Removed Matter and Scheduling Conference.
Forms
Adversary Proceeding Cover Sheet (Official Form 1040)
References
FRBP 9027
Step-by-Step Instructions
Open Adversary Proceeding Screen
- Select Adversary > Open an AP.
- Complaint - Select n.
- Counsel for - Select whether you represent the plaintiff or defendant in the removed matter.
Search for a Plaintiff Screen
- Search for an existing party record by entering plaintiff's name. Click Search.
- If no match is found, No person found displays. Click Create new party.
- If a possible match is found, parties with the same name display.
- Click a name and the party's information displays in a pop up window.
- If the displayed information is an exact match, click Select name from list. If you are not sure it is the same party, click Create new party.
- If not an exact match, click Create new party.
Plaintiff Information screen - Complete the following fields. Leave the other fields blank.
- Last name, First name, Middle name - Enter exactly as they appear in the caption of the complaint. Do not use all caps.
- Generation (Jr., III, etc.) - Enter, if any.
- Address 1, Address 2, Address 3
- City, State, Zip
- Party Text - If applicable, enter extraneous party information, e.g. a Vermont insurance company, in her capacity as Commissioner of Financial Securities.
- Role in Bankruptcy Case
- Add additional attorney - The attorney opening this adversary proceeding is automatically added as the plaintiff's attorney. Click to add additional attorneys.
- Alias - Add alias, if any.
- Click Review… and verify entered information is correct. Click Return to Party Screen.
- Click Submit.
Search for a Plaintiff Screen
- Repeat until all plaintiffs have been added.
- When done, click End plaintiff selection.
Search for a Defendant Screen
- Search for an existing party record by entering defendant's name. Click Search.
- If no match is found, No person found displays. Click Create new party.
- If a possible match is found, parties with the same name display.
- Click a name and the party's information displays in a pop up window.
- If the displayed information is an exact match, click Select name from list. If you are not sure it is the same party, click Create new party.
- If not an exact match, click Create new party.
Defendant Information Screen
- Last name, First name, Middle name - Enter exactly as they appear in the caption of the complaint. Do not use all caps.
- Generation (Jr., III, etc.) - Enter, if any.
- Address 1, Address 2, Address 3
- City, State, Zip
- Party Text - If appropriate, enter extraneous party information, e.g. a Vermont insurance company, in her capacity as Commissioner of Financial Securities.
- Role in Bankruptcy Case
- Attorney - Add attorney for defendant, if any. If debtor is the defendant, you must add the debtor's attorney.
- Alias - Add alias, if any.
- Click Review… and verify entered information is correct. Click Return to Party Screen.
- Click Submit.
Search for a Defendant Screen
- Repeat until all defendants have been added.
- When done, click End defendant selection.
Case Association Screen
- Lead case number - Enter case number of related bankruptcy case.
- Association type - Adversary.
Case Assignment Screen
- Click Next.
Statistical Information Screen
- Party Code - Select appropriate option.
- Rule 23 (class action) - Select appropriate option.
- Jury demand - If a demand for jury trial is included in the complaint, select Plaintiff. If not, select None.
- Demand ($000) - Enter in thousands (e.g. "5" for $5,000)
- State law - Select appropriate option.
- Nature of suit - Select 01 (Determination of removed claim or cause)
Select Event Screen
- Select Notice of Removal
PDF Upload Screen
- Click Browse/Choose File and upload PDF of Notice of Removal and Adversary Proceeding Cover Sheet.
State Court Prompts
- Identify state court action being removed, e.g., Civil No. 19-00123, Circuit Court of the First Circuit, State of Hawaii.
- Enter the name of the party removing the action, e.g., John Smith.
Fee Policy Screen
- Information regarding the court's policy regarding payment of filing fees display. Read it carefully.
Fee Screen
- If plaintiff is the debtor, enter 0.0 as the fee amount.
- If trustee is requesting deferral of the payment, enter 0.0 as the fee amount.
- Otherwise, click Next to accept default fee amount of $350.00.
- Click Next again at the blank screen.
Final Docket Screen
- Carefully review the final docket entry.
Sample docket entry: Adversary case 20-90005. ADVERSARY PROCEEDING OPENED. 01 (Determination of removed claim or cause): Notice of Removal: Civil No. 19-00123, Circuit Court of the First Circuit, State of Hawaii. Party removing the action: John Smith . Fee Amount $350. (01 (Determination of removed claim or cause))(Attorney, Test)
- If incorrect, use your browser back button to the applicable screen to make corrections.
- If correct, click Next to file your adversary proceeding.
- If fees are due, a Summary of current charges displays in a separate window. Click Pay Now or Continue Filing.
Notice of Electronic Filing
- The Notice of Electronic Filing is verification that the case has been electronically filed with the court.
Next Steps
- File Adversary Proceeding Cover Sheet, if not already attached to complaint.
- File Process and Pleadings in Removed Matter.
Motions
Application for Compensation / Expenses
Updated 11/11/2020
In General
Review Local Bankruptcy Rule 2016-1 for detailed information on compensation of professionals.
Hearing
Hearing required. Refer to the CHAP Chamber Presets Report for available hearing dates and times. File a separate notice of hearing with the preset hearing information.
Form
Application must include a cover sheet substantially confirming to local form Compensation Summary Sheet (H2016-1a).
References
11 U.S.C. §§330, 331, 503(b)(4); FRBP 2016; LBR 2016-1
Step-by-Step Instructions
- Select Bankruptcy > Applications for Compensation.
- Enter Case Number.
- Select Applications for Compensation / Expenses.
- Skip the Joint Filing screen.
- At the prompts, enter applicant information.
- Click Browse/Choose File and upload PDF.
- Select Party filer. If the party is not listed, view instructions on adding a new party to the case.
- The Attorney/Party Association screen displays if the association does not already exist. Carefully read the message in red.
- Modify docket text to describe attachments (e.g., Declaration, Summary Sheet, etc.), if appropriate.
- Verify final docket text. Click Next to complete the filing.
- The Notice of Electronic Filing displays. This is the verification that the document has been electronically filed.
Application for Payment of Unclaimed Funds
Updated 4/9/2024
In General
Effective immediately, Applications for Unclaimed Funds and their supporting documents must be submitted on paper, not filed online.
Application for Pro Hac Vice
Updated 11/11/2020
In General
Attorneys may request permission to appear pro hac vice in a bankruptcy case or proceeding in this court by filing an application substantially conforming to the local form (Application to Appear Pro Hac Vice) and submitting the assessment required by the district court. The current assessment fee is $300 per applicant. An attorney admitted to appear pro hac vice in a bankruptcy case will also be admitted to appear pro hac vice in a case that has been consolidated or is being jointly administered with, or in any adversary proceeding related to, the case in which the application has been granted.
Hearing
A hearing is not required.
Form
Application to Appear Pro Hac Vice (Local Form H2010-1b)
References
LBR 2090-1
Step-by-Step Instructions
- Select Bankruptcy or Adversary > Motions.
- Enter Case Number.
- Select Appear Pro Hac Vice (Motion).
- Click Browse/Choose File and upload PDF.
- At the prompt, Enter name of attorney applying for pro hac vice appearance.
- Carefully read the message that displays:
By order dated September 23, 2010, of the United States District Court for the District of Hawaii, there is an assessment of 300 Dollars for limited admission to appear pro hac vice.
- Click Next at the fee confirmation screen.
- Skip the Joint Filing screen.
- Select Party filer. If the party is not listed, view instructions on adding a new party to the case.
- The Attorney/Party Association screen displays if the association does not already exist. Carefully read the message in red.
- Modify docket text, if appropriate.
- Verify final docket text. Click Next to complete the filing.
- The Notice of Electronic Filing displays. This is the verification that the document has been electronically filed.
- A Summary of current charges displays in a separate window. Click Pay Now or Continue Filing.
Application for Waiver of Chapter 7 Filing Fee
Updated 11/11/2020
In General
A debtor who cannot afford to pay the chapter 7 filing fee may apply for a waiver under 11 U.S.C. § 1930(f). To qualify, a chapter 7 debtor must have income less than 150% of the income official poverty line and be unable to pay the fee in installments.
Hearing
A hearing is not required.
Form
Application to Have the Chapter 7 Filing Fee Waived (Official Form 103B)
References
11 U.S.C. § 1930(f)
Step-by-Step Instructions
- Select Bankruptcy > Motions/Applications.
- Enter Case Number.
- Select Waiver of Chapter 7 Filing Fee (Application).
- Click Browse/Choose File and upload PDF.
- Skip the Joint Filing screen.
- Select Party filer. Press and hold [Ctrl] key to select debtor and joint debtor.
- Modify docket text, if appropriate.
- Verify final docket text. Click Next to complete the filing.
- The Notice of Electronic Filing displays. This is the verification that the document has been electronically filed.
Application to Employ
Updated 11/11/2020
In General
A request for an order of employment may be made by filing an application substantially conforming to the local form (Application to Employ Professional).
Hearing
A hearing is not required unless there is an objection to the application.
Form
Application to Employ Professional (Local Form H2014)
References
11 U.S.C. §327; FRBP 2014, 6003; LBR 2014-1
Step-by-Step Instructions
- Select Bankruptcy > Motions/Applications.
- Enter Case Number.
- Select Employ (Application).
- Click Browse/Choose File and upload PDF.
- At the prompt, Enter Name of Person or Entity to be Employed and Enter Type of Position.
- Skip the Joint Filing screen.
- Select Party filer. If the party is not listed, view instructions on adding a new party to the case.
- The Attorney/Party Association screen displays if the association does not already exist. Carefully read the message in red.
- Modify docket text, if appropriate.
- Verify final docket text. Click Next to complete the filing.
- The Notice of Electronic Filing displays. This is the verification that the document has been electronically filed.
Next Step
The applicant shall either (a) submit a proposed order bearing the approval of the Office of the United States Trustee (OUST), (b) arrange for the OUST to notify chambers that the OUST does not object to the application, in which case the court may enter a text order granting the application, or (c) if there is an objection to the application, set the matter for hearing. LBR 2014-1.
Application to Pay Filing Fee in Installments
Updated 3/24/2026
In General
Individual debtors filing chapter 7 petitions may request to pay the filing fee in installments so long as the last payment becomes due within 120 days after the petition is filed. Installment payments in Chapters 12 and 13 are disfavored. If you do request payment in installments, the court generally will order you to pay the filing fee in full within 14 days after you file your petition. The court generally will not grant a request to pay the filing fee in installments in Chapter 11 cases.
Hearing
A hearing is not required.
Form
Application for Individuals to Pay the Filing Fee in Installments (Official Form 103A)
References
FRBP 1006(b)
Step-by-Step Instructions
- Select Bankruptcy > Motions/Applications.
- Enter Case Number.
- Select Pay Filing Fee in Installments (Application).
- Click Browse/Choose File and upload PDF.
- Skip the Joint Filing screen.
- Select Party filer. Press and hold [Ctrl] key to select debtor and joint debtor.
- Modify docket text, if appropriate.
- Verify final docket text. Click Next to complete the filing.
- The Notice of Electronic Filing displays. This is the verification that the document has been electronically filed.
Motion for 2004 Examination
Updated 11/11/2020
In General
A party in interest seeking to examine the debtor or other entity pursuant to Bankruptcy Rule 2004 may request an examination order by filing a motion substantially conforming to the local form (Motion for Rule 2004 Examination). The clerk is authorized to issue an examination order requested by a party in interest who has complied with the requirements of Local Bankruptcy Rule 2004-1.
Hearing
Generally, a hearing is not required. The court will advise you if the matter will be set for hearing.
Form
Motion for 2004 Examination (H2004-1)
References
FRBP 2004; LBR 2004-1
Step-by-Step Instructions
- Select Bankruptcy > Motions/Applications.
- Enter Case Number.
- Select Rule 2004 Examination (Motion).
- Click Browse/Choose File and upload PDF.
- At the prompt, enter Name of entity to be examined.
- Skip the Joint Filing screen if you are the only attorney filing this motion.
- Select Party filer. If the party is not listed, view instructions on adding a new party to the case.
- The Attorney/Party Association screen displays if the association does not already exist. Carefully read the message in red.
- Modify docket text, if appropriate.
- Verify final docket text. Click Next to complete the filing.
- The Notice of Electronic Filing displays. This is the verification that the document has been electronically filed.
Motion for Hardship Discharge
Updated 11/11/20
In General
After confirmation of a plan, circumstances may arise that prevent the debtor from completing the plan. In such situations, the debtor may ask the court to grant a "hardship discharge."
Hearing
Hearing required. Refer to the CHAP Chamber Presets Report for available hearing dates and times. File a separate notice of hearing with the preset hearing information.
References
11 U.S.C. §§1228(b), 1328(b); FRBP 4007(d)
Step-by-Step Instructions
- Select Bankruptcy > Motions/Applications.
- Enter Case Number.
- Select Hardship Discharge (Motion).
- Click Browse/Choose File and upload PDF.
- Skip the Joint Filing screen.
- Select Party filer. Press and hold [Ctrl] key to select debtor and joint debtor.
- Modify docket text to describe attachments (e.g., Declaration, Exhibits, etc.), if appropriate.
- Verify final docket text. Click Next to complete the filing.
- The Notice of Electronic Filing displays. This is the verification that the document has been electronically filed.
Motion for Issuance of Garnishee Summons
Updated 11/11/2020
In General
An ex parte motion for issuance of garnishee summons may be filed in a closed bankruptcy case or adversary proceeding.
Hearing
Generally, a hearing is not required for filing of the motion.
Step-by-Step Instructions
- Select Adversary > Motions.
- Enter Case Number.
- Select Issuance of Garnishee Summons (Motion).
- Click Browse/Choose File and upload PDF.
- At the prompt, enter Name of garnishee.
- Skip the Joint Filing screen.
- Select Party filer. If the party is not listed, view instructions on adding a new party to the case.
- The Attorney/Party Association screen displays if the association does not already exist. Carefully read the message in red.
- Modify docket text to describe document or attachments, if appropriate.
- Verify final docket text. Click Next to complete the filing.
- The Notice of Electronic Filing displays. This is the verification that the document has been electronically filed.
Next Step
- Submit a proposed Order for Issuance of Garnishee Summons.
- After the motion is granted, submit (not file) a Garnishee Summons and Order to the Clerk's Office. The court will enter a return date and time, and enter it on the docket.
Motion for Relief from Automatic Stay
Updated 12/1/2023
In General
Refer to Local Bankruptcy Rule 4001-1 for information regarding motion and supporting documents, hearing, notice and service requirements.
A motion to terminate, annul, modify, or condition the automatic stay must be accompanied by the appropriate filing fee. If a child support creditor is the movant and if the movant files Official Form 2810, no fee is required. In addition, no fee is required for approval of a stipulation to terminate, annul, modify or condition the automatic stay.
Hearing
Hearing required. Refer to the CHAP Chamber Presets Report for available hearing dates and times. File a separate notice of hearing with the preset hearing information.
Form
Motion must attach a cover sheet substantially confirming to local form Cover Sheet - Motion for Relief from Stay (H4001-1cs).
References
11 U.S.C. § 362(a); FRBP 4001(a); LBR 4001-1
Step-by-Step Instructions
- Select Bankruptcy > Motions/Applications.
- Enter Case Number.
- Select appropriate relief from stay motion - Relief from Automatic Stay (Motion) or Relief from Automatic Stay AND Ch 13 Codebtor Stay (Motion).
- Click Browse/Choose File and upload PDF.
- At the prompt, Briefly identify subject matter, e.g., Real Property Address, Vehicle Description, Title of Litigation, etc.
- Information regarding the court's policy regarding payment of filing fees display. Read it carefully.
- Fee screen displays. If you are filing an amended motion and have already paid the filing fee, change the fee amount to 0.00.
- Skip the Joint Filing screen if you are the only attorney filing this motion.
- Select Party filer. If the movant is not listed, view instructions on adding a new party to the case.
- The Attorney/Party Association screen displays if the association does not already exist. Carefully read the message in red.
- Modify docket text to describe attachments (e.g., Cover Sheet, Memorandum, Declaration, etc.), if appropriate.
- Verify final docket text. Click Next to complete the filing.
- The Notice of Electronic Filing displays. This is the verification that the document has been electronically filed.
- A Summary of current charges displays in a separate window. Click Pay Now or Continue Filing.
Motion for Relief from Codebtor Stay
Updated 11/11/2020
In General
Refer to Local Bankruptcy Rule 4001-1 for information regarding motion and supporting documents, hearing, notice and service requirements. There is no fee for filing a motion to terminate, annul, modify, or condition the codebtor stay.
Hearing
Hearing required. Refer to the CHAP Chamber Presets Report for available hearing dates and times. File a separate notice of hearing with the preset hearing information.
Form
Motion must attach a cover sheet substantially confirming to local form Cover Sheet - Motion for Relief from Stay (H4001-1cs).
References
11 U.S.C. §§1201, 1301; FRBP 4001; LBR 4001-1
Step-by-Step Instructions
- Select Bankruptcy > Motions/Applications.
- Enter Case Number.
- Select Relief from Codebtor Stay.
- Click Browse/Choose File and upload PDF.
- At the prompt, Briefly identify subject matter, e.g., Real Property Address, Vehicle Description, Title of Litigation, etc.
- Skip the Joint Filing screen if you are the only attorney filing this motion.
- Select Party filer. If the movant is not listed, view instructions on adding a new party to the case.
- The Attorney/Party Association screen displays if the association does not already exist. Carefully read the message in red.
- Modify docket text to describe attachments (e.g., Cover Sheet Memorandum, Declaration, etc.), if appropriate.
- Verify final docket text. Click Next to complete the filing.
- The Notice of Electronic Filing displays. This is the verification that the document has been electronically filed.
Motion for Stay Pending Appeal
Updated 11/11/2020
In General
A motion to stay pending appeal must first be filed in the bankruptcy court.
Hearing
The court will advise you if the matter will be set for hearing.
References
FRBP 8001-8028; LBR 8001-1; LR 8005.1, 8007.1, 8007.2
Step-by-Step Instructions
- Select Bankruptcy or Adversary > Motions.
- Enter Case Number.
- Select Stay Pending Appeal (Motion).
- Click Browse/Choose File and upload PDF.
- Skip the Joint Filing screen if you are the only attorney filing this motion.
- Select Party filer. If the movant is not listed, view instructions on adding a new party to the case.
- The Attorney/Party Association screen displays if the association does not already exist. Carefully read the message in red.
- Modify docket text to describe attachments, if appropriate.
- Verify final docket text. Click Next to complete the filing.
- The Notice of Electronic Filing displays. This is the verification that the document has been electronically filed.
Motion to Approve Settlement
Updated 11/11/2020
In General
A party may seek court approval of a settlement or stipulation by filing and serving on all creditors a motion pursuant to LBR 9013-1(c). If the motion concerns settlement of an adversary proceeding, the motion and notice must be entered on the docket in the bankruptcy case.
Hearing
Hearing required. Refer to the CHAP Chamber Presets Report for available hearing dates and times. File a separate notice of hearing with the preset hearing information.
References
FRBP 9019; LBR 9019-1(a)
Step-by-Step Instructions
- Select Bankruptcy or Adversary > Motions.
- Enter Case Number.
- Select Approve Settlement (Motion).
- Click Browse/Choose File and upload PDF.
- Skip the Joint Filing screen if you are the only attorney filing this motion.
- Select Party filer. If the party is not listed, view instructions on adding a new party to the case.
- The Attorney/Party Association screen displays if the association does not already exist. Carefully read the message in red.
- Modify docket text to describe attachments (e.g., Memorandum, Declaration, etc.), if appropriate.
- Verify final docket text. Click Next to complete the filing.
- The Notice of Electronic Filing displays. This is the verification that the document has been electronically filed.
Motion to Continue Hearing
Updated 11/11/2020
In General
Motions to continue a hearing must recite specific reasons for rescheduling the matter and the length of the proposed continuance. Click here for detailed information about how a party may request that a future hearing, trial, or scheduling conference be continued.
Hearing
The court will advise you if the matter will be set for hearing.
References
LBR 9006-1(b)(3)
Step-by-Step Instructions
- Select Bankruptcy or Adversary > Motions.
- Enter Case Number.
- Select Continue Hearing (Motion).
- Click Browse/Choose File and upload PDF.
- Check the box to relate to the matter you would like to continue.
- Skip the Joint Filing screen if you are the only attorney filing this motion. If this is a joint filing, check the box and select appropriate attorney(s).
- Select Party filer. If the party is not listed, view instructions on adding a new party to the case.
- The Attorney/Party Association screen displays if the association does not already exist. Carefully read the message in red.
- Modify docket text to describe attachments, if appropriate.
- Verify final docket text. Click Next to complete the filing.
- The Notice of Electronic Filing displays. This is the verification that the document has been electronically filed.
Motion to Extend Automatic Stay
Updated 11/11/2020
In General
Refer to Local Bankruptcy Rule 4001-5 for information regarding motion, notice, hearing, service requirements. There is no fee to file a motion to extend the automatic stay under 11 U.S.C. § 362(c)(3)(B).
Hearing
Hearing required. See LBR 4001-5(a)(3) for notice and hearing information.
References
11 U.S.C. § 362(c)(3)(B); LBR 4001-5
Step-by-Step Instructions
- Select Bankruptcy > Motions/Applications.
- Enter Case Number.
- Select Extend Automatic Stay (Motion).
- Click Browse/Choose File and upload PDF.
- Skip the Joint Filing screen.
- Select Party filer. If the movant is not listed, view instructions on adding a new party to the case.
- The Attorney/Party Association screen displays if the association does not already exist. Carefully read the message in red.
- Modify docket text to describe attachments (e.g., Memorandum, Declaration, etc.), if appropriate.
- Verify final docket text. Click Next to complete the filing.
- The Notice of Electronic Filing displays. This is the verification that the document has been electronically filed.
Motion to Modify Confirmed Plan
Updated 1/4/2020
In General
After confirmation of the plan but before completion of payments, the plan may be modified for the reasons set forth in 11 U.S.C. § 1329. The debtor may request modification by filing a motion and notice of hearing substantially conforming to the appropriate local form motion. A copy of the entire plan as modified need not be filed so long as the motion describes with specificity the proposed modifications to the plan then in effect.
New section 1329(d) of the "CARES Act" provides that a plan confirmed prior to March 27, 2020, may be modified to allow payments over a period expiring 7 years after the time the first payment under the confirmed plan was due.
Hearing
Hearing required. Refer to the CHAP Chamber Presets Report for available hearing dates and times.
Forms
Motion to Modify Confirmed Plan (H1329-A)
References
11 U.S.C. § 1329; FRBP 3015; LBR 3015-2
Step-by-Step Instructions
- Select Bankruptcy > Chapter 13 Events.
- Enter Case Number.
- Select Modify Confirmed Plan (Motion).
- Skip the Joint Filing screen if you are the only attorney filing this motion.
- Select Party filer. Press and hold [Ctrl] key to select debtor and joint debtor.
- The Attorney/Party Association screen displays if the association does not already exist. Carefully read the message in red.
- Click Browse/Choose File and upload PDF.
- Select Yes or No at the prompt: Are you using court form hib_3015-2b1 or H1329d, a combined Motion and Notice of Hearing?
- If Yes, select the appropriate Ch 13 Motions preset. Make sure it is the same date and time on your form motion.
- Relate to the Order Confirming Plan.
- Modify docket text to describe attachments (e.g., Memorandum, Declaration, etc.), if appropriate.
- Verify final docket text. Click Next to complete the filing.
- The Notice of Electronic Filing displays. This is the verification that the document has been electronically filed.
Motion to Reconsider
Updated 11/15/2020
In General
Review LBR 9024-1 for motion, service and disposition information. If this motion relates to a dismissal order, file a Motion to Reconsider Order Dismissing Case.
Hearing
The court will advise you if the matter will be set for hearing.
References
FRBP 9023, 9024; LBR 9024-1
Step-by-Step Instructions
- Select Bankruptcy or Adversary > Motions.
- Enter Case Number.
- Select Reconsider (Motion).
- Carefully read the message that displays:
File this motion without a hearing date. The court will advise if and when a hearing will be set.
- Click Browse/Choose File and upload PDF.
- Check the box to relate to the subject order.
- Select Yes or No at the prompt, Is this for reconsideration of an order dismissing the case or proceeding?
- Skip the Joint Filing screen if you are the only attorney filing this motion.
- Select Party filer. If the party is not listed, view instructions on adding a new party to the case.
- The Attorney/Party Association screen displays if the association does not already exist. Carefully read the message in red.
- Modify docket text, if appropriate.
- Verify final docket text. Click Next to complete the filing.
- The Notice of Electronic Filing displays. This is the verification that the document has been electronically filed.
Motion to Reconsider Order Dismissing Case
Updated 11/11/2020
In General
Review LBR 9024-1 for motion, service and disposition information. If the case was dismissed for failure to file documents or pay the filing fee, satisfy the deficiencies before filing the motion.
Hearing
The court will advise you if the matter will be set for hearing.
Form
Debtor's Motion to Reconsider Order Dismissing Case (H9024)
References
FRBP 9023, 9024; LBR 1007-1(c), 3015-1(d), 9024-1
Step-by-Step Instructions
- Select Bankruptcy > Motions/Applications.
- Enter Case Number.
- Select Reconsider Order Dismissing Case (Motion).
- Carefully read the message that displays:
File this motion without a hearing date. The court will advise if and when a hearing will be set.
- Click Browse/Choose File and upload PDF.
- Check the box to relate to the dismissal order.
- Skip the Joint Filing screen if you are the only attorney filing this motion.
- Select Party filer. Press and hold [Ctrl] key to select debtor and joint debtor.
- The Attorney/Party Association screen displays if the association does not already exist. Carefully read the message in red.
- Modify docket text, if appropriate.
- Verify final docket text. Click Next to complete the filing.
- The Notice of Electronic Filing displays. This is the verification that the document has been electronically filed.
Motion to Redact
Updated 12/1/2020
In General
Use this event when a document already on the court record includes a protected personal identifier:
- An individual's full Social Security Number -should be last 4 digits only;
- An individual's full birth date - should be year only;
- The name of a minor child - should be initials only; and
- A full financial account number - should be last four digits only.
This event will create an entry on the public docket but the PDF of the document will be restricted and may only be viewed by the filer and the court, unless the court orders otherwise.
See also: Guideline on Sealed and Redacted Documents
Process Overview
- Prepare motion using local form H9037A for adversary proceedings or local form H9037B for bankruptcy cases.
- Serve motion on individual whose personal information has been disclosed, debtor, trustee and Office of United States Trustee.
- File motion. $28 filing fee is due, unless you represent the individual whose personal identifier was disclosed.
Hearing
A hearing is not required.
Forms
Motion to Redact (AP) (H9037A)
Motion to Redact (BK) (H9037B)
References
FRBP 9037; LBR9037-1
Step-by-Step Instructions
- Select Bankruptcy or Adversary > Motions.
- Enter Case Number.
- Select Redact (Motion)(FEE 26).
- Carefully read the message that displays:
This event will create an entry on the public docket but the PDF of the document will be restricted and may only be viewed by the filer and the court, unless the court orders otherwise.
- Click Browse/Choose File and upload PDF.
- Read the message and answer the question.

- If you answered No:
- Information regarding the court's policy regarding payment of filing fees display. Read it carefully.
- Fee screen displays. If you are filing an amended motion and have already paid the filing fee, change the fee amount to 0.00.
- Skip the Joint Filing screen.
- Select Party filer. If the party is not listed, view instructions on adding a new party to the case.
- The Attorney/Party Association screen displays if the association does not already exist. Carefully read the message in red.
- Modify docket, if appropriate.
- Verify final docket text. Click Next to complete the filing.
- The Notice of Electronic Filing displays. This is the verification that the document has been electronically filed.
- A Summary of current charges displays in a separate window. Click Pay Now or Continue Filing.
Next Steps
- The court will enter a text order granting or denying the motion.
- If granted, file Submission of Redacted Version of Previously Filed Document. The court will restrict access to the document with personal identifiers.
Motion to Seal Document(s)
Updated 11/11/2020
In General
The motion must describe the item to be sealed, the applicable standard for sealing the information, and how that standard is met. The motion must also specify whether the document should be sealed in its entirety or whether the filer wishes to file a redacted document but make an unredacted version available to the judge. (If the confidential information will not be made available to the judge, a motion to seal generally is unnecessary.) Unless directed to do so by the court, do not file or submit the subject document at the time the motion is filed.
See also: Guideline on Sealed and Redacted Documents.
Hearing
Generally, a hearing is not required. The court will advise you if the matter will be set for hearing.
References
11 U.S.C. § 107; FRBP 9018; LBR 9018-1
Step-by-Step Instructions
- Select Bankruptcy > Motions/Applications.
- Enter Case Number.
- Select Seal Documents (Motion).
- Click Browse/Choose File and upload PDF.
- Skip the Joint Filing screen if you are the only attorney filing this motion. I
- Select Party filer. If the party is not listed, view instructions on adding a new party to the case.
- The Attorney/Party Association screen displays if the association does not already exist. Carefully read the message in red.
- Select Yes or No at the prompt, Does this concern a previously filed document?
- If Yes, this event will create an entry on the public docket but the PDF of the document will be restricted and may only be viewed by the filer and the court, unless the court orders otherwise.
- Modify docket text to describe attachments (e.g., Memorandum, Declaration, etc.), if appropriate.
- Verify final docket text. Click Next to complete the filing.
- The Notice of Electronic Filing displays. This is the verification that the document has been electronically filed.
Motion to Shorten Time
Updated 11/11/2020
In General
A party may seek to shorten the time to give notice of a hearing by filing an ex parte motion substantially conforming to the local form (Motion to Enlarge or Shorten Time). Refer to LBR 9006-1(b) for motion requirements.
Hearing
A hearing is not required.
Form
Motion to Enlarge or Shorten Time (H9006-1)
References
FRBP 9006(c); LBR 9006-1(b)
Step-by-Step Instructions
- Select Bankruptcy or Adversary > Motions.
- Enter Case Number.
- Select Shorten Time (Motion).
- Click Browse/Choose File and upload PDF.
- Carefully read the message that displays:
Please advise the courtroom deputy of this motion by email at calendar@hib.uscourts.gov or by phone at (808) 522-8113. Refer to LBR 9013-1 for motion requirements. Movant must attach a declaration concerning consultation with parties in interest about shortening time.
- Check the box to relate to the motion that you would like heard on shortened time.
- Skip the Joint Filing screen if you are the only attorney filing this motion.
- Select Party filer. If the party is not listed, view instructions on adding a new party to the case.
- The Attorney/Party Association screen displays if the association does not already exist. Carefully read the message in red.
- Modify docket text, if appropriate.
- Verify final docket text. Click Next to complete the filing.
- The Notice of Electronic Filing displays. This is the verification that the document has been electronically filed.
Objection to Claim
Updated 11/11/2020
In General
Parties may object to a claim by filing an objection that substantially conforms to the local form (Objection to Claim). If the local form is not used, Official Form 420B (Notice of Objection to Claim) must be filed and served together with the objection. The objection must give not less than 30 days’ notice of the deadline to respond.
Hearing
Hearing required. Refer to the CHAP Chamber Presets Report for available hearing dates and times.
Form
Objection to Claim (H3007)
References
11 U.S.C. § 502; FRBP 3007; LBR 3007-1
Step-by-Step Instructions
- Select Bankruptcy > Motions/Applications.
- Enter Case Number.
- Select Objection to Claim.
- Click Browse/Choose File and upload PDF.
- Select Yes or No at the prompt: Are you using Local Form H3007, a combined Objection to Claim and Notice of Objection to Claim?
- If Yes, select the appropriate preset. Make sure it is the same date and time on your form objection.
- At the prompt, Enter the claim numbers to which you are objecting (e.g., No. 1 or Nos. 4 and 5.
- Skip the Joint Filing screen if you are the only attorney filing this motion.
- Select Party filer. If the party is not listed, view instructions on adding a new party to the case.
- The Attorney/Party Association screen displays if the association does not already exist. Carefully read the message in red.
- Modify docket text to describe attachments (e.g., Memorandum, Declaration, etc.), if appropriate.
- Verify final docket text. Click Next to complete the filing.
- The Notice of Electronic Filing displays. This is the verification that the document has been electronically filed.
Next Steps
- If notice was sufficient and the claimant fails to file a timely response 7 days before the scheduled hearing, request an order sustaining the objection by filing a Declaration and Request for Entry of Order and uploading a proposed Order Sustaining Objection to Claim.
Notices, Misc Events and Responses
Notice of Hearing
Updated 11/29/2021
In General
Unless the court directs otherwise, notice of a hearing on a motion or other matter must be filed separately on the docket, using a notice substantially conforming to the local form Notice of Hearing.
Hearing Information
Most matters can be self-calendared with the use of preapproved “preset” hearing dates and times. Typically, these are matters that require 28-day notice and generally will be available until 30 days before the hearing date. Click here for an overview and more detailed instructions.
Form
References
LBR 9013, 9073
Step-by-Step Instructions
- Select Bankruptcy or Adversary > Notices.
- Enter Case Number.
- Select 1 Notice of Hearing.
- Skip the Joint Filing screen if you are the only attorney filing this notice.
- Select Party filer. If the party you represent is not listed, follow instructions on adding a new party to the case.
- The Attorney/Party Association screen displays if the association does not already exist. Carefully read the message in red.
- Click Browse/Choose File and upload PDF.
- Carefully read the message that displays:
Relate this notice to the motion, application, or objection being heard.
- At the hearing information screen, select the appropriate preset or reservation, then to relate to the matter being heard. See example below. Make sure it is the same hearing date and time on your notice.

- Carefully read the message that displays:
Modify final docket text to note if this is an AMENDED hearing notice.
- Modify docket text to describe attachments, if appropriate.
- Verify final docket text. Click Next to complete the filing.
- The Notice of Electronic Filing displays. This is the verification that the document has been electronically filed.
Response to a Motion
Updated 11/15/2020
Step-by-Step Instructions
- Select Bankruptcy > Responses > Reference an Existing motion/application or Adversary > Answers/Response to Motions > Motion/Application
- Enter Case Number.
- Select Response (USE FOR ALL RESPONSES).
- Skip the Joint Filing screen if you are the only attorney filing this document.
- Select Party filer. If the party is not listed, view instructions on adding a new party to the case.
- The Attorney/Party Association screen displays if the association does not already exist. Carefully read the message in red.
- Click Browse/Choose File and upload PDF.
- Select Yes or No at the prompt, Is this an opposition to a motion for relief from the automatic stay or the Chapter 13 codebtor stay?
- If Yes, at the prompt, Specify response e.g., Memorandum in Opposition.
- If No, select whether this Is this an objection and request for hearing?
- If Yes, at the prompt, Specify response (e.g., Objection to Motion to Transfer Case and Request for Hearing).
- If No, at the prompt, Briefly describe the nature of your response (e.g., Opposition, Reply, Statement in Support, Objection, Joinder, etc.) and to which motion this relates (e.g., Objection to Application for Compensation).
- Relate to the underlying motion.
- Modify docket text to describe attachments (e.g., Memorandum, Declaration, etc.), if appropriate.
- Verify final docket text. Click Next to complete the filing.
- The Notice of Electronic Filing displays. This is the verification that the document has been electronically filed.
Certificate of Service
Updated 11/15/2020
In General
A person serving documents on a party must immediately file a certificate of service unless (i) Bankruptcy Rule 7005 (applying Civil Rule 5) governs the service and filing of the document and (ii) all parties to be served are registered ECF users who receive CM/ECF Notices of Electronic Filing (NEFs). File the certificate of service as a separate docket entry.
For filing of a Certificate of Service of Summons and Complaint, click here.
Form
Certificate of Service (AP) (H9013-3A)
Certificate of Service (BK) (H9013-3B)
References
FRBP 7005, 9013; LBR 9013-3
Step-by-Step Instructions
- Select Bankruptcy or Adversary > Miscellaneous Documents.
- Enter Case Number.
- Select Certificate of Service.
- Skip the Joint Filing screen.
- Select Party filer. If the party is not listed, view instructions on adding a new party to the case.
- The Attorney/Party Association screen displays if the association does not already exist. Carefully read the message in red.
- Click Browse/Choose File and upload PDF.
- Check the box to relate to the documents served.
- Modify docket text to describe attachments, if appropriate.
- Verify final docket text. Click Next to complete the filing.
- The Notice of Electronic Filing displays. This is the verification that the document has been electronically filed.
Creditor List (Initial Filing)
Updated 8/15/2022
In General
The names and addresses of entities included – or to be included – in Schedules D, E/F, G, and H must accompany the petition in a voluntary case. Although generally referred to as the list of creditors, the list must also include the parties to executory contracts and unexpired leases identified in Schedule G and codebtors named in Schedule H.
The creditor list must be accompanied by the debtor's verification that all entities included on Schedules D, E/F, G, and H have been listed in the creditor list, using a form that substantially conforms to the local form (Debtor's Verification of Creditor List).
References
FRBP 1007-1(a)(1), 1009(a); LBR 1007-2
Form
Debtor's Verification of Creditor List (H1007-2d)
Step-by-Step Instructions
- Select Bankruptcy > Miscellaneous Documents.
- Enter Case Number.
- Select Creditor List (Initial Filing).
- Skip the Joint Filing screen.
- Select Party filer. Press and hold [Ctrl] key to select debtor and joint debtor.
- Carefully read the message that displays:
If you are amending a previously filed list of creditors, go back and use Creditor List (Amended - FEE 34).
- Click Browse/Choose File and upload PDF.
- Modify docket text, if appropriate.
- Verify final docket text. Click Next to complete the filing.
- The Notice of Electronic Filing displays. This is the verification that the document has been electronically filed.
Next Step
- Upload Creditor List
- File the signed Declaration re: Electronic Filing form within 7 days.
Creditor List (Amended)
Updated 8/15/2022
In General
The names and addresses of entities included – or to be included – in Schedules D, E/F, G, and H must accompany the petition in a voluntary case. Although generally referred to as the list of creditors, the list must also include the parties to executory contracts and unexpired leases identified in Schedule G and codebtors named in Schedule H.
An amended creditor list must be filed if:
- Schedules D, E/F, G, or H are amended to add or delete creditors, parties, or codebtors; or
- The creditor list filed with the petition does not match with the names and addresses in Schedules D, E/F, G, or H. This may occur when the schedules are not filed at the same time as the petition.
Change of Address Only
It is not necessary to amend a creditor list to change a creditor’s address. Use the local form Notice of Change of Address to update an address and docket as Notice of Change of Party Address.
PDF of Complete Creditor List
An amended creditor list to be filed with the court should be cumulative, i.e. it should include all creditors. However, enter only the additional creditors when adding them in the CM/ECF database.
$34 Amendment Fee
Filing an amended creditor list will incur a $34 fee. But note the following:
- Combine the filing of an amended creditor list with any amended schedules D or E/F to avoid being charged twice. If filed separately in CM/ECF, there will be one charge for the amended schedules and another charge for the amended creditor list.
- There is no fee for adding an attorney for a creditor. If this is the only change, select the event for an initial filing.
Step-by-Step Instructions
- Select Bankruptcy > Miscellaneous Documents.
- Enter Case Number.
- Select Creditor List (Amended - FEE 34).
- Skip the Joint Filing screen.
- Select Party filer. Press and hold [Ctrl] key to select debtor and joint debtor.
- Click Browse/Choose File and upload PDF.
- To add creditors individually, check the Add new creditor(s) box and enter new creditors on the next screen.
- To upload a .txt file, do not check the Add new creditor(s) box. Upload creditors after this filing.
- Modify docket text, if appropriate.
- Verify final docket text. Click Next to complete the filing.
- The Notice of Electronic Filing displays. This is the verification that the document has been electronically filed.
- A Summary of current charges displays in a separate window. Click Pay Now or Continue Filing.
Next Step
- Upload creditors, if not added individually above.
- File the signed Declaration re: Electronic Filing form within 7 days.
Declaration and Request for Entry of Order
Updated 11/15/2020
In General
If notice was sufficient and no timely opposition has been filed, the moving party may request an order granting the motion by filing a declaration that substantially conforms to the local form Declaration and Request for Entry of Order.
Form
Declaration and Request for Entry of Order (H9021-1)
Step-by-Step Instructions
- Select Bankruptcy or Adversary > Miscellaneous Documents.
- Enter Case Number.
- Select Declaration and Request for Entry of Order.
- Skip the Joint Filing screen.
- Select Party filer.
- At the prompt, enter the Name of person making declaration.
- Click Browse/Choose File and upload PDF.
- Carefully review the instructional message that displays:

- Relate to the underlying matter that is the subject of this declaration.
- Modify docket text, if appropriate.
- Verify final docket text. Click Next to complete the filing.
- The Notice of Electronic Filing displays. This is the verification that the document has been electronically filed.
Reaffirmation Agreement
Updated 11/15/2020
In General
The reaffirmation agreement must be filed before the entry of discharge and not later than 60 days after the date of the first meeting of creditors. Review LBR 4008-1 for deficiency and extension information.
See also Reaffirmation Agreements in Filing Without an Attorney.
References
11 U.S.C. § 524; FRBP 4008; LBR 4008-1
Forms
Cover Sheet for Reaffirmation Agreement (B 427)
Reaffirmation Documents (B 2400A)
Reaffirmation Agreement (B 2400A/B ALT)
Motion for Approval of Reaffirmation Agreement (B 2400B)
Step-by-Step Instructions
- Select Bankruptcy > Miscellaneous Documents.
- Enter Case Number.
- Select Reaffirmation Agreement.
- Skip the Joint Filing screen.
- Select Party filer. If the party is not listed, view instructions on adding a new party to the case.
- Click Browse/Choose File and upload PDF.
- At the prompt, Enter name of creditor and Identify collateral or subject debt (if entering account number, use only last 4 digits).
- Select Yes or No at the prompt, Has an attorney signed the certification in the reaffirmation agreement?
- Carefully read the message that displays
- Modify docket text, if appropriate.
- Verify final docket text. Click Next to complete the filing.
- The Notice of Electronic Filing displays. This is the verification that the document has been electronically filed.
Schedules A-J (Initial Filing)
Updated 8/15/2022
In General
All debtors must file Schedules A, B, C, D, E/F, G, and H. Individual debtors must also file Schedules I and J. They must be filed within 14 days of the date of filing the petition.
If schedules D and E/F includes creditors not identified in the creditor list filed with the petition, you must also file an amended creditor list that includes the additional creditors as well as those previously listed. There is a $34 amendment fee. (The PDF of the amended creditor list may be uploaded with these schedules so that you are charged the fee only once.)
References
FRBP 1007(b) and (c); LBR 1007-1
Step-by-Step Instructions
- Select Bankruptcy > Miscellaneous Documents.
- Enter Case Number.
- Select Schedules A-J (Initial Filing).
- Skip the Joint Filing screen.
- Select Party filer. Press and hold [Ctrl] key to select debtor and joint debtor.
- Carefully read the message that displays:
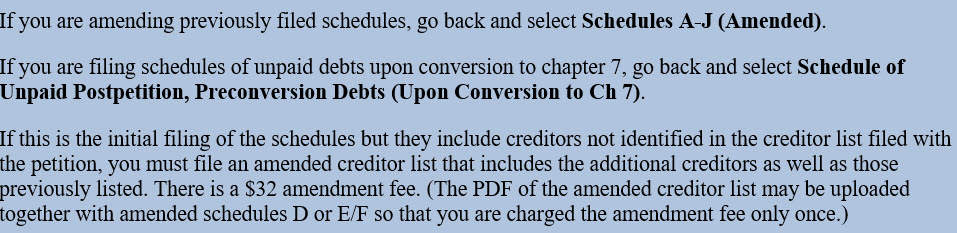
- Click Browse/Choose File and upload PDF.
- Specify the schedule(s) being filed.

- Carefully read the instruction screen.
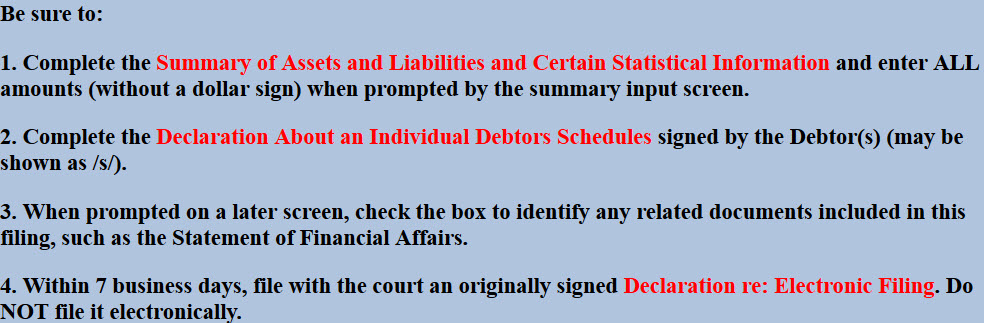
- Enter the amounts on the Summary of Assets and Liabilities screen.

- Identify any related documents being filed with the schedule(s).
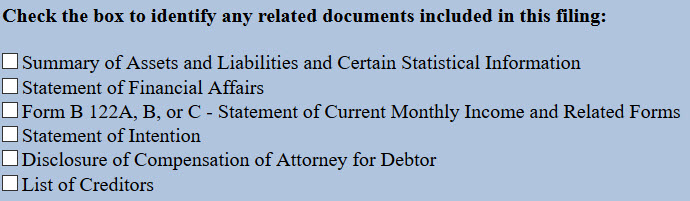
- Select Yes or No at the prompt.

- If Yes, the next few screens prompt you to add the new creditors. In the alternative, you may leave the box unchecked, complete this filing, and add the creditors later by uploading a .txt file using Creditor Maintenance from the Bankruptcy menu.

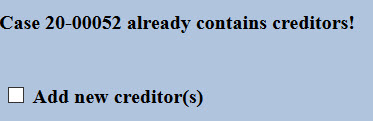
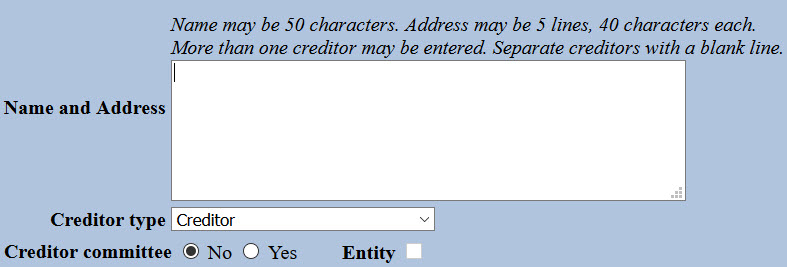
- A fee reminder displays.

- Modify docket text, if appropriate.
- Verify final docket text. Click Next to complete the filing.
- The Notice of Electronic Filing displays. This is the verification that the document has been electronically filed.
Next Step
- Upload creditors, if not added individually above.
- File the signed Declaration re: Electronic Filing form within 7 days.
Schedules A-J (Amended)
Updated 8/15/2022
In General
All debtors must file Schedules A, B, C, D, E/F, G, and H. Individual debtors must also file Schedules I and J. Amendments to these schedules may be filed at any time before the case is closed. Schedules of unpaid debts being filed because a Chapter 11 or Chapter 13 case has converted to Chapter 7 are not considered to be amendments. Use a separate event for filing - Schedule of Unpaid Postpetition, Preconversion Debts (Upon Conversion to Chapter 7).
Change of Address Only
It is not necessary to amend a schedule in order to change a creditor’s address. Use the local form Notice of Change of Address (H2002g) to update an address and docket as Notice of Change of Party Address.
Adding Creditors
If the amendments include additional creditors, parties, or codebtors, the names and addresses must be added either by adding them individually during the electronic filing or by uploading the creditor data in a .txt file. For detailed instructions, refer to Uploading Creditors and upload only the additional creditors.
Amendment Fee
Filing an amended Schedule D or E/F will incur a $34 fee. This applies to any change to the previously filed information. But note the following.
- If the amendment requires the filing of an amended creditor list, combine the filing of the amended schedule D or E/F with the amended creditor list to avoid being charged twice. If filed separately in CM/ECF, there will be one charge for the amended schedules and another charge for the amended creditor list.
- There is no fee for adding an attorney for a creditor. If this is the only change, select the event for an initial filing - Schedules A-J (Initial Filing).
Step-by-Step Instructions
- Select Bankruptcy > Miscellaneous Documents.
- Enter Case Number.
- Select Schedules A-J (Amended).
- Skip the Joint Filing screen.
- Select Party filer. Press and hold [Ctrl] key to select debtor and joint debtor.
- Carefully read the warning message that displays:

- The next screen provides additional instructions.
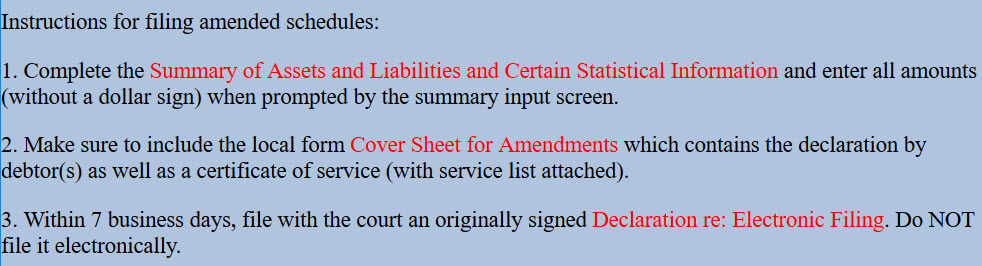
- Enter the amounts on the Summary of Assets and Liabilities screen.
- Specify the schedule(s) being filed.

- Identify any related documents being filed with the amended schedule(s).
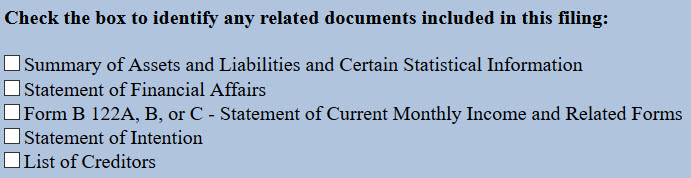
- Select Yes or No at the prompt.
- If Yes, a $34 fee is due.
- The next screen provides instructions regarding additional creditors listed in Schedules D and E/F.
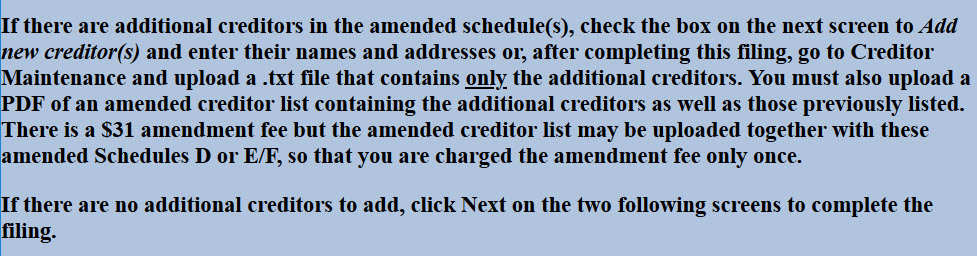
- If there are additional creditors, check the box when prompted. In the alternative, you may leave the box unchecked, complete this filing, and add the creditors later by uploading a .txt file using Creditor Maintenance from the Bankruptcy menu.
- Add creditor names and addresses on the next screen. More than one creditor may be added – just separate with a blank line. Accept the defaults for Creditor type and Creditor committee. If not adding creditors, skip to the next screen.
- Click Browse/Choose File and upload PDF.
- Modify docket text, if appropriate.
- Verify final docket text. Click Next to complete the filing.
- The Notice of Electronic Filing displays. This is the verification that the document has been electronically filed.
- A Summary of current charges displays in a separate window. Click Pay Now or Continue Filing.
Next Step
- Upload creditors, if not added individually above.
- File the signed Declaration re: Electronic Filing form within 7 days.
Sealed Document(s)
Updated 11/15/2020
In General
After entry of an order granting the motion to seal, file the subject document. A docket entry and notice of electronic filing will be created but the document will not be accessible for viewing by the public in PACER. When filing, make sure to provide an adequate description of the document in the text of the docket entry, e.g., “Declaration of Jane Doe in Support of Motion to Obtain Financing” or “Aircraft Lease: N473PA.”
Review Local Bankruptcy Rule 9018-1 and procedure on Filing Sealed and Redacted Documents.
References
11 U.S.C. § 107; FRBP 9018; LBR 9018-1
Step-by-Step Instructions
- Select Bankruptcy or Adversary > Miscellaneous Documents.
- Enter Case Number.
- Select Seal Document(s).
- Skip the Joint Filing screen.
- Select Party filer.
- A message displays:
This event will create an entry on the public docket but the PDF of the document will be restricted and may only be viewed by the court.
- Click Browse/Choose File and upload PDF.
- In the Document Title(s) field, enter adequate description of the document filed under seal.
- Relate to motion to seal and any other pertinent docket entries, e.g. the motion being supported by the confidential information.
- Verify final docket text. Click Next to complete the filing.
- The Notice of Electronic Filing displays. This is the verification that the document has been electronically filed.
Stipulation to Continue Trial
Updated 11/16/2020
In General
Stipulations to continue a hearing must recite specific reasons for rescheduling the matter and the length of the proposed continuance. Click here for detailed information about how a party may request that a future hearing, trial, or scheduling conference be continued.
The filer must promptly advise the court that a stipulation has been filed for the court's consideration. If the stipulation is approved, the parties will be contacted with a new date. The parties must promptly upload a proposed order with the new date and any updated deadlines.
Step-by-Step Instructions
- Select Adversary > Miscellaneous Documents.
- Enter Case Number.
- Select Stipulation to Continue Trial.
- Skip the Joint Filing screen.
- Select Party filer. If the party is not listed, view instructions on adding a new party to the case.
- The Attorney/Party Association screen displays if the association does not already exist. Carefully read the message in red.
- Click Browse/Choose File and upload PDF.
- Modify docket text to describe attachments, if appropriate.
- Verify final docket text. Click Next to complete the filing.
- The Notice of Electronic Filing displays. This is the verification that the document has been electronically filed.
Next Step
Advise the courtroom deputy that the stipulation has been filed.
Submission of Redacted Version of Previously Filed Document
Updated 11/16/2020
In General
If the motion to redact is granted and you are the party who filed the original document, download the appropriate local form Submission of Redacted Version of Previously Filed Document, attaching a redacted version. The court will restrict access to the document with personal identifiers.
See also: Guideline on Sealed and Redacted Documents
Form
Submission of Redacted Version of Previously Filed Document (AP) (H9037sA)
Submission of Redacted Version of Previously Filed Document (BK) (H9037sB)
Step-by-Step Instructions
- Select Bankruptcy or Adversary > Miscellaneous Documents.
- Enter Case Number.
- Select Submission of Redacted Version of Previously Filed Document.
- Skip the Joint Filing screen.
- Select Party filer.
- Click Browse/Choose File and upload PDF.
- Select Yes or No at the prompt, Are you submitting a redacted version of a previously filed proof of claim or claim supplement?
- If Yes, select the proof of claim to which this submission relates.
- If No, at the prompt, Enter title of document you are attaching, e.g., Declaration of Joseph Smith, Exhibit A, etc.
- Relate to the document you would like restricted.
- Modify docket text, if appropriate.
- Verify final docket text. Click Next to complete the filing.
- The Notice of Electronic Filing displays. This is the verification that the document has been electronically filed.
Transcript Request
Updated 3/10/2025
In General
The court does not have contract court reporters. Court-approved transcription services prepare transcripts from digital audio recordings made by the court. To order a transcript of a court proceeding, file local form Request for Transcript. Submit a separate form for each hearing requested, making sure to select one of the court-approved transcription services below:
|
Access Transcripts, LLC |
Jessica B. Cahill |
eScribers |
A Quo Co. |
Form
Request for Transcript (H5077-1a1)
Step-by-Step Instructions
- Select Bankruptcy or Adversary > Miscellaneous Documents.
- Enter Case Number.
- Select Transcript Request.
- Skip the Joint Filing screen.
- Select Party filer. If the party is not listed, view instructions on adding a new party to the case.
- Click Browse/Choose File and upload PDF.
- Relate to the minutes of the hearing you would like to have transcribed. If the minutes have not yet been entered, contact the CM/ECF Help Desk at (808) 523-7373.
- Modify docket text, if appropriate.
- Verify final docket text. Click Next to complete the filing.
- The Notice of Electronic Filing displays. This is the verification that the document has been electronically filed.
Trial Exhibits
Updated 11/16/2020
In General
Not later than the date specified in the scheduling order, each party must file with the court a final, comprehensive set of exhibits that will be used at trial for any purpose, including for rebuttal or impeachment. Each party’s set of exhibits should consist of a single continuously paginated PDF with individual exhibits “bookmarked” to facilitate online sharing of the exhibit image during trial. The exhibits should be attached to the local form Exhibit List for Trial/Evidentiary Hearing. Online access to the exhibits will be restricted to the filer and court users.
Click here for Remote Trial Procedures.
Form
Exhibit List for Trial/Evidentiary Hearing (H7016e)
Step-by-Step Instructions
- Select Bankruptcy or Adversary > Miscellaneous Documents.
- Enter Case Number.
- Select Trial Exhibits.
- Skip the Joint Filing screen.
- Select Party filer.
- Click Browse/Choose File and upload PDF.
- Carefully read the message that displays:
Use local form Exhibit List for Trial/Evidentiary Hearing with exhibits attached.
- Modify docket text to describe attachments, if appropriate.
- Verify final docket text. Click Next to complete the filing.
- The Notice of Electronic Filing displays. This is the verification that the document has been electronically filed.
Written Direct Testimony
Updated 11/16/2020
In General
All direct testimony of a witness must be provided in a written declaration made under penalty of perjury. Use local form Written Testimony for Trial/Evidentiary Hearing. List each witness/declarant with declarations attached.
Click here for Remote Trial Procedures.
Form
Written Direct Testimony for Trial/Evidentiary Hearing (H7016dt)
Step-by-Step Instructions
- Select Bankruptcy or Adversary > Miscellaneous Documents.
- Enter Case Number.
- Select Written Direct Testimony.
- Skip the Joint Filing screen.
- Select Party filer.
- Click Browse/Choose File and upload PDF.
- Carefully read the message that displays:
Use local form Written Testimony for Trial/Evidentiary Hearing with witness declarations attached.
- At the prompt, enter Name(s) of declarant(s).
- Modify docket text to describe attachments, if appropriate.
- Verify final docket text. Click Next to complete the filing.
- The Notice of Electronic Filing displays. This is the verification that the document has been electronically filed.
Written Rebuttal Testimony
Updated 11/16/2020
In General
Not later than the date specified in the scheduling order, the plaintiff shall file and serve declarations, under penalty of perjury, containing all rebuttal testimony that the plaintiff intends to offer. Use the local form Written Testimony for Trial /Evidentiary Hearing, checking the box Rebuttal Testimony. List each rebuttal
witness/declarant with declarations attached.
Click here for Remote Trial Procedures.
Form
Written Direct Testimony for Trial/Evidentiary Hearing (H7016dt)
Step-by-Step Instructions
- Select Bankruptcy or Adversary > Miscellaneous Documents.
- Enter Case Number.
- Select Written Rebuttal Testimony .
- Skip the Joint Filing screen.
- Select Party filer.
- Click Browse/Choose File and upload PDF.
- Carefully read the message that displays:
Use local form Written Testimony for Trial/Evidentiary Hearing with witness declarations attached.
- At the prompt, enter Name(s) of declarant(s).
- Modify docket text to describe attachments, if appropriate.
- Verify final docket text. Click Next to complete the filing.
- The Notice of Electronic Filing displays. This is the verification that the document has been electronically filed.
Unclaimed Funds Supporting Documentation
Updated 4/9/2024
Effective immediately, Applications for Unclaimed Funds and their supporting documents must be submitted on paper, not filed online.
Chapter 13 Events
Chapter 13 Plan - ORIGINAL
Updated 4/19/2021
In General
The chapter 13 plan must be filed within 14 days of case filing and must substantially conform to the local form plan.
Request to Value Collateral to Determine Amount of Secured Claim. If the plan includes a request to value the collateral of a non-governmental unit under § 506(a), the plan must include an addendum that substantially conforms to the local form (Attachment A: Addendum to Section 4.5). A request for valuation under Bankruptcy Rule 3012(c) to determine the amount of a secured claim held by a governmental unit must be made using a motion that substantially conforms to the local form (Attachment A: Addendum to Section 4.5).
Request to Avoid a Lien. If the plan includes a request to avoid a lien under § 522(f), the plan must include an addendum that substantially conforms to the local form (Attachment B: Addendum to Section 4.7)
Form
Chapter 13 Plan (H113)
Attachment A: Addendum to Section 4.5 Request for Valuation of Secured Claim (H113_ExA)
Attachment B: Addendum to Section 4.7 Request to Avoid Lien (H113_ExB)
References
11 U.S.C. §§1321-1326; FRBP 3015; LBR 3015-1
Step-by-Step Instructions
- Select Bankruptcy > Chapter 13 Events.
- Enter Case Number.
- Select 1 Chapter 13 Plan - ORIGINAL.
- Skip the Joint Filing screen.
- Select Party filer. Press and hold [Ctrl] key to select debtor and joint debtor.
- Click Browse/Choose File and upload PDF.
- Carefully read the message that displays.

- Select to indicate whether plan motions are included with the plan. Click Next if none of the attachments are included.

- Verify final docket text. Click Next to complete the filing.
- The Notice of Electronic Filing displays. This is the verification that the document has been electronically filed.
Next Steps
- Serve the plan in the manner provided in LBR 3015-1(g).
- File Certificate of Service of Chapter 13 Plan.
Chapter 13 Plan - AMENDED Before Confirmation
Updated 4/19/2021
In General
The debtor may file an amended chapter 13 plan anytime before confirmation by filing and serving on all creditors a plan substantially conforming to the local form plan (Chapter 13 Plan). The debtor must check the box labeled "Amended" and complete confirmation hearing information before filing and serving.
If the terms of an amended plan are inconsistent with any plan motions filed with the original plan, the debtor must file an amended plan motion.
Form
Chapter 13 Plan (H113)
Attachment A: Addendum to Section 4.5 Request for Valuation of Secured Claim (H113_ExA)
Attachment B: Addendum to Section 4.7 Request to Avoid Lien (H113_ExB)
References
11 U.S.C. §§1321-1326; FRBP 3015; LBR 3015-2
Step-by-Step Instructions
- Select Bankruptcy > Chapter 13 Events.
- Enter Case Number.
- Select 1 Chapter 13 Plan - ORIGINAL.
- Skip the Joint Filing screen.
- Select Party filer. Press and hold [Ctrl] key to select debtor and joint debtor.
- Click Browse/Choose File and upload PDF.
- Carefully read the informational messages that display.


- The hearing information screen displays. Click the drop-down arrow and select the preset for Ch 13 Motions & Amended Plans. Make sure it is the same hearing date and time on the amended plan.
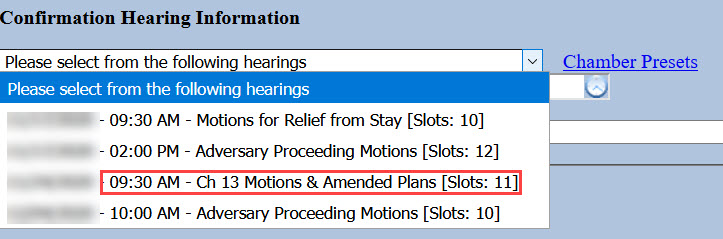
- Select to indicate whether plan motions are included with the plan. Click Next if none of the attachments are included.
- Verify final docket text. Click Next to complete the filing.
- The Notice of Electronic Filing displays. This is the verification that the document has been electronically filed.
Next Steps
- Serve the amended plan in the manner provided in LBR 3015-1(g).
- File Certificate of Service of Chapter 13 Plan.
Certificate of Service - Chapter 13 Plan
Updated 11/16/2020
In General
The plan and any amended plans must be served on the trustee and all creditors and parties in interest when it is filed with the court, and in the manner provided in LBR 3015-1(g)(2).
Form
Certificate of Service of Chapter 13 Plan with Attachment A/B (H113cs)
References
FRBP 3012(b), 3015(d), 4003(d); LBR 3015-1(g)(2)
Step-by-Step Instructions
- Select Bankruptcy > Chapter 13 Events.
- Enter Case Number.
- Select 4 Certificate of Service - Chapter 13 Plan.
- Skip the Joint Filing screen.
- Select Party filer. Press and hold [Ctrl] key to select debtor and joint debtor.
- Click Browse/Choose File and upload PDF.
- Relate to the chapter 13 plan served.
- Select Yes or No to the prompt, Does the plan include Attachment A or B?
- Verify final docket text. Click Next to complete the filing.
- The Notice of Electronic Filing displays. This is the verification that the document has been electronically filed.
Objection to Chapter 13 Plan or Related Motion
Updated 11/16/2020
In General
A party objecting to confirmation of a chapter 13 plan or a plan motion must file an objection by the later of: (1) 7 days before the date of the confirmation hearing or continued confirmation hearing, and (2) 21 days after the date of filing of the plan, amended plan, or plan motion.
Form
Objection to Chapter 13 Plan (H13015d)
References
FRBP 3015(f); LBR 3015-3
Step-by-Step Instructions
- Select Bankruptcy > Chapter 13 Events.
- Enter Case Number.
- Select Objection to Chapter 13 Plan or Related Motion.
- Skip the Joint Filing screen.
- Select Party filer. If the party is not listed, view instructions on adding a new party to the case.
- The Attorney/Party Association screen displays if the association does not already exist. Carefully read the message in red.
- Click Browse/Choose File and upload PDF.
- Check the box and relate to the chapter 13 plan to which you are objecting.
- Verify final docket text. Click Next to complete the filing.
- The Notice of Electronic Filing displays. This is the verification that the document has been electronically filed.
Claim and Creditor Events
Notice of Mortgage Payment Change
Updated 11/16/2020
In General
The Notice of Mortgage Payment Change is filed as a supplement to the claim and displays only on the claim register. Do not use this event if there is no claim on file. Use the generic notice event which does not require selection of a claim during docketing.
Form
Notice of Mortgage Payment Change (Official Form 410S1)
References
FRBP 3002.1
Step-by-Step Instructions
- Select Bankruptcy > Claim Actions or Creditor Claimant Activity.
- Enter Case Number.
- Select Notice of Mortgage Payment Change.
- Skip the Joint Filing screen.
- Select Party filer. If the party is not listed, view instructions on adding a new party to the case.
- The Attorney/Party Association screen displays if the association does not already exist. Carefully read the message in red.
- Carefully read the messages that display:


- Click Browse/Choose File and upload PDF.
- Select the subject claim.
- Select whether a certificate of service is included.
- Modify docket text, if appropriate.
- Verify final docket text. Click Next to complete the filing.
- The Notice of Electronic Filing displays. This is the verification that the document has been electronically filed.
Notice of Mortgage Payment Forbearance/Deferral
Updated 11/16/2020
Step-by-Step Instructions
- Select Bankruptcy > Claim Actions or Creditor Claimant Activity.
- Enter Case Number.
- Select Notice of Mortgage Payment Forbearance/Deferral.
- Skip the Joint Filing screen.
- Select Party filer. If the party is not listed, view instructions on adding a new party to the case.
- The Attorney/Party Association screen displays if the association does not already exist. Carefully read the message in red.
- Carefully read the messages that display:
- Click Browse/Choose File and upload PDF.
- Select the subject claim.
- Select whether a certificate of service is included.
- Modify docket text, if appropriate.
- Verify final docket text. Click Next to complete the filing.
- The Notice of Electronic Filing displays. This is the verification that the document has been electronically filed.
Notice of Postpetition Mortgage Fees, Expenses, and Charges
Updated 11/16/2020
In General
The Notice of Postpetition Mortgage Fees, Expenses, and Charges is filed as a supplement to the claim and displays only on the claim register. Do not use this event if there is no claim on file. Use the generic notice event which does not require selection of a claim during docketing.
Form
Notice of Postpetition Mortgage Fees, Expenses, and Charges (Official Form 410S2)
References
FRBP 3002.1
Step-by-Step Instructions
- Select Bankruptcy > Claim Actions or Creditor Claimant Activity.
- Enter Case Number.
- Select Notice of Postpetition Mortgage Fees, Expenses, and Charges.
- Skip the Joint Filing screen.
- Select Party filer. If the party is not listed, view instructions on adding a new party to the case.
- The Attorney/Party Association screen displays if the association does not already exist. Carefully read the message in red.
- Carefully read the messages that display:

- Click Browse/Choose File and upload PDF.
- Select the subject claim.
- Select whether a certificate of service is included.
- Modify docket text, if appropriate.
- Verify final docket text. Click Next to complete the filing.
- The Notice of Electronic Filing displays. This is the verification that the document has been electronically filed.
Notice of Transfer of Claim
Updated 12/1/2020
In General
Whenever a claim is transferred under terms specified in Rule 3001(e)(2), that is, other than for security and after a proof of claim has been filed, the purchaser/transferee must file evidence of the transfer. The notice must state further that any objection must be filed within 20 days of the date the notice is mailed. Form 2100A is designed to serve as evidence of the transfer.
The Bankruptcy Court will give notice of the alleged transfer to the seller/transferor.
Form
Transfer of Claim Other Than for Security (Official Form B2100A)
References
FRBP 3001(e)(2)
Step-by-Step Instructions
- Select Bankruptcy > Claim Actions or Creditor Claimant Activity.
- Enter Case Number.
- Select 1Notice of Transfer of Claim (FEE 26).
- Skip the Joint Filing screen.
- Select the Party filer. If the party is not listed, view instructions on adding a new party to the case.
- The Attorney/Party Association screen displays if the association does not already exist. Carefully read the message in red.
- Click Browse/Choose File and upload PDF.
- Select the subject claim.
- Select Transferred as the claim status.
- Carefully read the instructional message:
![]()
- The transfer screen displays.
![]()
- Select transfer type.
- Search for transferee - Click Search Creditors and select transferee.
- Search for transferor - Click Search Creditors and select transferor.
- In the example below, Allan Attorney & Associates is transferring Claim 1 to The Credit Union.
![]()
- Information regarding the court's policy regarding payment of filing fees display. Read it carefully.
- Modify docket text, if appropriate.
- Verify final docket text. Click Next to complete the filing.
- The Notice of Electronic Filing displays. This is the verification that the document has been electronically filed.
- A Summary of current charges displays in a separate window. Click Pay Now or Continue Filing.
Response to Notice of Final Cure Payment
Updated 11/16/2020
In General
The Response to Notice of Final Cure Payment is filed as a supplement to the claim and displays only on the claim register. Do not use this event if there is no claim on file. Use the generic notice event which does not require selection of a claim during docketing.
References
FRBP 3002.1
Step-by-Step Instructions
- Select Bankruptcy > Claim Actions or Creditor Claimant Activity.
- Enter Case Number.
- Select Response to Notice of Final Cure Payment.
- Skip the Joint Filing screen.
- Select Party filer. If the party is not listed, view instructions on adding a new party to the case.
- The Attorney/Party Association screen displays if the association does not already exist. Carefully read the message in red.
- Carefully read the messages that display:

- Click Browse/Choose File and upload PDF.
- Select the subject claim.
- Select whether you AGREE or DISAGREE that both (1) the prepetition default has been cured and (2) the postpetition payments paid directly by the debtor(s) are current?
- Select whether a certificate of service is included.
- Modify docket text, if appropriate.
- Verify final docket text. Click Next to complete the filing.
- The Notice of Electronic Filing displays. This is the verification that the document has been electronically filed.
Withdrawal of Claim
Updated 11/16/2020
Step-by-Step Instructions
- Select Bankruptcy > Withdraw Claim ....
- Enter Case Number.
- Select Withdrawal of Claim.
- Skip the Joint Filing screen.
- Select the Party filer. If the party is not listed, view instructions on adding a new party to the case.
- The Attorney/Party Association screen displays if the association does not already exist. Carefully read the message in red.
- Click Browse/Choose File and upload PDF.
- Carefully read the instructional message:
When prompted, select the claim being withdrawn and Withdrawn as the status.
- Select the claim being withdrawn.
- Select Withdrawn as the claim status.
- Modify docket text, if appropriate.
- Verify final docket text. Click Next to complete the filing.
- The Notice of Electronic Filing displays. This is the verification that the document has been electronically filed.
Appeals
Notice of Appeal
Updated 11/17/2020
In General
An appeal from a judgment, order, or decree of a bankruptcy court to a district court or Bankruptcy Appellate Panel (BAP) may be taken only by filing a notice of appeal with the bankruptcy clerk within the time allowed by FRBP 8002. The notice of appeal must conform substantially to the Official Form, be accompanied by the judgment, order or decree being appealed, and be accompanied by the filing fee (currently $298).
The Bankruptcy Appellate Panel (BAP) will hear the appeal unless a party elects to have it heard by the United States District Court. The appellant makes that election by checking the appropriate box on the form Notice of Appeal.
A party appealing more than one judgment or order must file a separate notice of appeal for each judgment or order being appealed.
Form
Notice of Appeal (Official Form 417A)
Step-by-Step Instructions
- Select Bankruptcy > Appeals or Adversary > Appeals.
- Enter Case Number.
- Select 1 Notice of Appeal - Adversary Proceeding (FEE 298) or 1 Notice of Appeal - Bankruptcy Case (FEE 298).
- Skip the Joint Filing screen if you are the only attorney filing this document.
- Click Browse/Choose File and upload PDF.
- Select Party filer. If the party is not listed, view instructions on adding a new party to the case.
- The Attorney/Party Association screen displays if the association does not already exist. Carefully read the message in red.
- At the prompt, Enter Title of Order or Judgment Being Appealed.
- Select Yes or No at the prompt, Is the order being appealed entered on the docket?
- Select Yes or No at the prompt, Does the notice of appeal include a Statement of Election to have appeal heard by District Court?
- Information regarding the court's policy regarding payment of filing fees display. Read it carefully.
- Fee screen displays.
- Modify docket text to describe attachments, if appropriate.
- Verify final docket text. Click Next to complete the filing.
- The Notice of Electronic Filing displays. This is the verification that the document has been electronically filed.
- A Summary of current charges displays in a separate window. Click Pay Now or Continue Filing.
Appeal Bond
Updated 11/17/2020
In General
The district court, BAP, or court of appeals may condition relief on filing a bond or other security with the bankruptcy court. Attach a cover sheet to the bond when filing electronically.
Step-by-Step Instructions
- Select Bankruptcy or Adversary > Appeals.
- Enter Case Number.
- Select Appeal Bond.
- Skip the Joint Filing screen.
- Click Browse/Choose File and upload PDF.
- Select Party filer. If the party is not listed, view instructions on adding a new party to the case.
- The Attorney/Party Association screen displays if the association does not already exist. Carefully read the message in red.
- Carefully read the instructional message that displays:

- At the prompt, Enter amount of appeal bond (for example, 125,000).
- Relate to the appropriate appeal to which this bond applies.
- Modify docket text to describe attachments, if appropriate.
- Verify final docket text. Click Next to complete the filing.
- The Notice of Electronic Filing displays. This is the verification that the document has been electronically filed.
Next Step
Bring the original bond to the court for deposit.
Appellant Designation of Items / Issues Presented
Updated 11/17/2020
In General
The appellant must file with the bankruptcy clerk and serve on the appellee, a designation of the items to be included in the record on appeal and a statement of the issues to be presented.
Step-by-Step Instructions
- Select Bankruptcy or Adversary > Appeals.
- Enter Case Number.
- Select Appellant Designation of Items / Issues Presented.
- Skip the Joint Filing screen.
- Select Party filer. If the party is not listed, view instructions on adding a new party to the case.
- Click Browse/Choose File and upload PDF.
- Relate to the appropriate appeal to which this designation applies.
- Modify docket text to describe attachments, if appropriate.
- Verify final docket text. Click Next to complete the filing.
- The Notice of Electronic Filing displays. This is the verification that the document has been electronically filed.
Appellee Designation of Items
Updated 11/17/2020
In General
Within the time prescribed by the applicable rule, the appellee may file with the bankruptcy clerk and serve on the appellant a designation of additional items to be included in the record.
Step-by-Step Instructions
- Select Bankruptcy or Adversary > Appeals.
- Enter Case Number.
- Select Appellee Designation of Items.
- Skip the Joint Filing screen.
- Select Party filer. If the party is not listed, view instructions on adding a new party to the case.
- Click Browse/Choose File and upload PDF.
- Relate to the appropriate appeal to which this designation applies.
- Modify docket text to describe attachments, if appropriate.
- Verify final docket text. Click Next to complete the filing.
- The Notice of Electronic Filing displays. This is the verification that the document has been electronically filed.
Appellee Election to Proceed in District Court
Updated 11/17/2020
In General
The appellee may elect to have the appeal heard by the United States District Court by filing a statement that substantially confirms to the Official Form 417B within the time prescribed by 28 U.S.C. §158(c)(1)(B).
Form
Optional Appellee Statement to Election to Proceed in District Court (Official Form 417B)
Step-by-Step Instructions
- Select Bankruptcy or Adversary > Appeals.
- Enter Case Number.
- Select Election to Proceed in District Court (Appellee).
- Skip the Joint Filing screen.
- Select Party filer. If the party is not listed, view instructions on adding a new party to the case.
- Click Browse/Choose File and upload PDF.
- Relate to the appropriate appeal to which this statement applies.
- Modify docket text to describe attachments, if appropriate.
- Verify final docket text. Click Next to complete the filing.
- The Notice of Electronic Filing displays. This is the verification that the document has been electronically filed.
Certification of No Transcript Ordered
Updated 11/17/2020
Step-by-Step Instructions
- Select Bankruptcy or Adversary > Appeals.
- Enter Case Number.
- Select Certification of No Transcript Ordered.
- Skip the Joint Filing screen.
- Select Party filer. If the party is not listed, view instructions on adding a new party to the case.
- Click Browse/Choose File and upload PDF.
- Relate to the appropriate appeal to which this certification applies.
- Modify docket text to describe attachments, if appropriate.
- Verify final docket text. Click Next to complete the filing.
- The Notice of Electronic Filing displays. This is the verification that the document has been electronically filed.
Motion for Leave to Appeal
Updated 11/17/2020
In General
The bankruptcy court will transmit the notice of appeal and motion for leave to appeal to the BAP or district court.
Step-by-Step Instructions
- Select Bankruptcy or Adversary > Motions.
- Enter Case Number.
- Select Leave to Appeal (Motion).
- Click Browse/Choose File and upload PDF.
- Skip the Joint Filing screen if you are the only attorney filing this motion.
- Select Party filer. If the movant is not listed, view instructions on adding a new party to the case.
- The Attorney/Party Association screen displays if the association does not already exist. Carefully read the message in red.
- Modify docket text to describe attachments, if appropriate.
- Verify final docket text. Click Next to complete the filing.
- The Notice of Electronic Filing displays. This is the verification that the document has been electronically filed.
Pro Se Filer Events
Certificate of Credit Counseling
Updated 11/17/2020
Step 1 - PDF Requirement
CM/ECF will accept only PDF documents. Make sure you have a PDF version of the certificate saved on your computer.
Step 2 - Login to CM/ECF
- Go to https://ecf.hib.uscourts.gov/
- Click on District of Hawaii - Document Filing System
- At the login screen, enter your Login and Password, and read the Important Notice of Redaction Responsibility. Check the box to confirm you understand it and click Login.
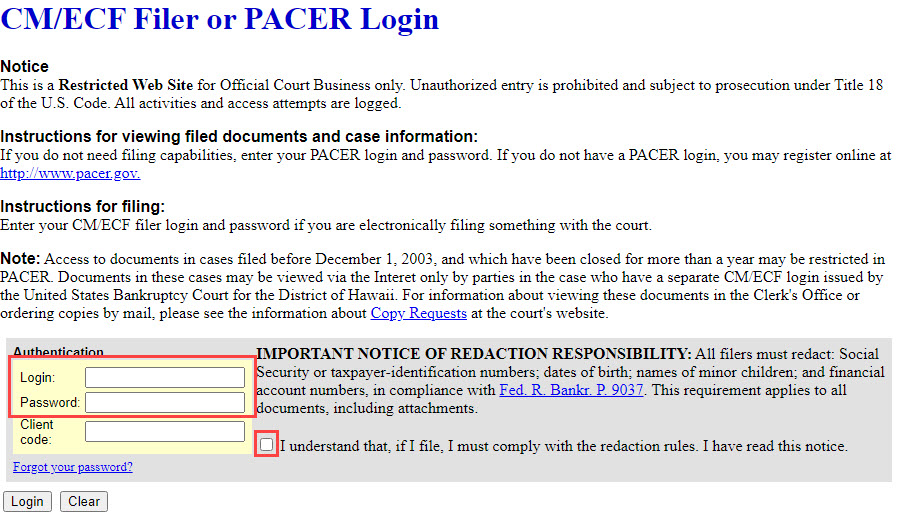
Step 3 - File Certificate
- Select Bankruptcy from the blue main menu bar. Then select Pro Se Events.
- Enter the Case Number. Click Next.
- A list of available events displays. Select Certificate of Credit Counseling. It will display on the right, in the Selected Event box. Click Next.
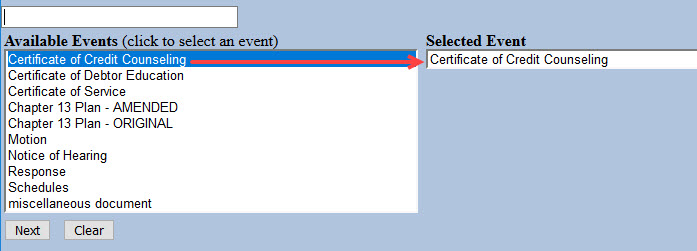
- The next screen gives you an option to select attorneys. Do not make a selection. Click Next. Click OK at the Note that you have not selected an attorney.

- A list of case participants displays. Your name should already be listed. Select it and click Next.
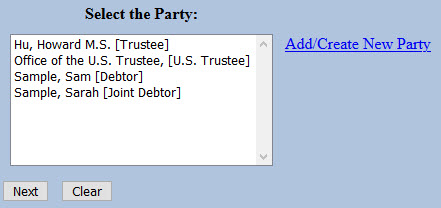
- Click Choose File or Browse and attach the PDF of your certificate. Click Next when done.
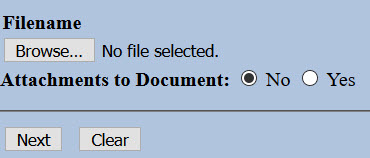

You should always view your document to ensure you are selecting the correct one. To view it, browse to the desired PDF document and right-click the file name. Select Open and the file will open for viewing.
- The docket text displays, allowing additional information. If appropriate, select a pre-text option and/or type titles of additional documents attached in the free text box. Click Next.
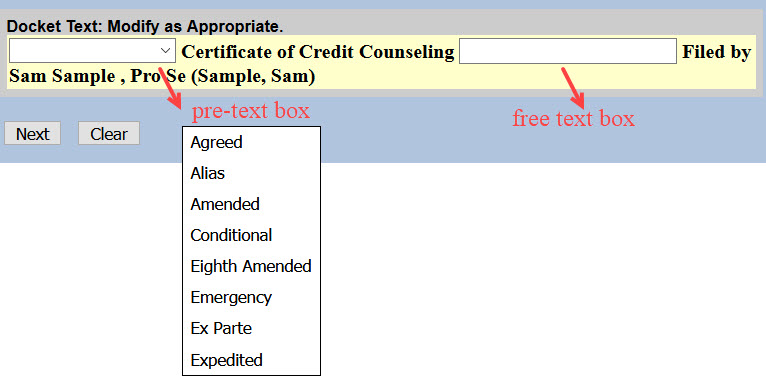
- The final docket text displays. This is your final opportunity to modify your filing. Carefully review the docket entry. If you need to make a change, use your browser's back button to return to the appropriate screen. If correct, click Next to submit.
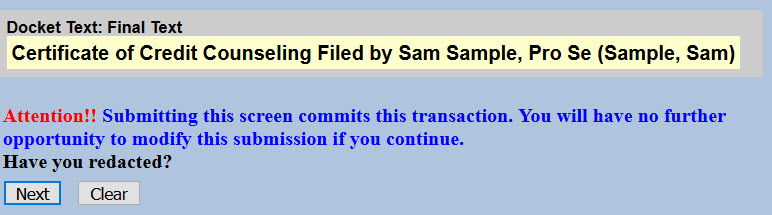
- The Notice of Electronic Filing (NEF) displays. It is confirmation of the filing in the court's database. The NEF is emailed to the registered parties in the case and includes the text of the docket entry, the unique electronic document stamp, a list of the case participants receiving e-mail notification of the filing, and a hyperlink to the document(s) filed.

Certificate of Debtor Education
Updated 11/18/2020
Step 1 - PDF Requirement
CM/ECF will accept only PDF documents. Make sure you have a PDF version of the certificate saved on your computer.
Step 2 - Login to CM/ECF
- Go to https://ecf.hib.uscourts.gov/
- Click on District of Hawaii - Document Filing System
- At the login screen, enter your Login and Password, and read the Important Notice of Redaction Responsibility. Check the box to confirm you understand it and click Login.
Step 3 - File Certificate
- Select Bankruptcy from the blue main menu bar and then select Pro Se Events.
- Enter the Case Number. Click Next.
- A list of available events displays. Select Certificate of Debtor Education. It will display on the right, in the Selected Event box. Click Next.
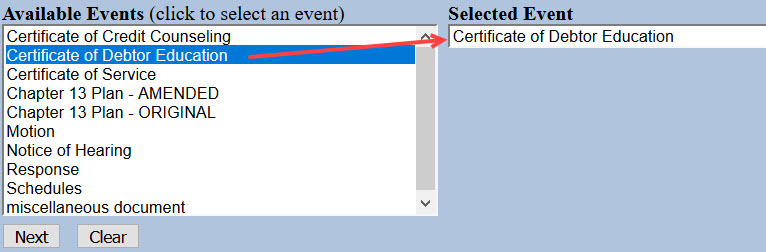
- The next screen gives you an option to select attorneys. Do not make a selection. Click Next. Click OK at the Note that you have not selected an attorney.
- A list of case participants displays. Your name should already be listed. Select it and click Next.
- Click Choose File or Browse and attach the PDF of your certificate. Click Next when done.
You should always view your document to ensure you are selecting the correct one. To view it, browse to the desired PDF document and right-click the file name. Select Open and the file will open for viewing.
- The docket text displays, allowing additional information. If appropriate, select a pre-text option and/or type titles of additional documents attached in the free text box. Click Next.
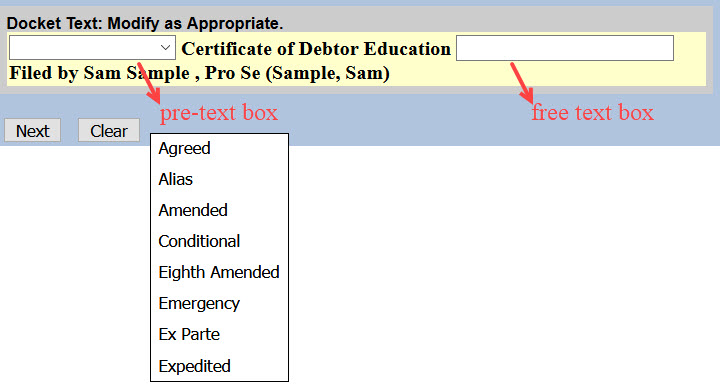
- The final docket text displays. This is your final opportunity to modify your filing. Carefully review the docket entry. If you need to make a change, use your browser's back button to return to the appropriate screen. If correct, click Next to submit.
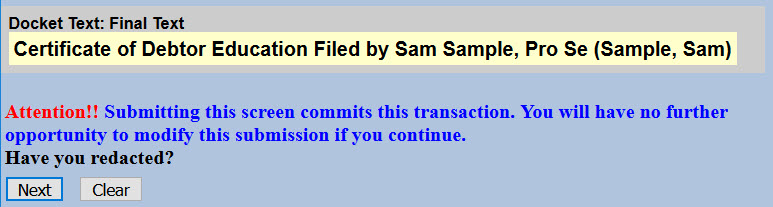
- The Notice of Electronic Filing (NEF) displays. It is confirmation of the filing in the court's database. The NEF is emailed to the registered parties in the case and includes the text of the docket entry, the unique electronic document stamp, a list of the case participants receiving e-mail notification of the filing, and a hyperlink to the document(s) filed.

Certificate of Service
Updated 11/18/2020
General Information
Bankruptcy rules may require you to serve the document you filed with the court on other parties.
Step 1 - Prepare Certificate of Service
Complete the appropriate form:
Certificate of Service (H9013-3A) (for adversary proceedings)
Certificate of Service (H9013-3B) (for bankruptcy cases)
Step 2 - Sign Document
Sign the certificate or type your name on the signature line.
Step 3 - Scan Document or Print to PDF
CM/ECF will accept only PDF documents. Make sure you have a PDF version of the certificate saved on your computer.
Step 4 - Login to CM/ECF
- Go to https://ecf.hib.uscourts.gov/
- Click on District of Hawaii - Document Filing System
- At the login screen, enter your Login and Password, and read the Important Notice of Redaction Responsibility. Check the box to confirm you understand it and click Login.
Step 5 - File Certificate of Service
- Select Bankruptcy or Adversary from the blue main menu bar and then select Pro Se Events.
- Enter the Case Number. Click Next.
- A list of available events displays. Select Certificate of Service. It will display on the right, in the Selected Event box. Click Next.
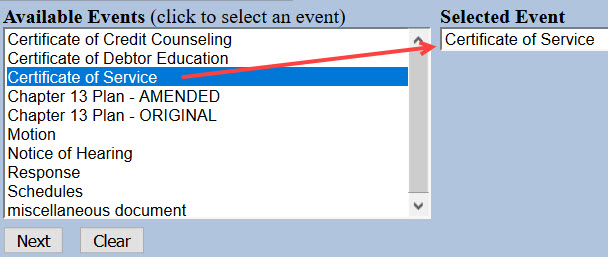
- The next screen gives you the option to select attorneys. Do not make a selection. Click Next. Click OK at the Note that you have not selected an attorney.
- A list of case participants displays. Your name should already be listed. Select it and click Next.
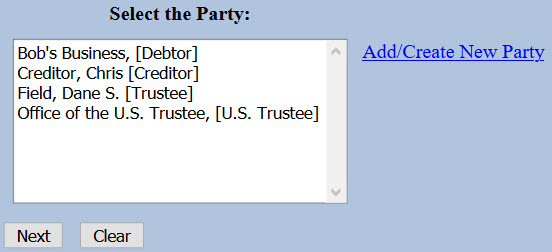
- Click Choose File or Browse and attach the PDF of your certificate. Click Next when done.
You should always view your document to ensure you are selecting the correct one. To view it, browse to the desired PDF document and right-click the file name. Select Open and the file will open for viewing.
- Type the titles of documents served. For example, if you served a motion and notice of hearing on other parties, type that in the box. Click Next when done.

- An instructional message displays. Read it carefully and click Next.

- Select all categories. Left-click "answer" and drag to the bottom of the list. Click Next.

- A list of all documents filed in the case displays. Check the box(es) for the document(s) served. For example, if you served the Motion to Dismiss and Amended Notice of Hearing, check the boxes for "3" and "4".

- The docket text displays, allowing additional information. If appropriate, select a pre-text option and/or type titles of additional documents attached in the free text box. Click Next.
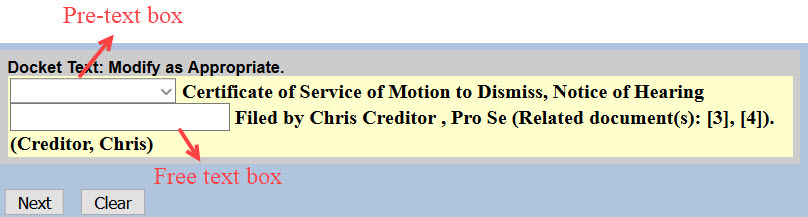
- The final docket text displays. This is your final opportunity to modify your filing. Carefully review the docket entry. If you need to make a change, use your browser's back button to return to the appropriate screen. If correct, click Next to submit.

- The Notice of Electronic Filing (NEF) displays. It is confirmation of the filing in the court's database. The NEF is emailed to the registered parties in the case and includes the text of the docket entry, the unique electronic document stamp, a list of the case participants receiving e-mail notification of the filing, and a hyperlink to the document(s) filed.
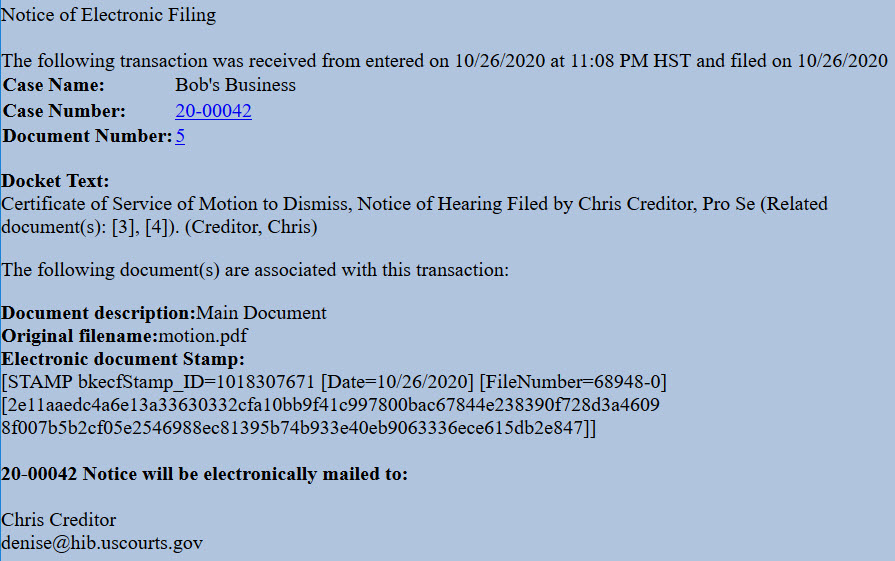
Chapter 13 Plan - ORIGINAL
Updated 4/19/2021
General Information
The chapter 13 plan must be filed within 14 days of case filing and must substantially conform to the local Chapter 13 Plan. Review Local Bankruptcy Rule 3015-1 for important information on the plan, including service requirements.
Request to Value Collateral to Determine Amount of Secured Claim. If the plan includes a request to value the collateral of a non-governmental unit under § 506(a) or a governmental unit under Bankruptcy Rule 3012(c), the plan must include Attachment A: Addendum to Section 4.5 Request for Valuation of Secured Claim.
Request to Avoid a Lien. If the plan includes a request to avoid a lien under § 522(f), the plan must include Attachment B: Addendum to Section 4.7 Request to Avoid Lien.
Step 1 - Prepare Chapter 13 Plan and Any Attachments
Chapter 13 Plan (H113)
Attachment A: Addendum to Section 4.5 Request for Valuation of Secured Claim (H113_ExA)
Attachment B: Addendum to Section 4.7 Request to Avoid Lien (H113_ExB)
Include Attachments A and B only if they apply to your situation.
Step 2 - Sign Document
Sign the plan or type your name on the signature line.
Step 3 - Scan Document or Print to PDF
CM/ECF will accept only PDF documents. Make sure you have a PDF version of the plan and any attachments saved on your computer.
Step 4 - Login to CM/ECF
- Go to https://ecf.hib.uscourts.gov/
- Click on District of Hawaii - Document Filing System
- At the login screen, enter your Login and Password, and read the Important Notice of Redaction Responsibility. Check the box to confirm you understand it and click Login.
Step 5 - File Plan
- After logging in, select Bankruptcy from the blue main menu bar and then select Pro Se Events.
- Enter the Case Number. Click Next.
- A list of available events displays. Select Chapter 13 Plan - ORIGINAL. It will display on the right, in the Selected Event box. Click Next.

- The next screen gives you an option to select additional attorneys. Do not make a selection. Click Next. Click OK at the Note that you have not selected an attorney.
- A list of case participants displays. Your name should already be listed. Select it and click Next.
- Click Choose File or Browse and attach the PDF of your plan. Click Next when done.
You should always view your document to ensure you are selecting the correct one. To view it, browse to the desired PDF document and right-click the file name. Select Open and the file will open for viewing.
- A reminder message displays. Read it carefully and click Next.
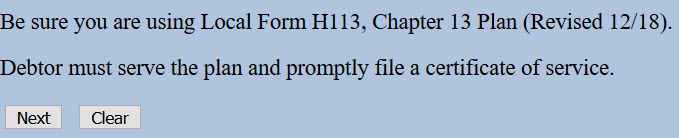
- The docket text displays, allowing additional information. If appropriate, type titles of additional documents attached in the free text box. Click Next.

For example, if you are attaching a Request for Valuation, type that in the box.

- The final docket text displays. This is your final opportunity to modify your filing. Carefully review the docket entry. If you need to make a change, use your browser's back button to return to the appropriate screen. If correct, click Next to submit.

- The Notice of Electronic Filing (NEF) displays. It is confirmation of the filing in the court's database. The NEF is emailed to the registered parties in the case and includes the text of the docket entry, the unique electronic document stamp, a list of the case participants receiving e-mail notification of the filing, and a hyperlink to the document(s) filed.
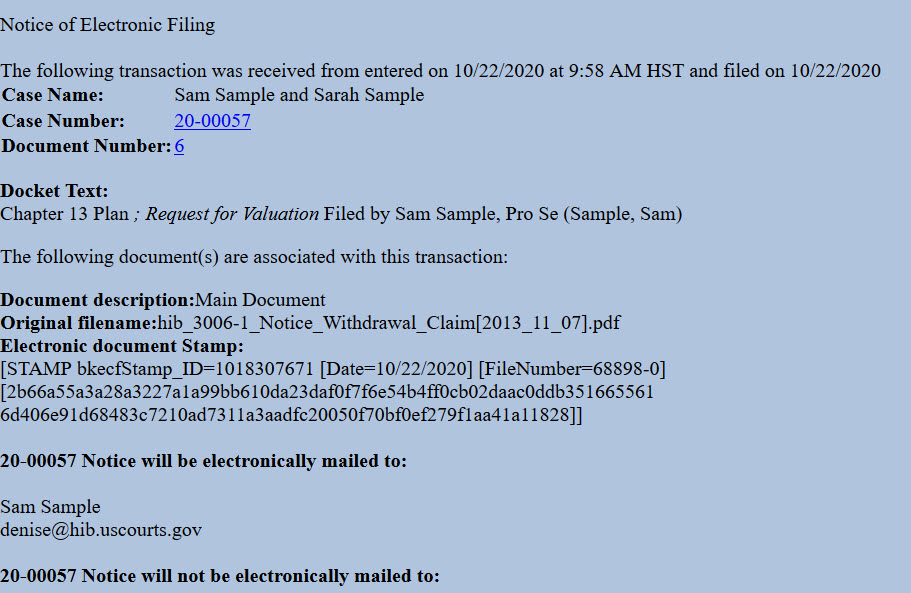
Chapter 13 Plan - AMENDED
Updated 4/19/2021
General Information
The debtor may file an amended chapter 13 plan anytime before confirmation by filing and serving on all creditors an Amended Chapter 13 Plan. The debtor must check the box labeled "Amended" and complete confirmation hearing information before filing and serving. Review Local Bankruptcy Rule 3015-1 and 3015-2 for important information on the plan, including service requirements.
Step 1 - Obtain Hearing Date
The court uses a "self-calendaring" system, so you do not need to contact the courtroom deputy to obtain the confirmation hearing date for your amended plan. You will need to login to CM/ECF to check for available dates.
Login to CM/ECF
- Go to https://ecf.hib.uscourts.gov/
- Click on District of Hawaii - Document Filing System
- Enter your Login and Password, and read the Important Notice of Redaction Responsibility. Check the box to confirm you understand it and click Login.
- Click on CHAP Chamber Presets in the Reports Menu.
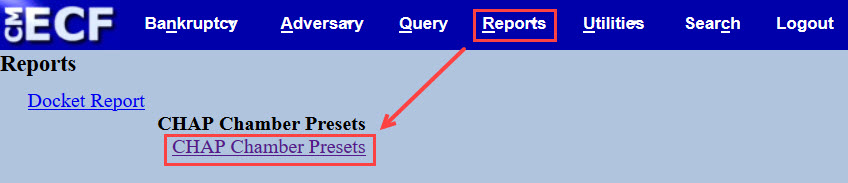
- When the report displays, look for the hearing type of Ch 13 Motions & Amended Plans. Note the hearing date and time. You will need to include that information on the first page of your amended plan.
Example
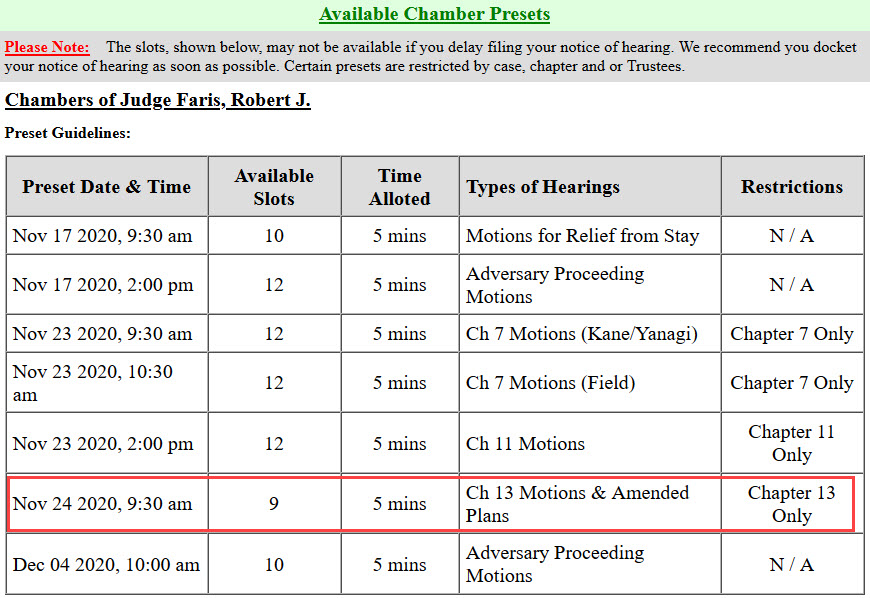
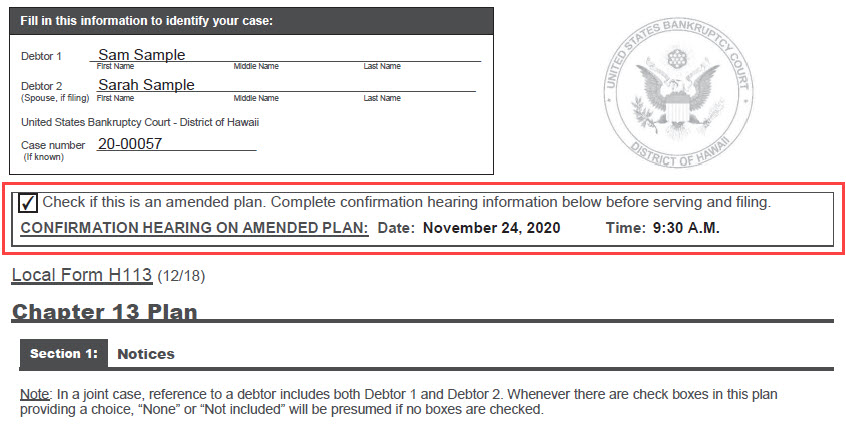
Step 2 - Prepare Amended Chapter 13 Plan and Any Attachments
Chapter 13 Plan (H113)
Attachment A: Addendum to Section 4.5 Request for Valuation of Secured Claim (H113_ExA)
Attachment B: Addendum to Section 4.7 Request to Avoid Lien (H113_ExB)
Check the "Amended" box and enter the confirmation hearing date and time from the CHAP Chambers Presets Report you obtained in Step 1 above. Include Attachments A and B only if they apply to your situation.
Step 3 - Sign Document
Sign the plan or type your name on the signature line.
Step 4 - Scan Document or Print to PDF
CM/ECF will accept only PDF documents. Make sure you have a PDF version of the amended plan and any attachments saved on your computer.
Step 5 - File Amended Plan
- After logging in to CM/ECF, select Bankruptcy from the blue main menu bar and then select Pro Se Events.
- Enter the Case Number. Click Next.
- A list of available events displays. Select Chapter 13 Plan - AMENDED. It will display on the right, in the Selected Event box. Click Next.
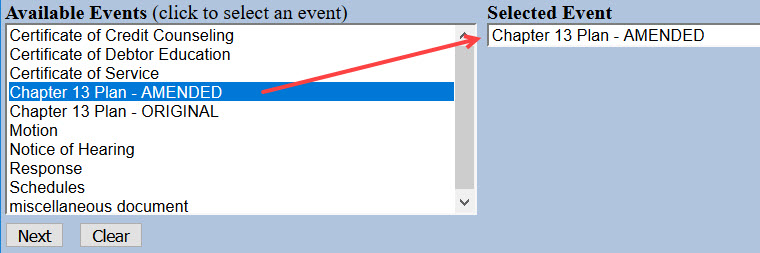
- The next screen gives you an option to select attorneys. Do not make a selection. Click Next. Click OK at the Note that you have not selected an attorney.
- A list of case participants displays. Your name should already be listed. Select it and click Next.
- Click Choose File or Browse and attach the PDF of your amended plan. Click Next when done.
You should always view your document to ensure you are selecting the correct one. To view it, browse to the desired PDF document and right-click the file name. Select Open and the file will open for viewing.
- A reminder message displays. Read it carefully and click Next.
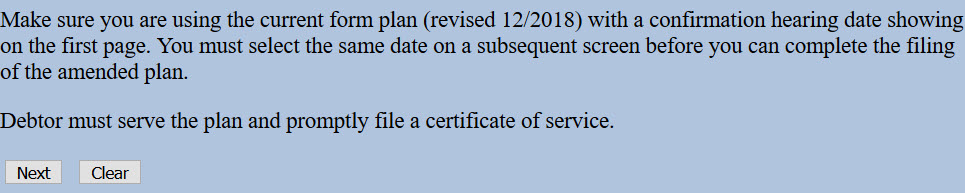
- The hearing information screen displays. Click the drop-down arrow and select the appropriate hearing. Make sure it is the same hearing and date time on your form. Click Next.
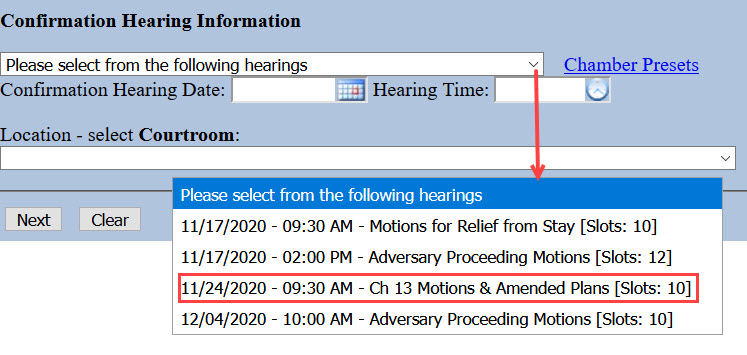
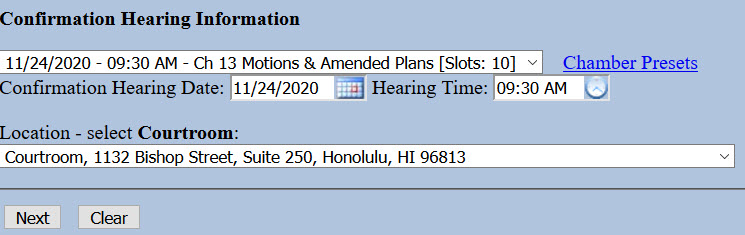
- The docket text displays, allowing additional information. If appropriate, type titles of additional documents attached in the free text box. Click Next.
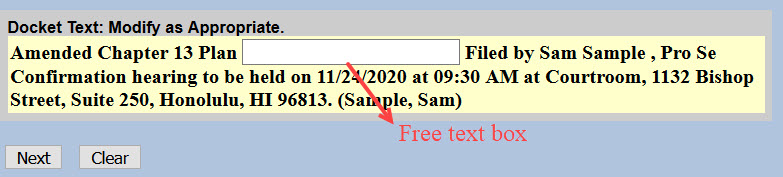
For example, if you are attaching a Request for Valuation, type that in the box.
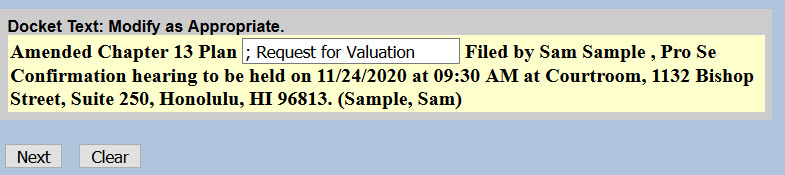
- The final docket text displays. This is your final opportunity to modify your filing. Carefully review the docket entry. If you need to make a change, use your browser's back button to return to the appropriate screen. If correct, click Next to submit.
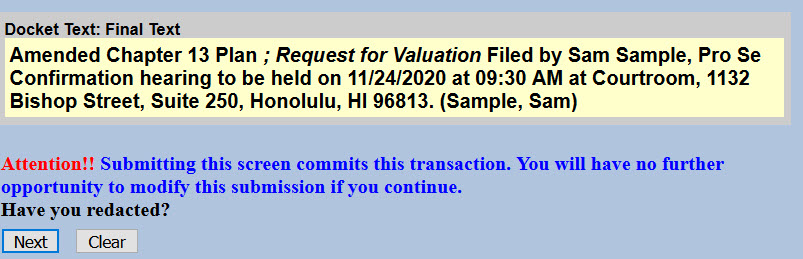
- The Notice of Electronic Filing (NEF) displays. It is confirmation of the filing in the court's database. The NEF is emailed to the registered parties in the case and includes the text of the docket entry, the unique electronic document stamp, a list of the case participants receiving e-mail notification of the filing, and a hyperlink to the document(s) filed.
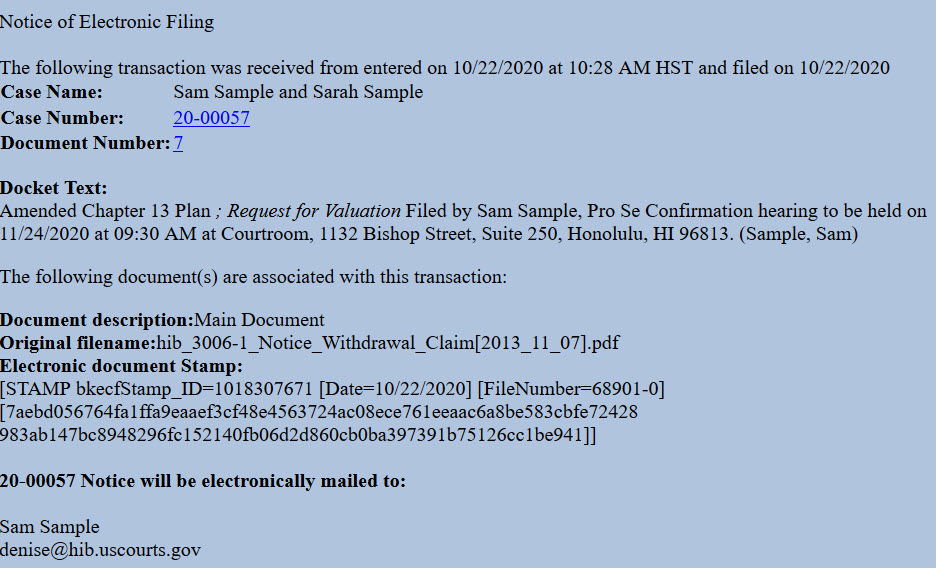
Motion
Updated 11/18/2020
Step 1 - Prepare Motion
When preparing your motion, be sure to include:
- Your name, address and contact information;
- The case name and number;
- Title of your motion; and
- Explanation of the relief sought (i.e., what you are asking the court to do).
You may also choose to use the bankruptcy caption form or adversary proceeding caption form.
Step 2 - Sign Document
Sign your motion or type your name on the signature line of the caption form.
Step 3 - Scan Document or Print to PDF
CM/ECF will accept only PDF documents. Make sure you have a PDF version of your document saved on your computer.
Step 4 - Login to CM/ECF
- Go to https://ecf.hib.uscourts.gov/
- Click on District of Hawaii - Document Filing System
- At the login screen, enter your Login and Password, and read the Important Notice of Redaction Responsibility. Check the box to confirm you understand it and click Login.
Step 5 - File Motion
- Select Bankruptcy or Adversary from the blue main menu bar and then select Pro Se Events.
- Enter the Case Number.Click Next.
- A list of available events displays. Select Motion. It will display on the right, in the Selected Event box. Click Next.
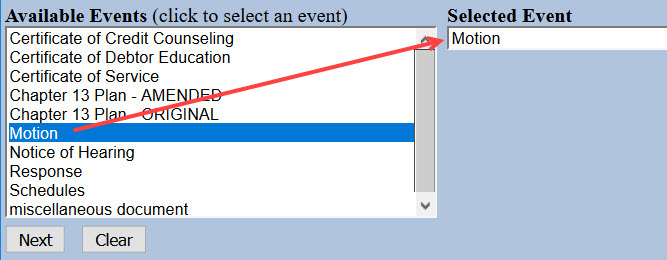
- The next screen gives you the option to select attorneys. Do not make a selection. Click Next. Click OK at the Note that you have not selected an attorney.
- A list of case participants displays. Your name should already be listed. Select it and click Next. If your name is not listed, click Add/Create New Party and view instructions on adding a new party to the case.

- Click Choose File or Browse and attach the PDF of your motion. Click Next when done.
You should always view your document to ensure you are selecting the correct one. To view it, browse to the desired PDF document and right-click the file name. Select Open and the file will open for viewing.
- In the box, describe your motion.

For example:

- The docket text displays, allowing additional information. If appropriate, select a pre-text option and/or type titles of additional documents attached in the free text box. Click Next.
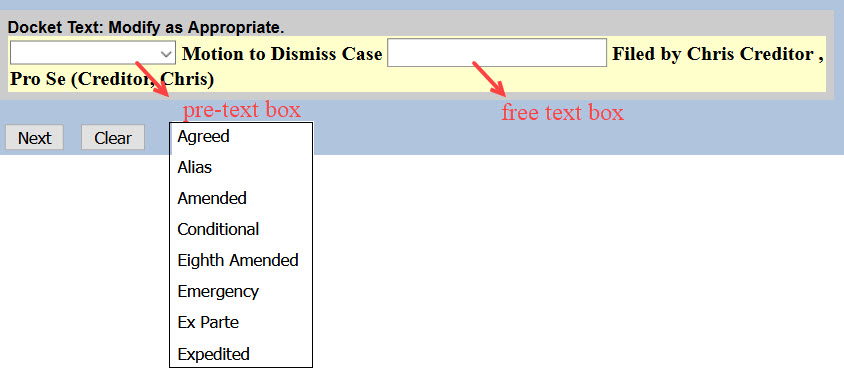
For example, if you are attaching exhibits, type Exhibits in the free text box.

- The final docket text displays. This is your final opportunity to modify your filing. Carefully review the docket entry. If you need to make a change, use your browser's back button to return to the appropriate screen. If correct, click Next to submit.
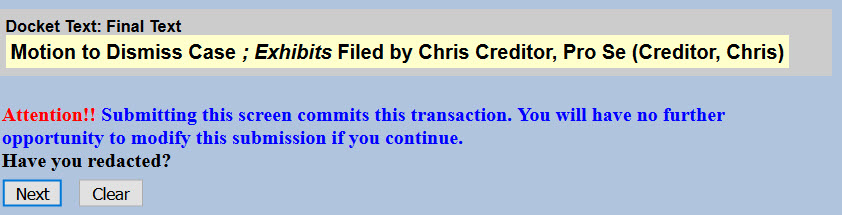
- The Notice of Electronic Filing (NEF) displays. It is confirmation of the filing in the court's database. The NEF is emailed to the registered parties in the case and includes the text of the docket entry, the unique electronic document stamp, a list of the case participants receiving e-mail notification of the filing, and a hyperlink to the document(s) filed.
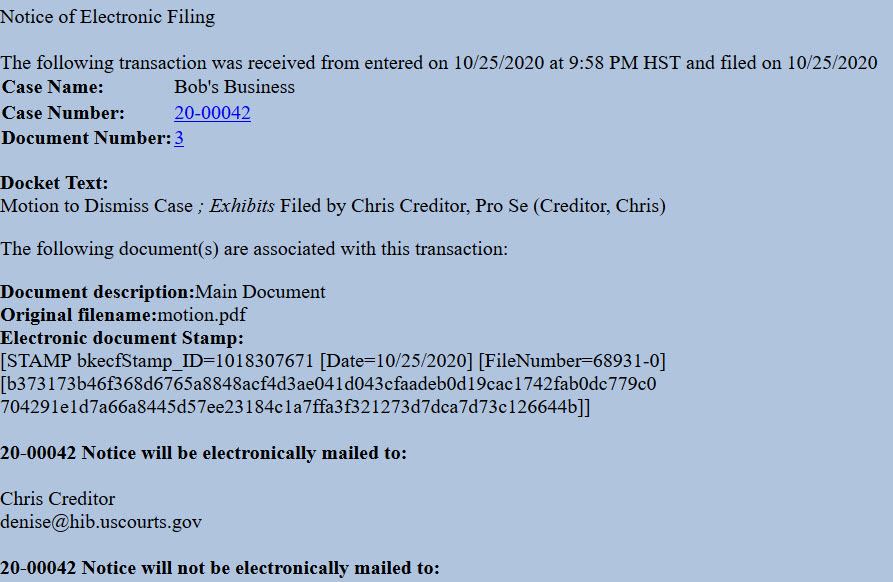
Notice of Hearing
Updated 11/29/2021
General Information
If you filed a motion that must be set for hearing, you may be contacted by the court to file a document that notifies other parties of when the hearing will be held and where it will take place. Effective December 1, 2021, all hearings will be held by Zoom audio. The notice must include the connection and call-in information.
Step 1 - Obtain Hearing Date
The courtroom deputy will provide you with a hearing date and time, and will create a "reservation" for you in the court's calendaring program.
Step 2 - Prepare Notice of Hearing
Complete the Notice of Hearing (H9073-1). Be sure to enter the same hearing date and time provided by the courtroom deputy.
Step 3 - Sign Document
Sign the notice or type your name on the signature line.
Step 4 - Scan Document or Print to PDF
CM/ECF will accept only PDF documents. Make sure you have a PDF version of the hearing notice saved on your computer.
Step 5 - Login to CM/ECF
- Go to https://ecf.hib.uscourts.gov/
- Click on District of Hawaii - Document Filing System
- At the login screen, enter your Login and Password, and read the Important Notice of Redaction Responsibility. Check the box to confirm you understand it and click Login.
Step 6 - File Notice of Hearing
- Select Bankruptcy or Adversary from the blue main menu bar and then select Pro Se Events.
- Enter the Case Number. Click Next.
- A list of available events displays. Select Notice of Hearing. It will display on the right, in the Selected Event box. Click Next.
- The next screen gives you the option to select attorneys Do not make a selection. Click Next. Click OK at the Note that you have not selected an attorney.
- A list of case participants displays. Your name should already be listed. Select it and click Next.
- Click Choose File or Browse and attach the PDF of your notice. Click Next when done.
You should always view your document to ensure you are selecting the correct one. To view it, browse to the desired PDF document and right-click the file name. Select Open and the file will open for viewing.
- An important message displays. Read it carefully and click Next.
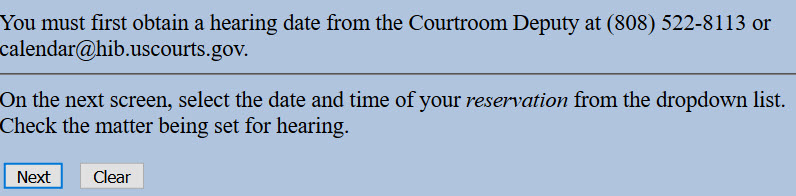
- The hearing information screen displays. Click the drop-down arrow, select your reservation and check the box for the matter being heard. Make sure the reservation is the same hearing date and time on your form. Click Next.
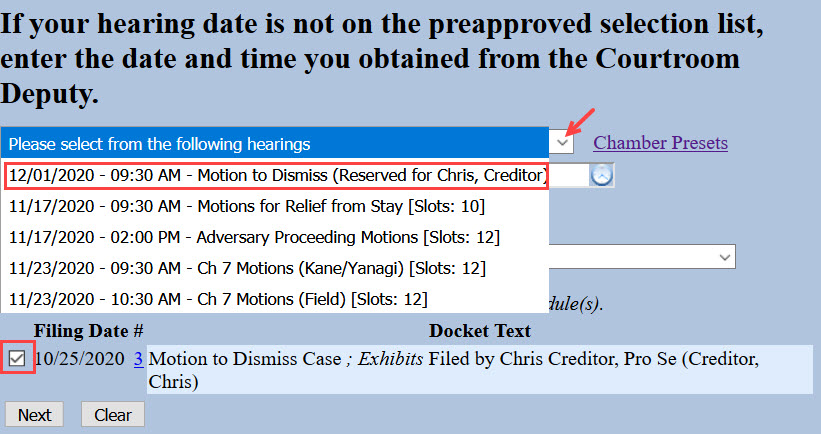
- The docket text displays, allowing additional information. If appropriate, select a pre-text option and/or type titles of additional documents attached in the free text box. Click Next.

For example, if you are filing an amended notice, select Amended from the pre-text box.

- The final docket text displays. This is your final opportunity to modify your filing. Carefully review the docket entry. If you need to make a change, use your browser's back button to return to the appropriate screen. If correct, click Next to submit.
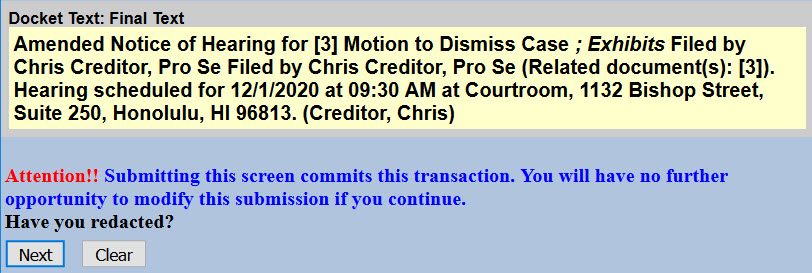
- The Notice of Electronic Filing (NEF) displays. It is confirmation of the filing in the court's database. The NEF is emailed to the registered parties in the case and includes the text of the docket entry, the unique electronic document stamp, a list of the case participants receiving e-mail notification of the filing, and a hyperlink to the document(s) filed.
Response
Updated 11/18/2020
Step 1 - Prepare Response
When preparing your response, be sure to include:
- Your name, address and contact information;
- The case name and number;
- Title of your document;
- Details of your response (i.e., whether you agree or disagree, and why)
You may also choose to use the bankruptcy caption form or adversary proceeding caption form.
Step 2 - Sign Document
Sign your document or type your name on the signature line of the caption form.
Step 3 - Scan Document or Print to PDF
CM/ECF will accept only PDF documents. Make sure you have a PDF version of the response saved on your computer.
Step 4 - Login to CM/ECF
- Go to https://ecf.hib.uscourts.gov/
- Click on District of Hawaii - Document Filing System
- At the login screen, enter your Login and Password, and read the Important Notice of Redaction Responsibility. Check the box to confirm you understand it and click Login.
Step 5 - File Response
- Select Bankruptcy or Adversary from the blue main menu bar and then select Pro Se Events.
- Enter the Case Number. Click Next.
- A list of available events displays. Select Response. It will display on the right, in the Selected Event box. Click Next.
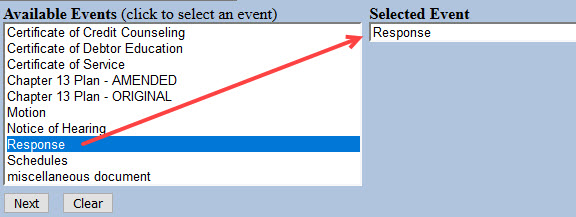
- The next screen gives you the option to select attorneys. Do not make a selection. Click Next. Click OK at the Note that you have not selected an attorney.
- A list of case participants displays. Your name should already be listed. Select it and click Next.
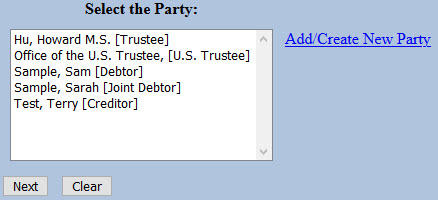
- Click Choose File or Browse and attach the PDF of your notice. Click Next when done.
You should always view your document to ensure you are selecting the correct one. To view it, browse to the desired PDF document and right-click the file name. Select Open and the file will open for viewing.
- Type the title of your response. Click Next when done.

For example, if you are opposing a motion to dismiss, type that in the box.

- An instructional message displays. Read it carefully and click Next.

- Select all categories. Left-click "answer" and drag to the bottom of the list. Click Next.
- Check the box(es) for the document to which you are responding. For example, if you are opposing the motion to dismiss, check the box for "10".
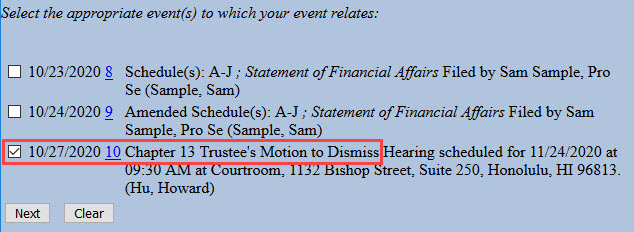
- The docket text displays, allowing additional information. If appropriate, select a pre-text option and/or type titles of additional documents attached in the free text box. Click Next.
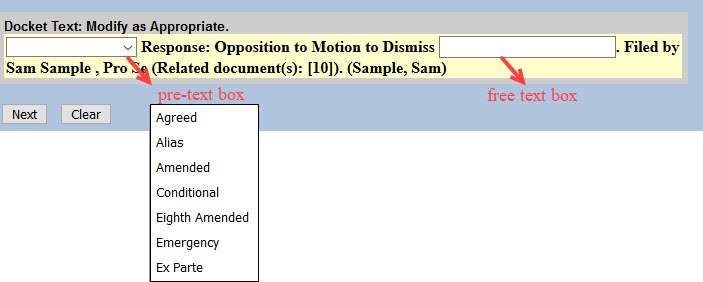
For example, if you are attaching exhibits, type that it the box.

- The final docket text displays. This is your final opportunity to modify your filing. Carefully review the docket entry. If you need to make a change, use your browser's back button to return to the appropriate screen. If correct, click Next to submit.
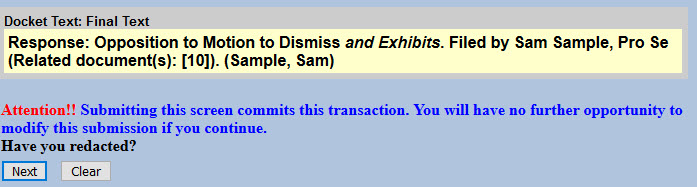
- The Notice of Electronic Filing (NEF) displays. It is confirmation of the filing in the court's database. The NEF is emailed to the registered parties in the case and includes the text of the docket entry, the unique electronic document stamp, a list of the case participants receiving e-mail notification of the filing, and a hyperlink to the document(s) filed.
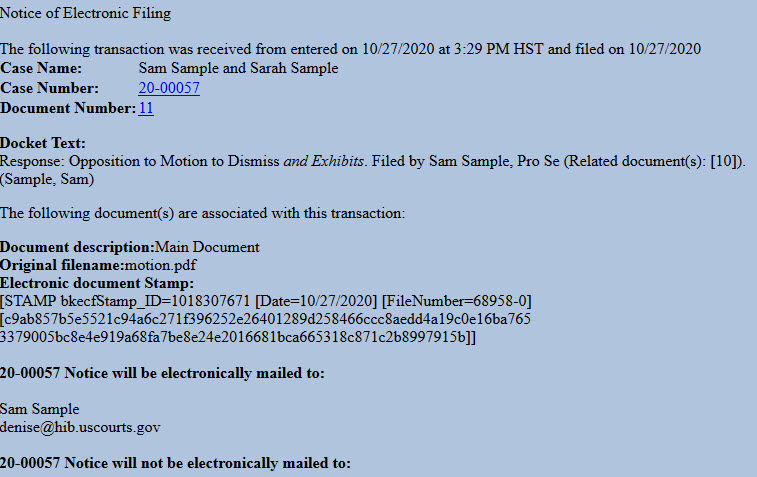
Schedules
Updated 10/20/20
Step 1 - Prepare Schedules
Complete schedules, attaching Declaration About an Individual Debtor's Schedules (Official Form 106Dec) as the last page. Be sure to sign or type your name on the signature line of the declaration.
Step 2 - PDF Requirement
CM/ECF will accept only PDF documents. Make sure you have a PDF version of your schedules saved on your computer.
Step 3 - Login to CM/ECF
- Go to https://ecf.hib.uscourts.gov/
- Click on District of Hawaii - Document Filing System
- At the login screen, enter your Login and Password, and read the Important Notice of Redaction Responsibility. Check the box to confirm you understand it and click Login.
Step 4 - File Schedules
- Select Bankruptcy from the blue main menu bar and then select Pro Se Events.
- Enter the Case Number. Click Next.
- A list of available events displays. Select Schedules. It will display on the right, in the Selected Event box. Click Next.
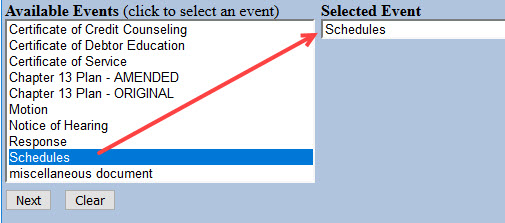
- The next screen gives you the option to select attorneys. Do not make a selection. Click Next. Click OK at the Note that you have not selected an attorney.
- A list of case participants displays. Your name should already be listed. Select it and click Next.
- If you are filing amended schedules D or E/F, or filing initial schedules that adds new creditors, a filing fee is due. Click Next when done reading the message.

- Click Choose File or Browse and attach the PDF of your documents. Click Next when done.
You should always view your document to ensure you are selecting the correct one. To view it, browse to the desired PDF document and right-click the file name. Select Open and the file will open for viewing.
- In the box, enter the schedules you are filing.

- The docket text displays, allowing additional information. If appropriate, select a pre-text option and/or type titles of additional documents attached in the free text box. Click Next.
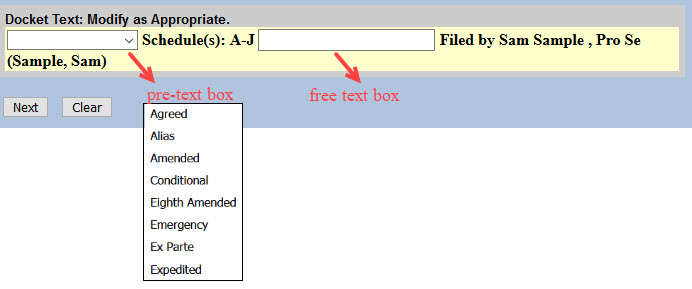
For example, if you are filing amended schedules and attaching the Statement of Financial Affairs, select Amended from the pre-text box and type Statement of Financial Affairs in the free text box.

- The final docket text displays. This is your final opportunity to modify your filing. Carefully review the docket entry. If you need to make a change, use your browser's back button to return to the appropriate screen. If correct, click Next to submit.
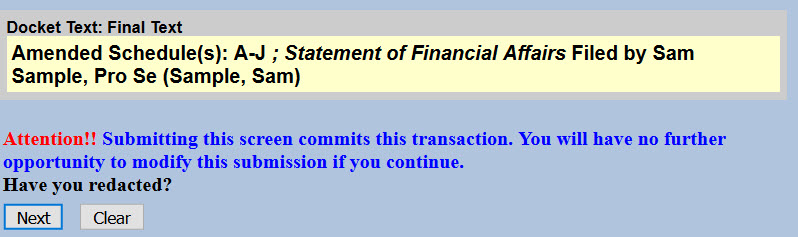
- The Notice of Electronic Filing (NEF) displays. It is confirmation of the filing in the court's database. The NEF is emailed to the registered parties in the case and includes the text of the docket entry, the unique electronic document stamp, a list of the case participants receiving e-mail notification of the filing, and a hyperlink to the document(s) filed.
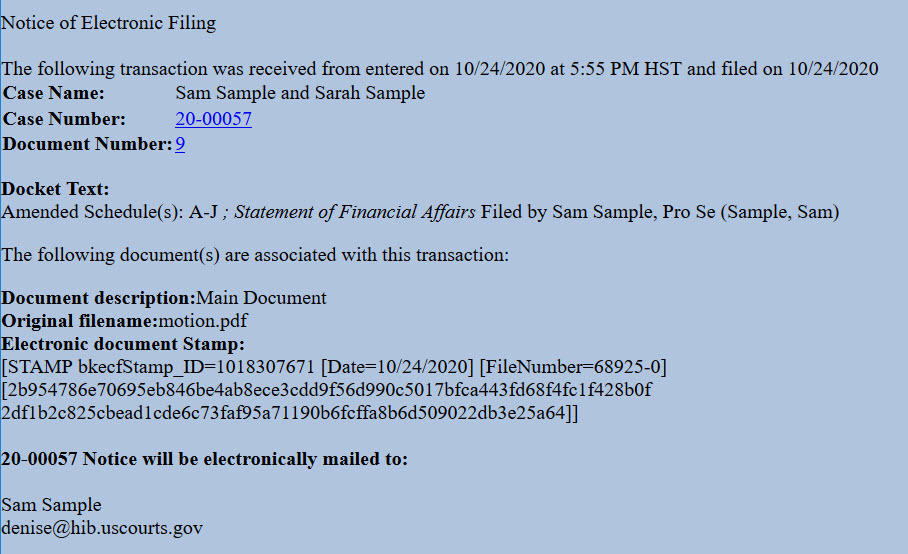
miscellaneous document
Updated 11/18/2020
Step 1 - Prepare Document
When preparing your document, be sure to include:
- Your name, address and contact information;
- The case name and number; and
- Title of your document.
You may also choose to use the bankruptcy caption form or adversary proceeding caption form.
Step 2 - Sign Document
Be sure to sign the document or type your name on the signature line of the caption form.
Step 3 - Scan Document or Print to PDF
CM/ECF will accept only PDF documents. Make sure you have a PDF version of your document saved on your computer.
Step 4 - Login to CM/ECF
- Go to https://ecf.hib.uscourts.gov/
- Click on District of Hawaii - Document Filing System
- At the login screen, enter your Login and Password, and read the Important Notice of Redaction Responsibility. Check the box to confirm you understand it and click Login.
Step 5 - File Document
- After logging in to CM/ECF, select Bankruptcy or Adversary from the blue main menu bar and then select Pro Se Events.
- Enter the Case Number. Click Next.
- A list of available events displays. Select miscellaneous document. It will display on the right, in the Selected Event box. Click Next.
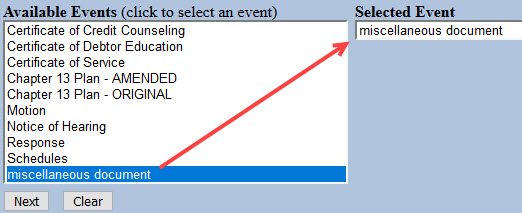
- The next screen gives you the option to select attorneys. Do not make a selection. Click Next. Click OK at the Note that you have not selected an attorney.
- A list of case participants displays. Your name should already be listed. Select it and click Next.
- Click Choose File or Browse and attach the PDF of your document. Click Next when done.
You should always view your document to ensure you are selecting the correct one. To view it, browse to the desired PDF document and right-click the file name. Select Open and the file will open for viewing.
- Type the title of your document. Click Next when done.
For example, if you are filing a statement, type it in the box.
- The docket text displays, allowing additional information. If appropriate, type titles of additional documents attached in the free text box. Click Next.
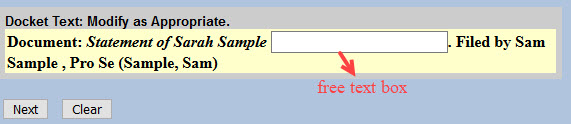
- The final docket text displays. This is your final opportunity to modify your filing. Carefully review the docket entry. If you need to make a change, use your browser's back button to return to the appropriate screen. If correct, click Next to submit.

- The Notice of Electronic Filing (NEF) displays. It is confirmation of the filing in the court's database. The NEF is emailed to the registered parties in the case and includes the text of the docket entry, the unique electronic document stamp, a list of the case participants receiving e-mail notification of the filing, and a hyperlink to the document(s) filed.
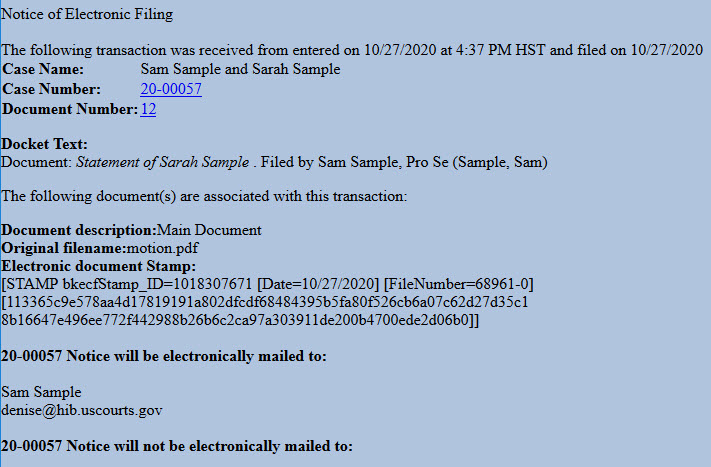
Multi-Case Docketing
Notice of Change of Attorney Address (PDF not required)
Created 10/27/2021
In General
LR 83.1 (Attorneys: Admission to the Bar of this Court; Change of Address) applies in adversary and miscellaneous proceedings. In bankruptcy cases, the attorney must give notice of the change in business address or firm affiliation in each pending case in which the attorney has appeared. This notice must be filed within 14 days of the effective date of the change.
An attorney who is a registered ECF user is responsible for changing, promptly after the effective date of the change, the office, address, and email information in the attorney's electronic filing account. These changes must be done in PACER. For instructions on office and address updates, click here. For instructions on email updates, click here.
References
LBR 2091-1(c) Change of Business Address or Firm Affiliation
Form (Optional)
Attorney's Notice of Change of Address
Step-by-Step Instructions
Docketing of this event does not require a PDF and will create a "virtual" entry on the docket.
- Select Bankruptcy > Multi-Case Docketing.
- Enter Case Numbers. (You may enter more than one case number.)
- Select Notice of Change of Attorney Address (PDF not required).
- Select Yes or No at the prompt, Are you attaching a PDF?
- If Yes, click Browse/Choose File and upload PDF.
- At the prompts:
- Enter the name of the attorney whose address has changed;
- Enter the effective date of the address change; and
- Enter your new address.
For example:

- Carefully read the information message.

- Entered information will pull into the docket entry. Carefully review the text. If necessary, use the back browser button to make corrections.

- When correct, click Next.
- Click Next to complete the filing.
- The Notice of Electronic Filing displays.
Important!! Docketing of this event does not change your address in CM/ECF. These changes must be done in PACER. For instructions on office and address updates, click here. For instructions on email updates, click here.
Notice of Change of Firm Affiliation (PDF not required - Special Use)
Created 10/1/2021
In General
LR 83.1 (Attorneys: Admission to the Bar of this Court; Change of Address) applies in adversary and miscellaneous proceedings. In bankruptcy cases, the attorney must give notice of the change in business address or firm affiliation in each pending case in which the attorney has appeared. This notice must be filed within 14 days of the effective date of the change.
References
LBR 2091-1(c) Change of Business Address or Firm Affiliation
Form (Optional)
Attorney's Notice of Change of Firm Affiliation
Step-by-Step Instructions
Docketing of this event does not require a PDF and will create a "virtual" entry on the docket.
- Select Bankruptcy > Multi-Case Docketing.
- Enter Case Numbers. (You may enter more than one case number.)
- Select Notice of Change of Firm Affiliation (PDF not required - Special use).
- Select Yes or No at the prompt, Are you attaching a PDF?
- If Yes, click Browse/Choose File and upload PDF.
- At the prompts:
- Enter the name of the attorney whose firm affiliation has changed;
- Enter the name of the former law firm;
- Enter the effective date of the new affiliation;
- Enter the name of the attorney who will represent the party; and
- Enter the address of the attorney (include city, state and zipcode).
For example:
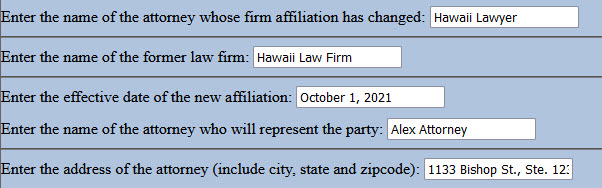
- Entered information will pull into the docket entry. Carefully review the text. If necessary, use the back browser button to make corrections.
Example:
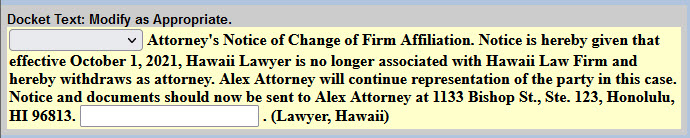
- When correct, click Next.
- Click Next to complete the filing.
- The Notice of Electronic Filing displays.
Notice of Change of Firm Affiliation (PDF not required)
Created 10/1/2021
In General
LR 83.1 (Attorneys: Admission to the Bar of this Court; Change of Address) applies in adversary and miscellaneous proceedings. In bankruptcy cases, the attorney must give notice of the change in business address or firm affiliation in each pending case in which the attorney has appeared. This notice must be filed within 14 days of the effective date of the change.
References
LBR 2091-1(c) Change of Business Address or Firm Affiliation
Form (Optional)
Attorney's Notice of Change of Firm Affiliation
Step-by-Step Instructions
Docketing of this event does not require a PDF and will create a "virtual" entry on the docket.
- Select Bankruptcy > Multi-Case Docketing.
- Enter Case Numbers. (You may enter more than one case number.)
- Select Notice of Change of Firm Affiliation (PDF not required).
- Select Yes or No at the prompt, Are you attaching a PDF?
- If Yes, click Browse/Choose File and upload PDF.
- At the prompts:
- Enter the name of the attorney whose firm affiliation has changed;
- Enter the effective date of the new affiliation;
- Enter the name of the new firm; and
- Enter the new firm address (include city, state and zipcode).
For example:
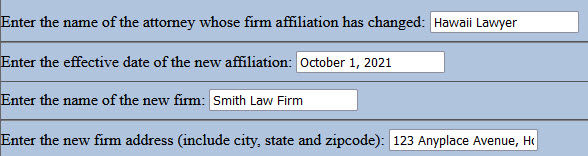
- Select Yes or No at the prompt, Will the attorney continue representation of the party in this matter?
- If No, enter the name and address of the attorney who will represent the party.
For example:

- Entered information will pull into the docket entry. Carefully review the text. If necessary, use the back browser button to make corrections.
Example One - Attorney will not continue representation
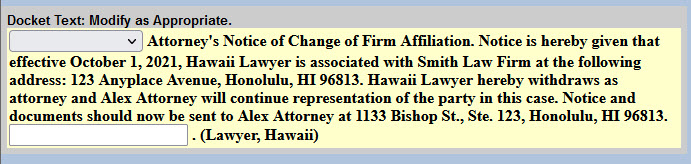
Example Two - Attorney will continue representation

- When correct, click Next.
- Click Next to complete the filing.
- The Notice of Electronic Filing displays.